Create a DIY modern geometric tree sign using the Cricut Explore or Cricut Maker. This sign is perfect for layering with other Christmas signs for a festive modern holiday home.
Welcome to Have Yourself A Very Cricut Christmas: 25 Days of Homemade Holiday Crafts!
Each day in December, I’ll be sharing a new Christmas project that you can make using your Cricut. It’s going to be a blog version of an advent calendar! Come back every day to get a new “gift.”
Today’s gift is a Modern Geometric Tree Sign.


Signs make great decorations because they, in general, are large. They can be placed in the back area of a display and act as a backdrop, or they can take center stage as a statement piece.
Around the holidays, I love to decorate with festive signs.
I was looking for something a little more modern this year that I could use with my Christmas decorations. I wanted to create a simple geometric design that looked like a Christmas tree.
You’re going to love this Modern Geometric Tree Sign. Here’s how to make it!
How to Make a Modern Geometric Tree Sign Using The Cricut
This post contains affiliate links for your convenience. For more information, see my disclosures here.
Materials:
- Modern Geometric Tree Sign SVG file
- Black/ Midnight Vinyl
- Champagne Adhesive Foil Matte
- Pink Adhesive Foil Matte
- Craft Plywood 12” x 12”
Tools:
- Cricut Machine (You can use a Cricut Explore or a Cricut Maker for this project)
- Strong Grip Cutting Mat
- Standard Grip Cutting Mat
- Cricut Fine-Point Blade (comes with all Cricut Machines)
- Cricut Weeder Tool
- Cricut Brayer Tool
- Transfer Tape
- Scissors
How to Cut Out The Project Using The Cricut
First, you will need to download the Modern Geometric Tree Sign SVG file.
Get the Free Modern Geometric Tree Sign SVG File

Start by opening Cricut Design Space and creating a new project.
Upload the SVG File
Then, upload the SVG file by selecting the Upload button and then Upload Image. Next, drag and drop or select the SVG file you want to upload.
After the SVG is uploaded, add the image to your design canvas.
If you need a little more help uploading SVG files, you can learn more in this post.
The SVG file will already be sized properly for this project.


For this project, you will see some registration marks at the top of the design. They are shaped like plus signs. There are registration marks in each color so that one set is cut out with each layer. This will help you line up the vinyl design during assembly.
Make It
Now it’s time to make your project!
Click on the Make It button in the upper right of the screen.
The first screen you will see is the Mat Preview Screen. This will show you all of the different mats needed for your project. Each mat represents another piece of material.
For this project, the pink layer represents the pieces you will be cutting out of pink adhesive foil.

The black layer represents the pieces you will be cutting out of black vinyl.

The gold layer represents the pieces you will be cutting out of champagne adhesive foil.

For each material, you will need a piece that is about 9” wide and 12” tall.
Click on the Continue button in the lower right of the screen.
Connect your Cricut machine.
For the first mat, which is the pink adhesive foil material, adjust your settings as follows.
Material: Adhesive Foil, Matte
You will need to search to select this material.

Pressure: Default
Tools: Fine-Point Blade
Load the strong grip cutting mat with the adhesive foil material into the machine. Then, press the flashing Go button to begin the cutting process.
For the second mat, which is the black vinyl material, adjust your settings as follows.
Material: Vinyl
Pressure: Default
Tools: Fine-Point Blade
Load the standard grip cutting mat with the black vinyl material into the machine. Then, press the flashing Go button to begin the cutting process.
For the third mat, which is the champagne adhesive foil material, adjust your settings as follows.
Material: Adhesive Foil, Matte
You will need to search to select this material.
Pressure: Default
Tools: Fine-Point Blade
Load the strong grip cutting mat with the adhesive foil material into the machine. Then, press the flashing Go button to begin the cutting process.
How to Assemble The Project
Once all of your pieces are cut out, it’s time to assemble the project.
First, you will need to weed each of the designs to remove the extra material. The goal is to leave only the vinyl and adhesive foil for the design images behind.
Use the weeder tool to pick up the vinyl or foil off the backing and easily remove it. After all of the extra vinyl or foil is removed, you should be left with just the designs on the backing sheets.

Now you are going to work with one color layer at a time, starting with the pink layer.
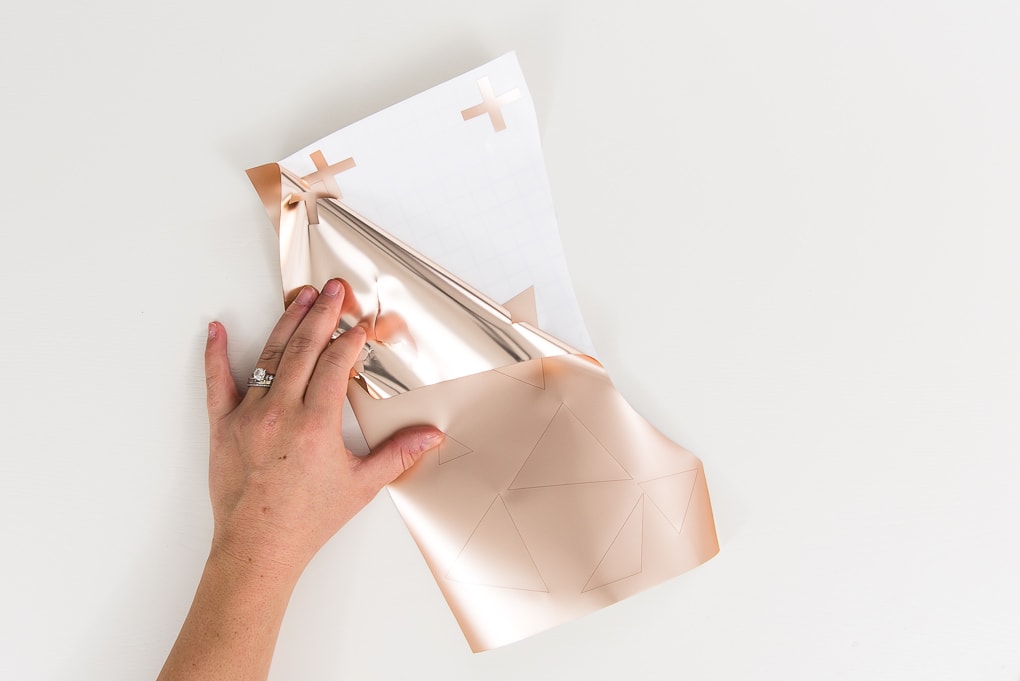
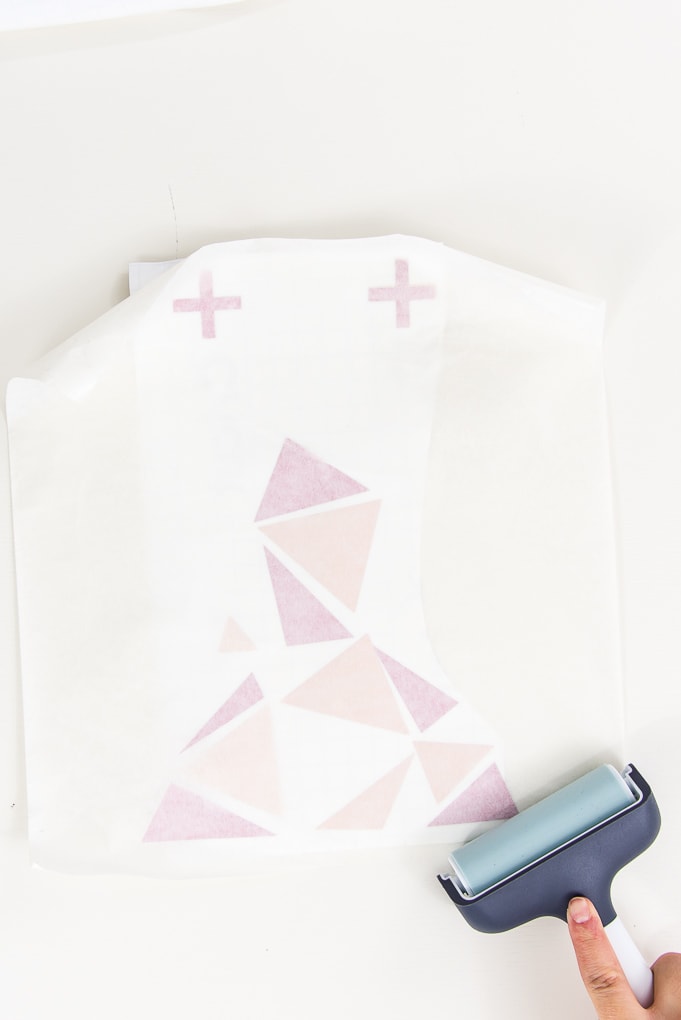
Take a piece of transfer tape and place it over the entire pink layer design. I like to use these big rolls of transfer tape. Make sure the transfer tape is slightly larger because it will need to cover the entire tree design (9” x 12” total).
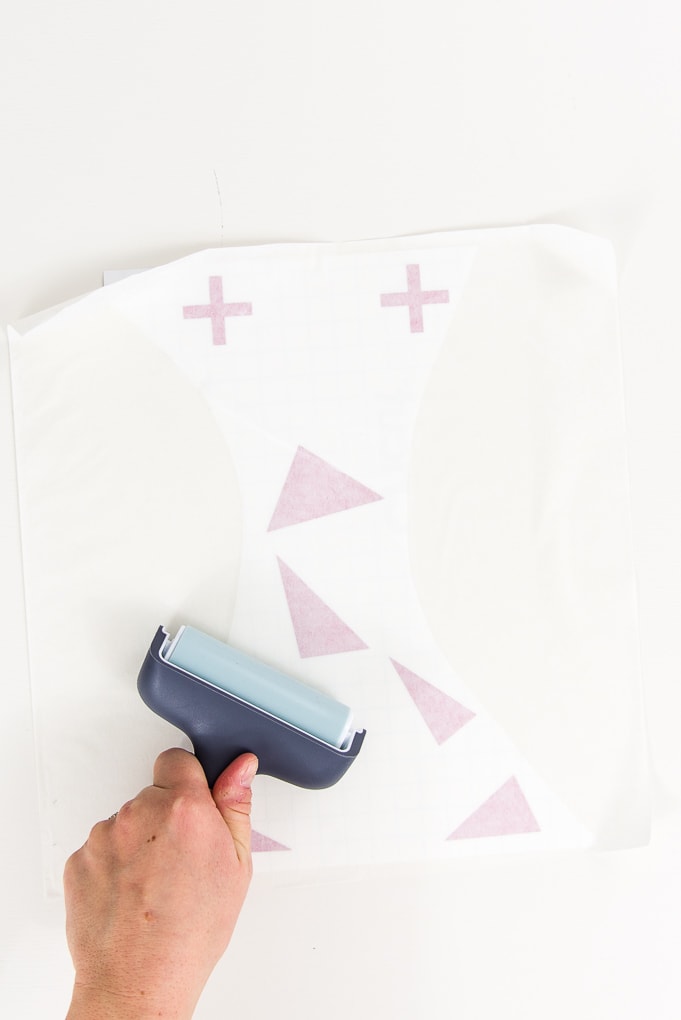
Smooth down the transfer tape with your hand or using the brayer tool onto the pink adhesive foil. But, do not remove the backing yet.
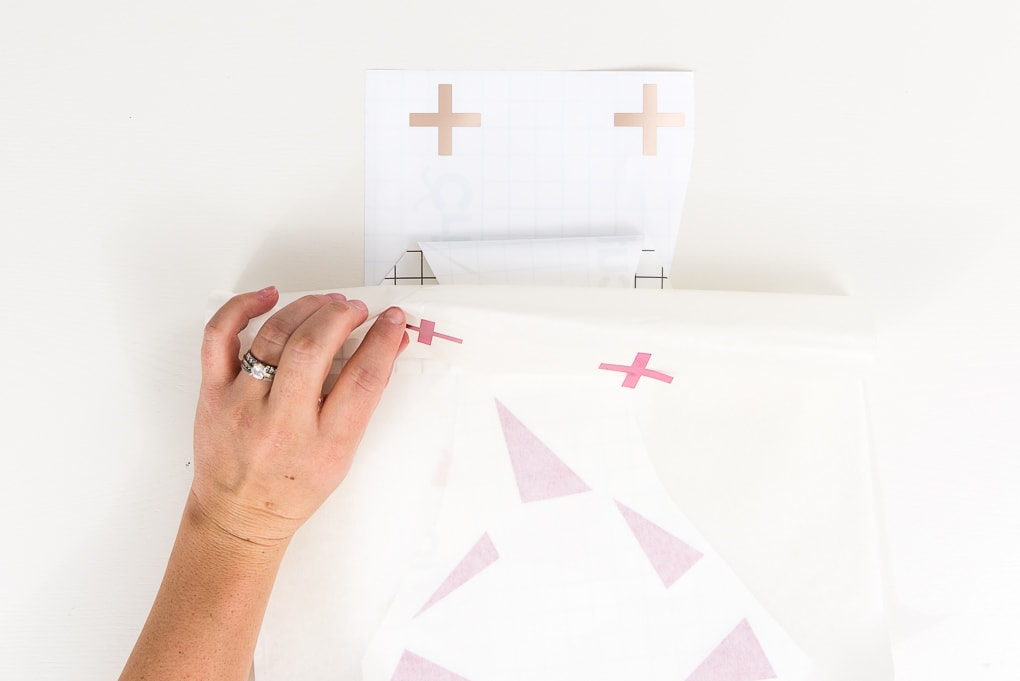
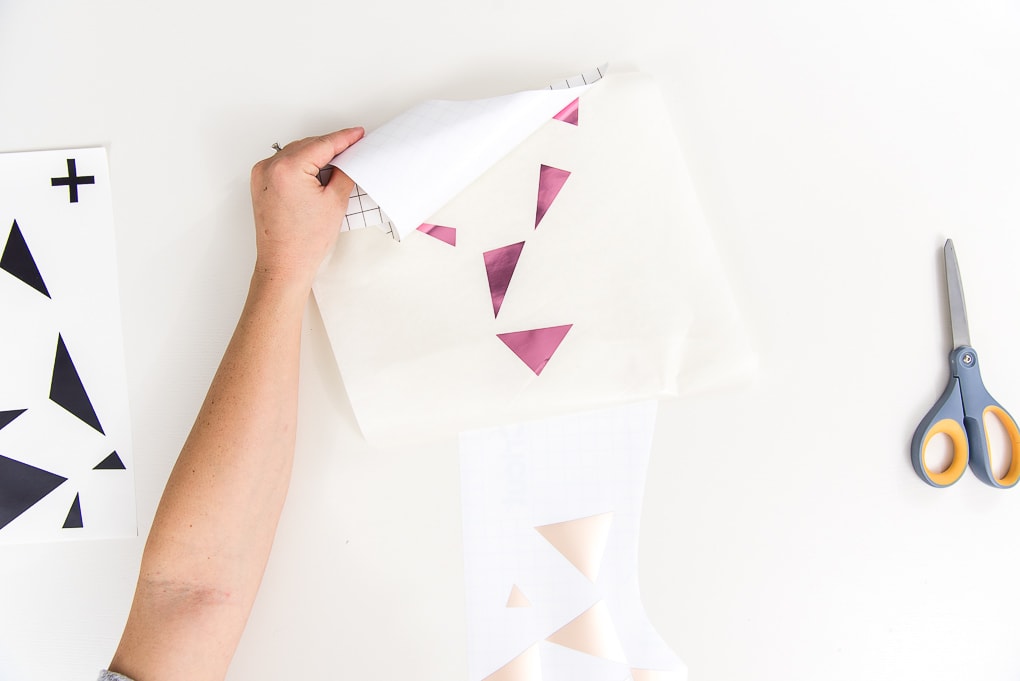
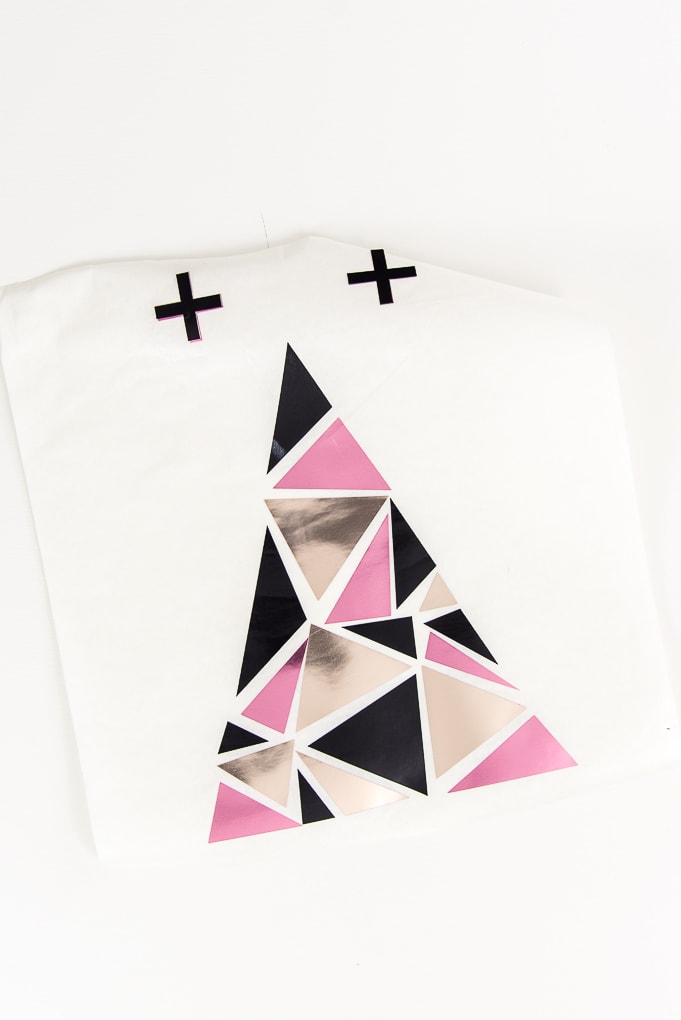
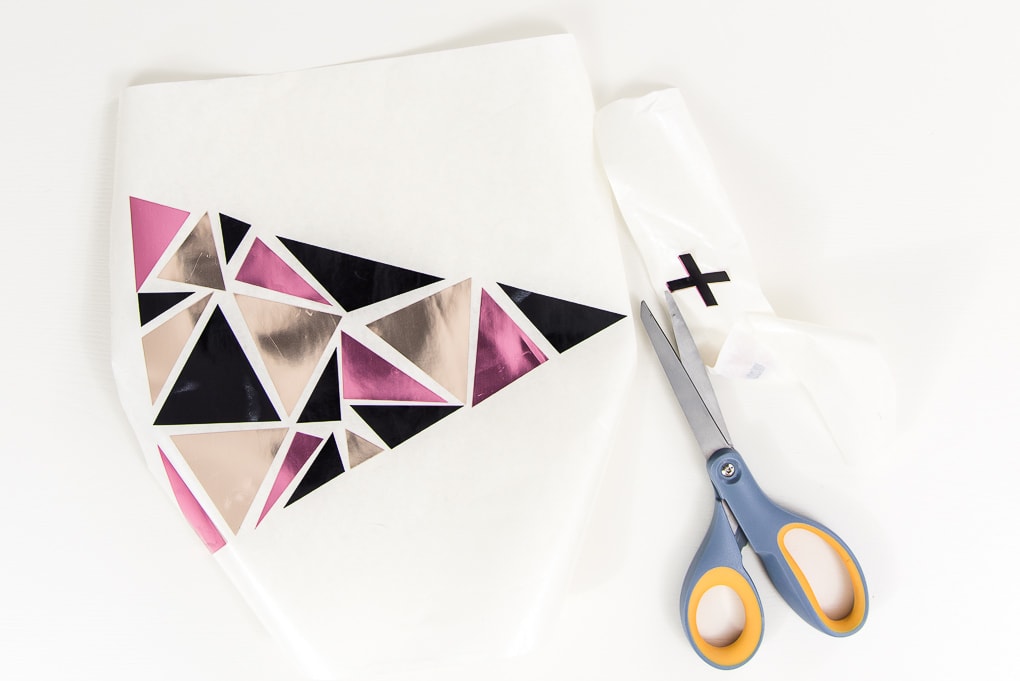
Next, carefully pull back the top of the transfer tape so that the registration marks come off of the backing and are stuck to the transfer tape.

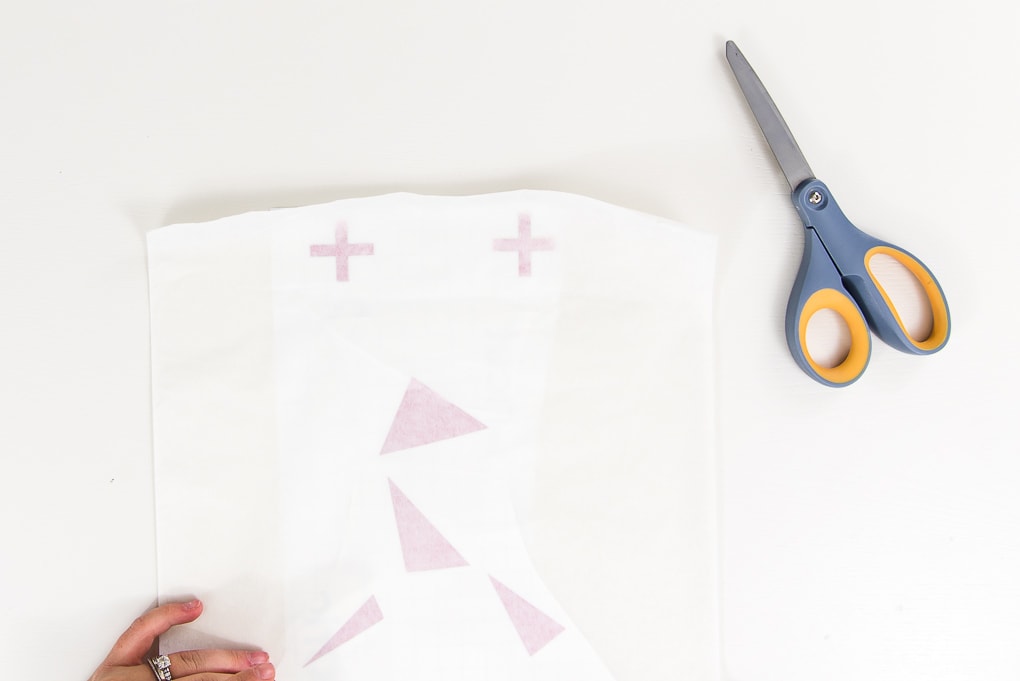
Take a pair of scissors and cut off the backing from the registration mark area of the pink layer.

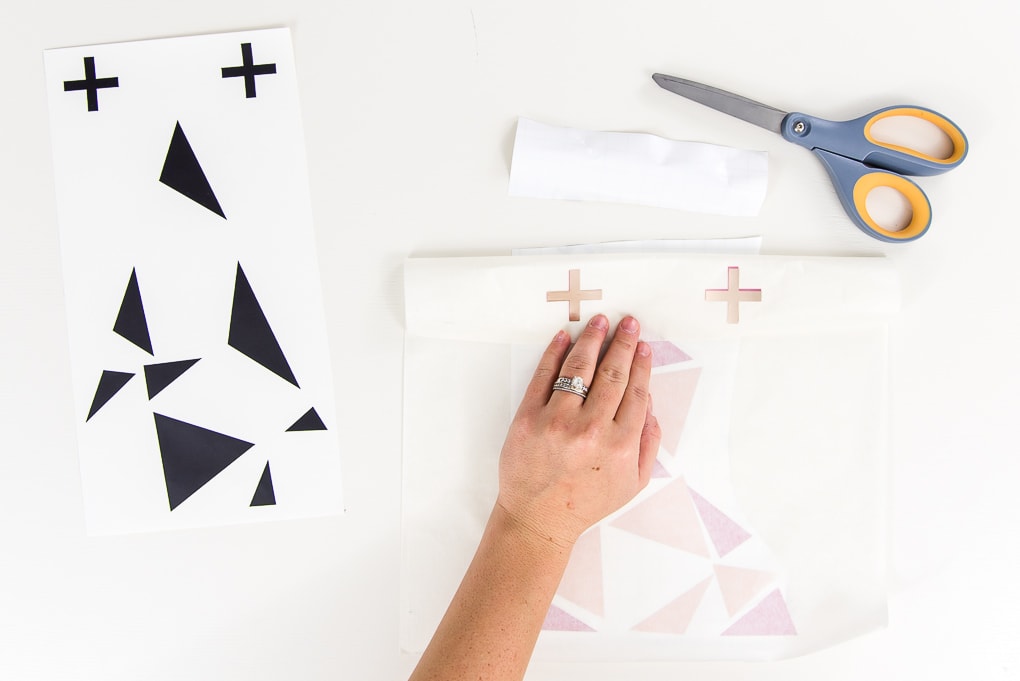
Slide the champagne layer behind the pink layer. Then, line up the pink registration marks with the champagne registration marks to get the designs placed properly.
At this point, the pink adhesive foil registration marks will be stuck to the champagne adhesive foil registration marks.
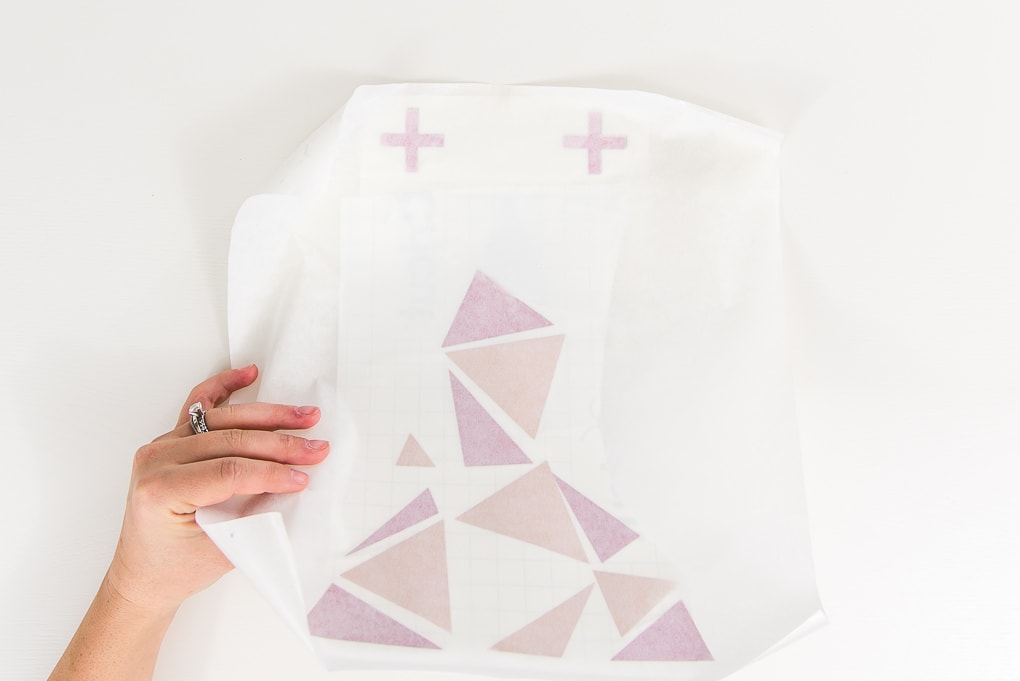
Next, flip up the pink layer and peel off the backing so that the foil is stuck to the transfer tape and the sticky part is revealed.

Carefully place the transfer tape back down over the champagne layer. Use the brayer tool to smooth the transfer tape onto the champagne adhesive foil. Now both layers will be attached to the transfer tape.
At this point, the backing from the champagne layer should still be attached to the back of the design.
Next, carefully pull back the top of the transfer tape so that both sets of the registration marks come off of the backing and are stuck to the transfer tape.
Take a pair of scissors and cut off the backing from the registration mark area of the champagne layer.
Slide the black layer behind the champagne layer. Then, line up the pink registration marks with the black registration marks to get the designs placed properly.

At this point, the pink adhesive foil registration marks will be stuck to the champagne adhesive foil registration marks and the black vinyl registration marks.
Next, flip up the champagne layer (which has both the champagne and pink pieces attached) and peel off the backing so that the foil is stuck to the transfer tape and the sticky part is revealed.


Carefully place the transfer tape back down over the black layer. Use the brayer tool to smooth the transfer tape onto the black vinyl. Now all three layers will be attached to the transfer tape.

At this point, the backing from the black layer should still be attached to the back of the design.

Now, flip over the entire layered design and peel the backing away.

If the transfer tape is stuck properly to every layer, the vinyl and foil will be attached to the transfer tape and will peel off of the backing.
But, if you are having problems with it sticking properly, flip the design over again and try to put more pressure on the transfer tape to get the design to stick.
The registration marks help to line up the design properly so you get that layered vinyl and foil look. But, it can be difficult to get them perfectly aligned.
If this happens, you can adjust some of the pieces on the transfer tape. Use the weeder tool to lift up a piece and adjust as needed.


Now that you are done with the registration marks, you can use the scissors to cut those pieces off with the transfer tape. Now only the tree design is left on the transfer tape.
Next, place the transfer tape with the design onto the craft plywood.
Use the brayer tool to transfer the design from the transfer tape onto the wooden sign. Make sure to get all of the vinyl pieces pressed down so it will stick properly.

Then, take one corner of the transfer tape and peel it back and away from your design. If the design is stuck properly, the transfer tape will peel right off leaving the design behind.

Now your Modern Geometric Tree Sign is ready!
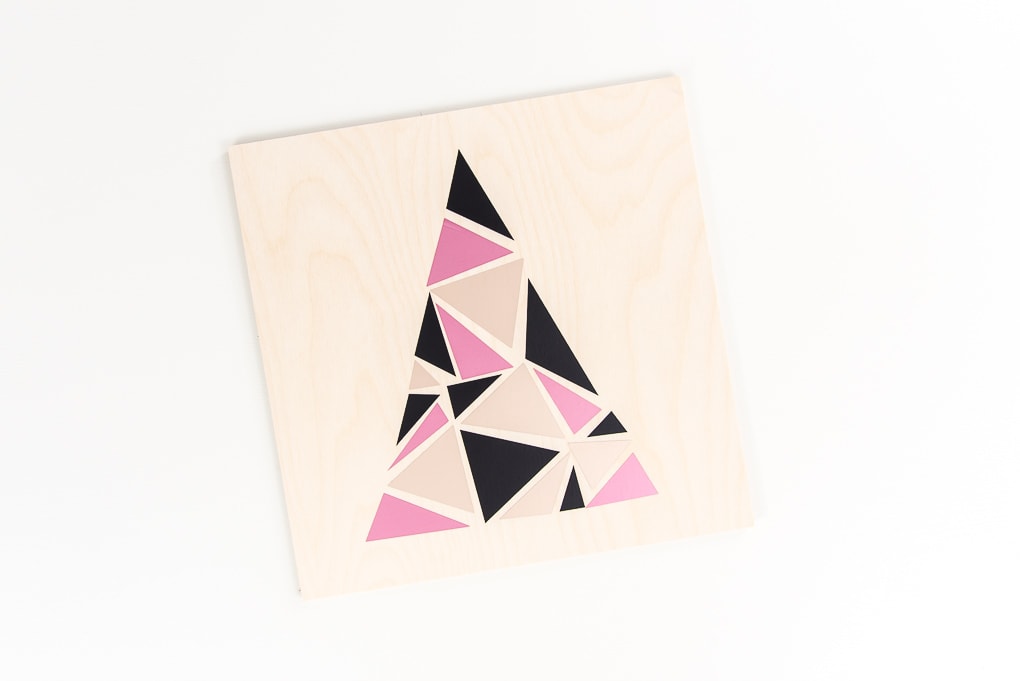
This is such a cute sign for layering with other Christmas signs in your home. I love that it’s just a simple modern geometric design.
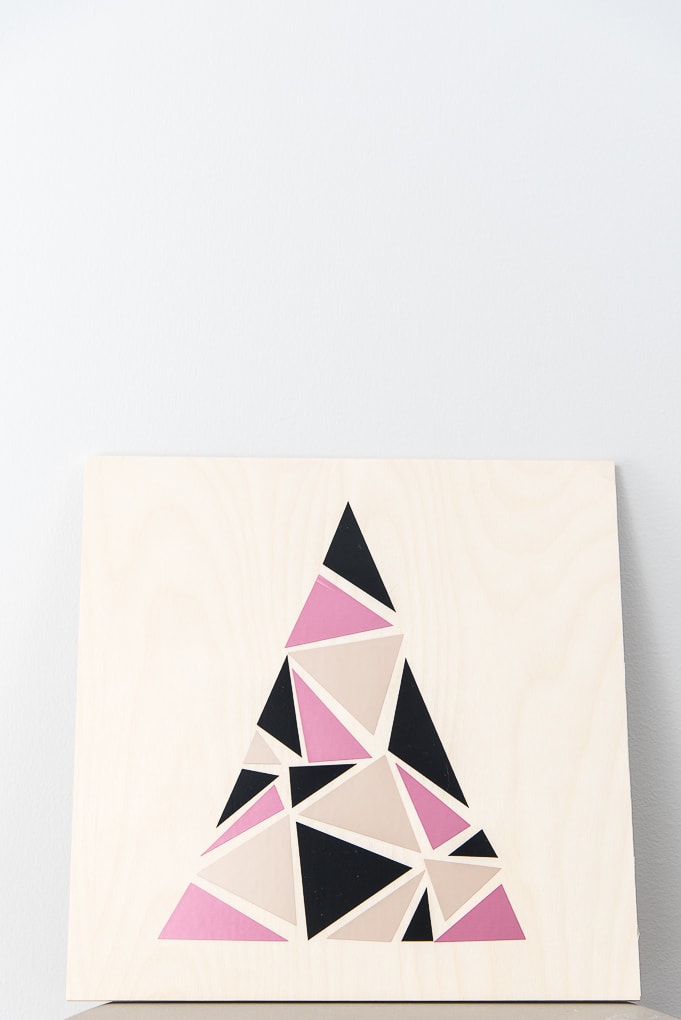
If you want to make it look a little more finished, you can add some pine wood around the outside of the wood to create a frame. But I also love the plain wood look because it looks a little more modern.

I hope you love this Modern Geometric Tree Sign.
If you decide to make this project, I would love to see!
Tag me on Instagram. Use the hashtag #25daysofcricut so that we can all see each other’s projects too!
To see more projects from Have Yourself A Very Cricut Christmas: 25 Days of Homemade Holiday Crafts!, click here!
If you want to follow along and see all of the projects for Have Yourself A Very Cricut Christmas: 25 Days of Homemade Holiday Crafts!, you can bookmark this blog post and visit it each day to see the newest project.


One Comment