Create an easy 3D star decoration using the Cricut Explore or Cricut Maker. These make such beautiful holiday decorations for your home.
Welcome to Have Yourself A Very Cricut Christmas: 25 Days of Homemade Holiday Crafts!
Each day in December, I’ll be sharing a new Christmas project that you can make using your Cricut. It’s going to be a blog version of an advent calendar! Come back every day to get a new “gift.”
Today’s gift is a 3D Star.

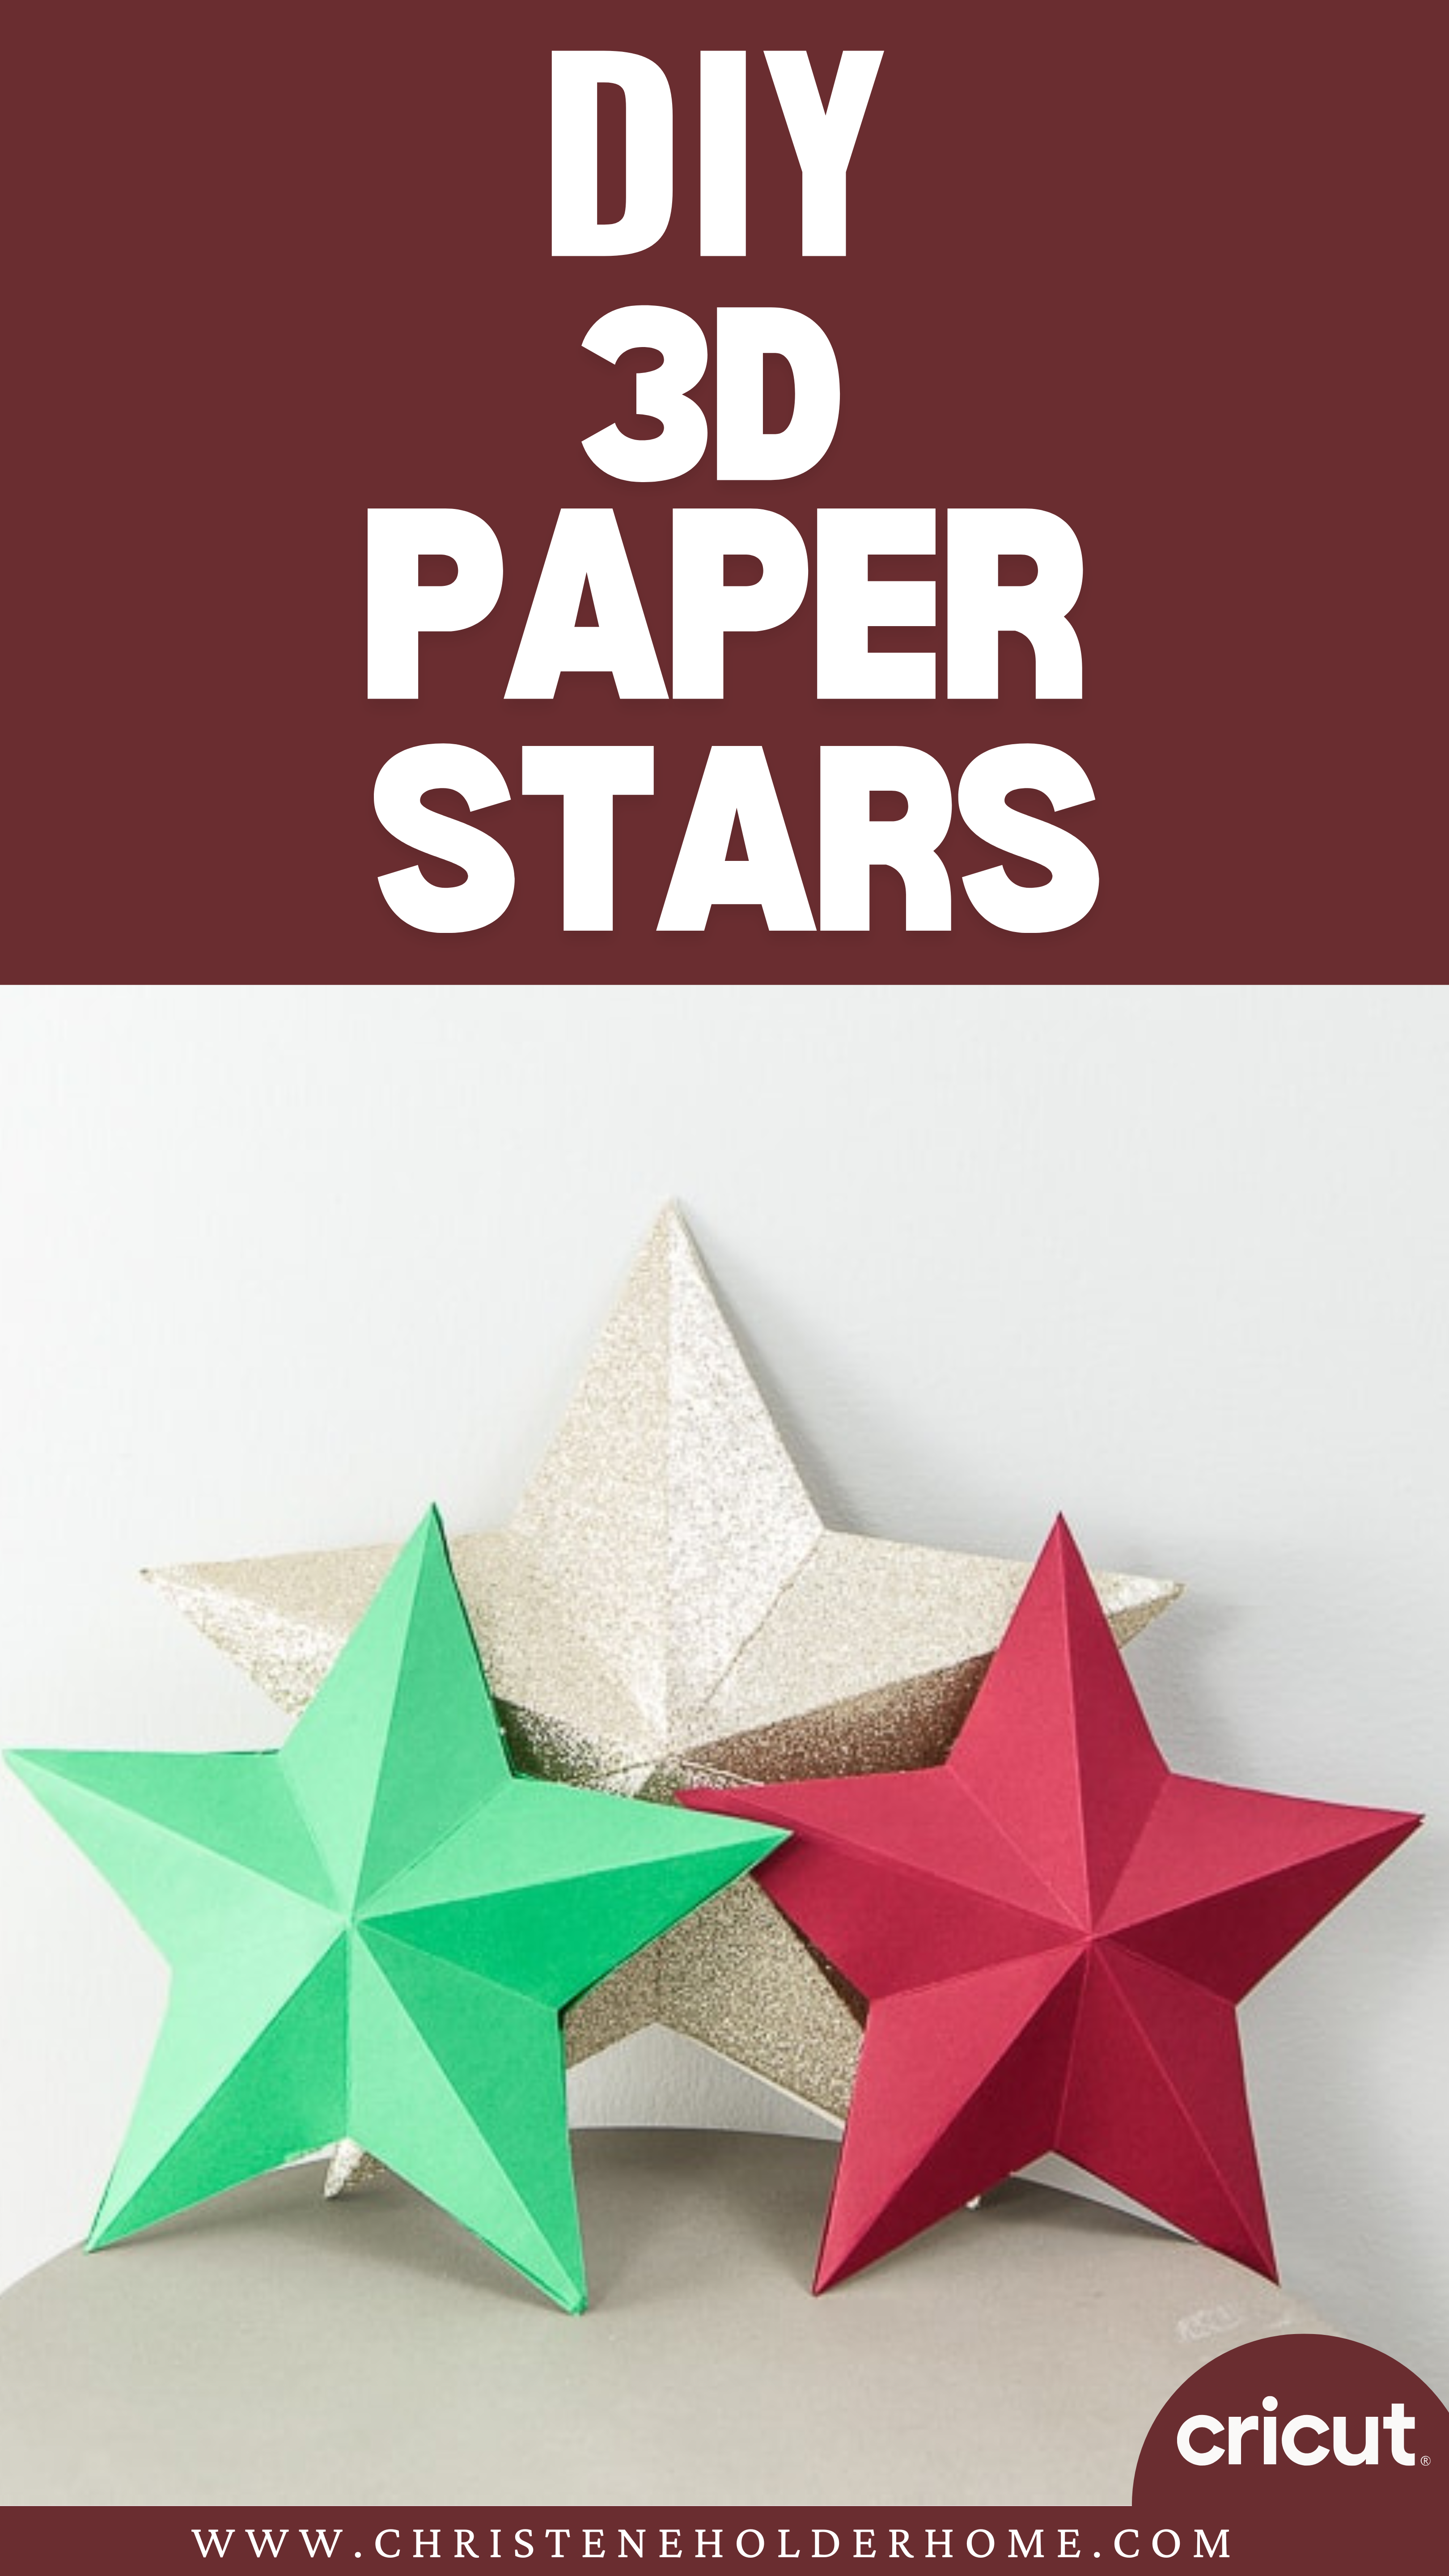
Stars are a classic Christmas decoration. They look beautiful and can make a home feel festive this time of year.
I’m sure you’ve created a 2D paper star before by cutting the shape out of paper. But to really make a star look extra special, you can make a 3D version. This gives the star dimension, texture, and makes it look like a Christmas decoration you bought at the store.
The best part is, you can make as many as you want at home using some basic cardstock paper. And they will look beautiful in your home for Christmas.
You’re going to love this 3D Star. Here’s how to make it!
How to Make a 3D Star Using The Cricut
This post contains affiliate links for your convenience. For more information, see my disclosures here.
Materials:
- 3D Star SVG file
- Cardstock 12” x 12”
- Choose any colors you want – I used glitter cardstock for my main star
- You will need one sheet of paper per side of the star, so two sheets per 3D star
Tools:
- Cricut Machine (You can use a Cricut Explore or a Cricut Maker for this project)
- Standard Grip Cutting Mat
- Cricut Fine-Point Blade (comes with all Cricut Machines)
- Cricut Scoring Stylus or Cricut Scoring Wheel (only can be used with the Cricut Maker)
- Bone Folder
- Hot Glue Gun and Hot Glue Sticks
How to Cut Out The Project Using The Cricut
First, you will need to download the 3D Star SVG file.
Get the Free 3D Star SVG File

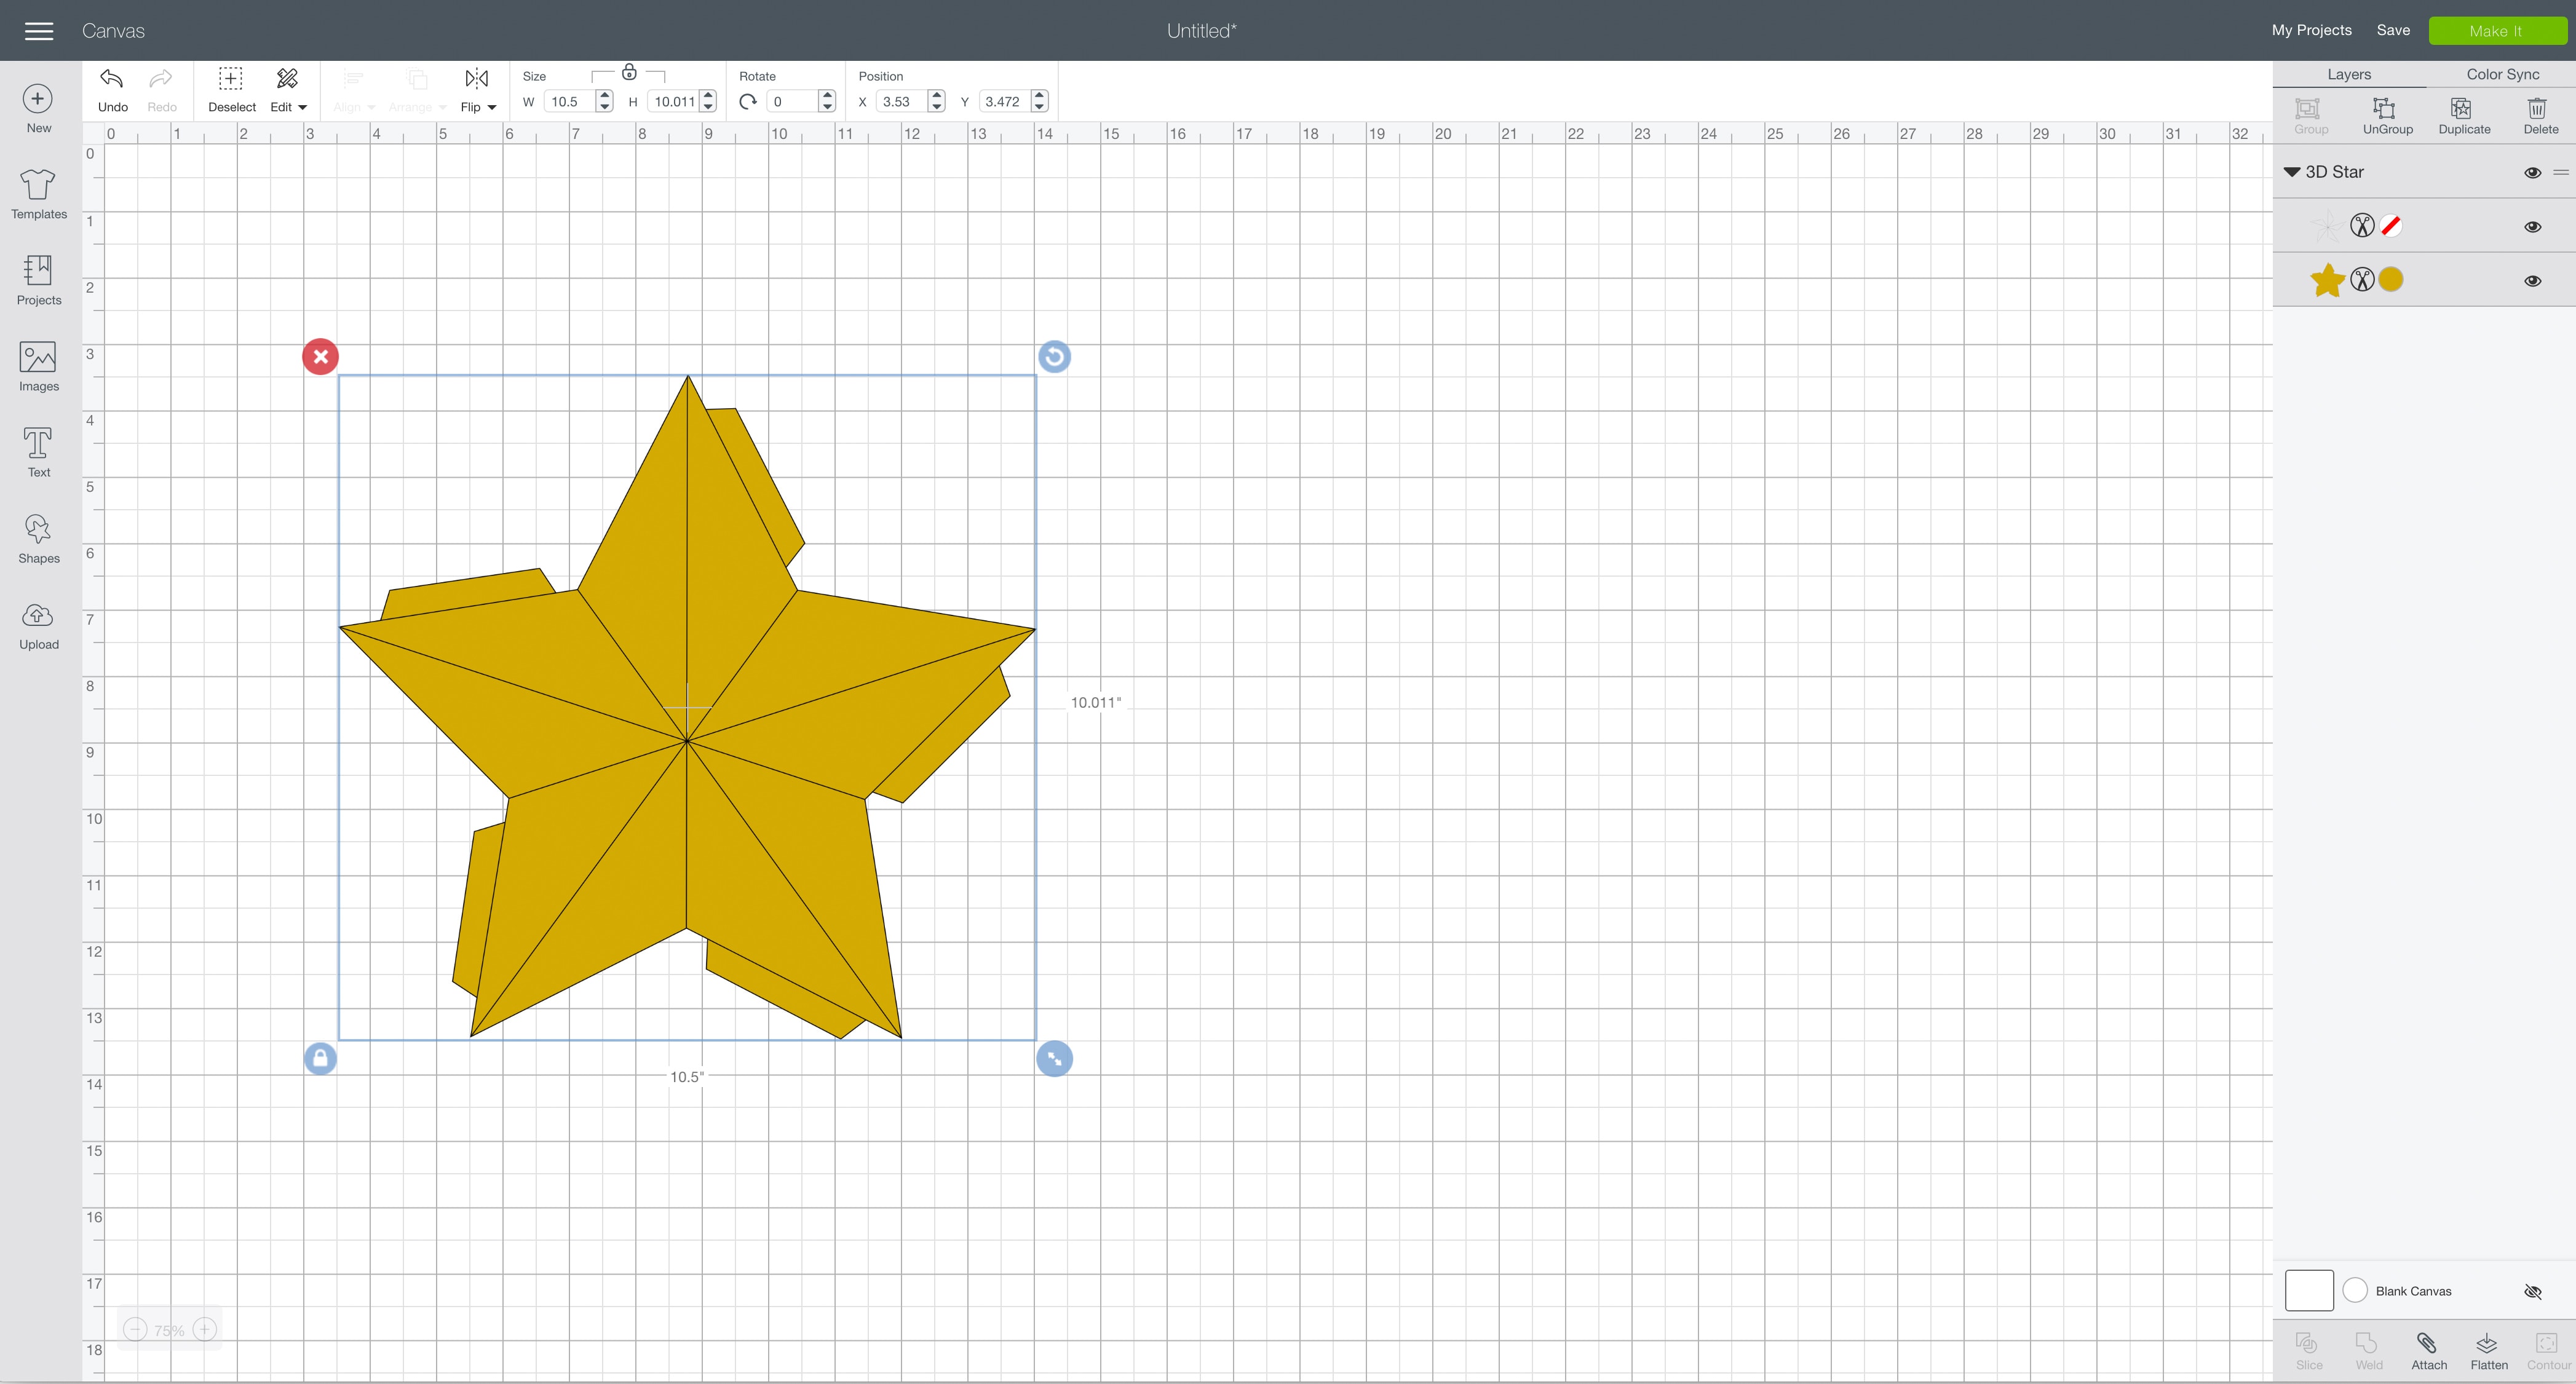
Start by opening Cricut Design Space and creating a new project.
Upload the SVG File
Then, upload the SVG file by selecting the Upload button and then Upload Image. Next, drag and drop or select the SVG file you want to upload.
After the SVG is uploaded, add the image to your design canvas.
If you need a little more help uploading SVG files, you can learn more in this post.
The SVG file will already be sized properly for this project, but you can resize the star file to any size that you want. You can create really large stars, really small stars, or a mix of sizes. Choose a size for your star depending on where you want to use it for decorating your home.

Layer Adjustments
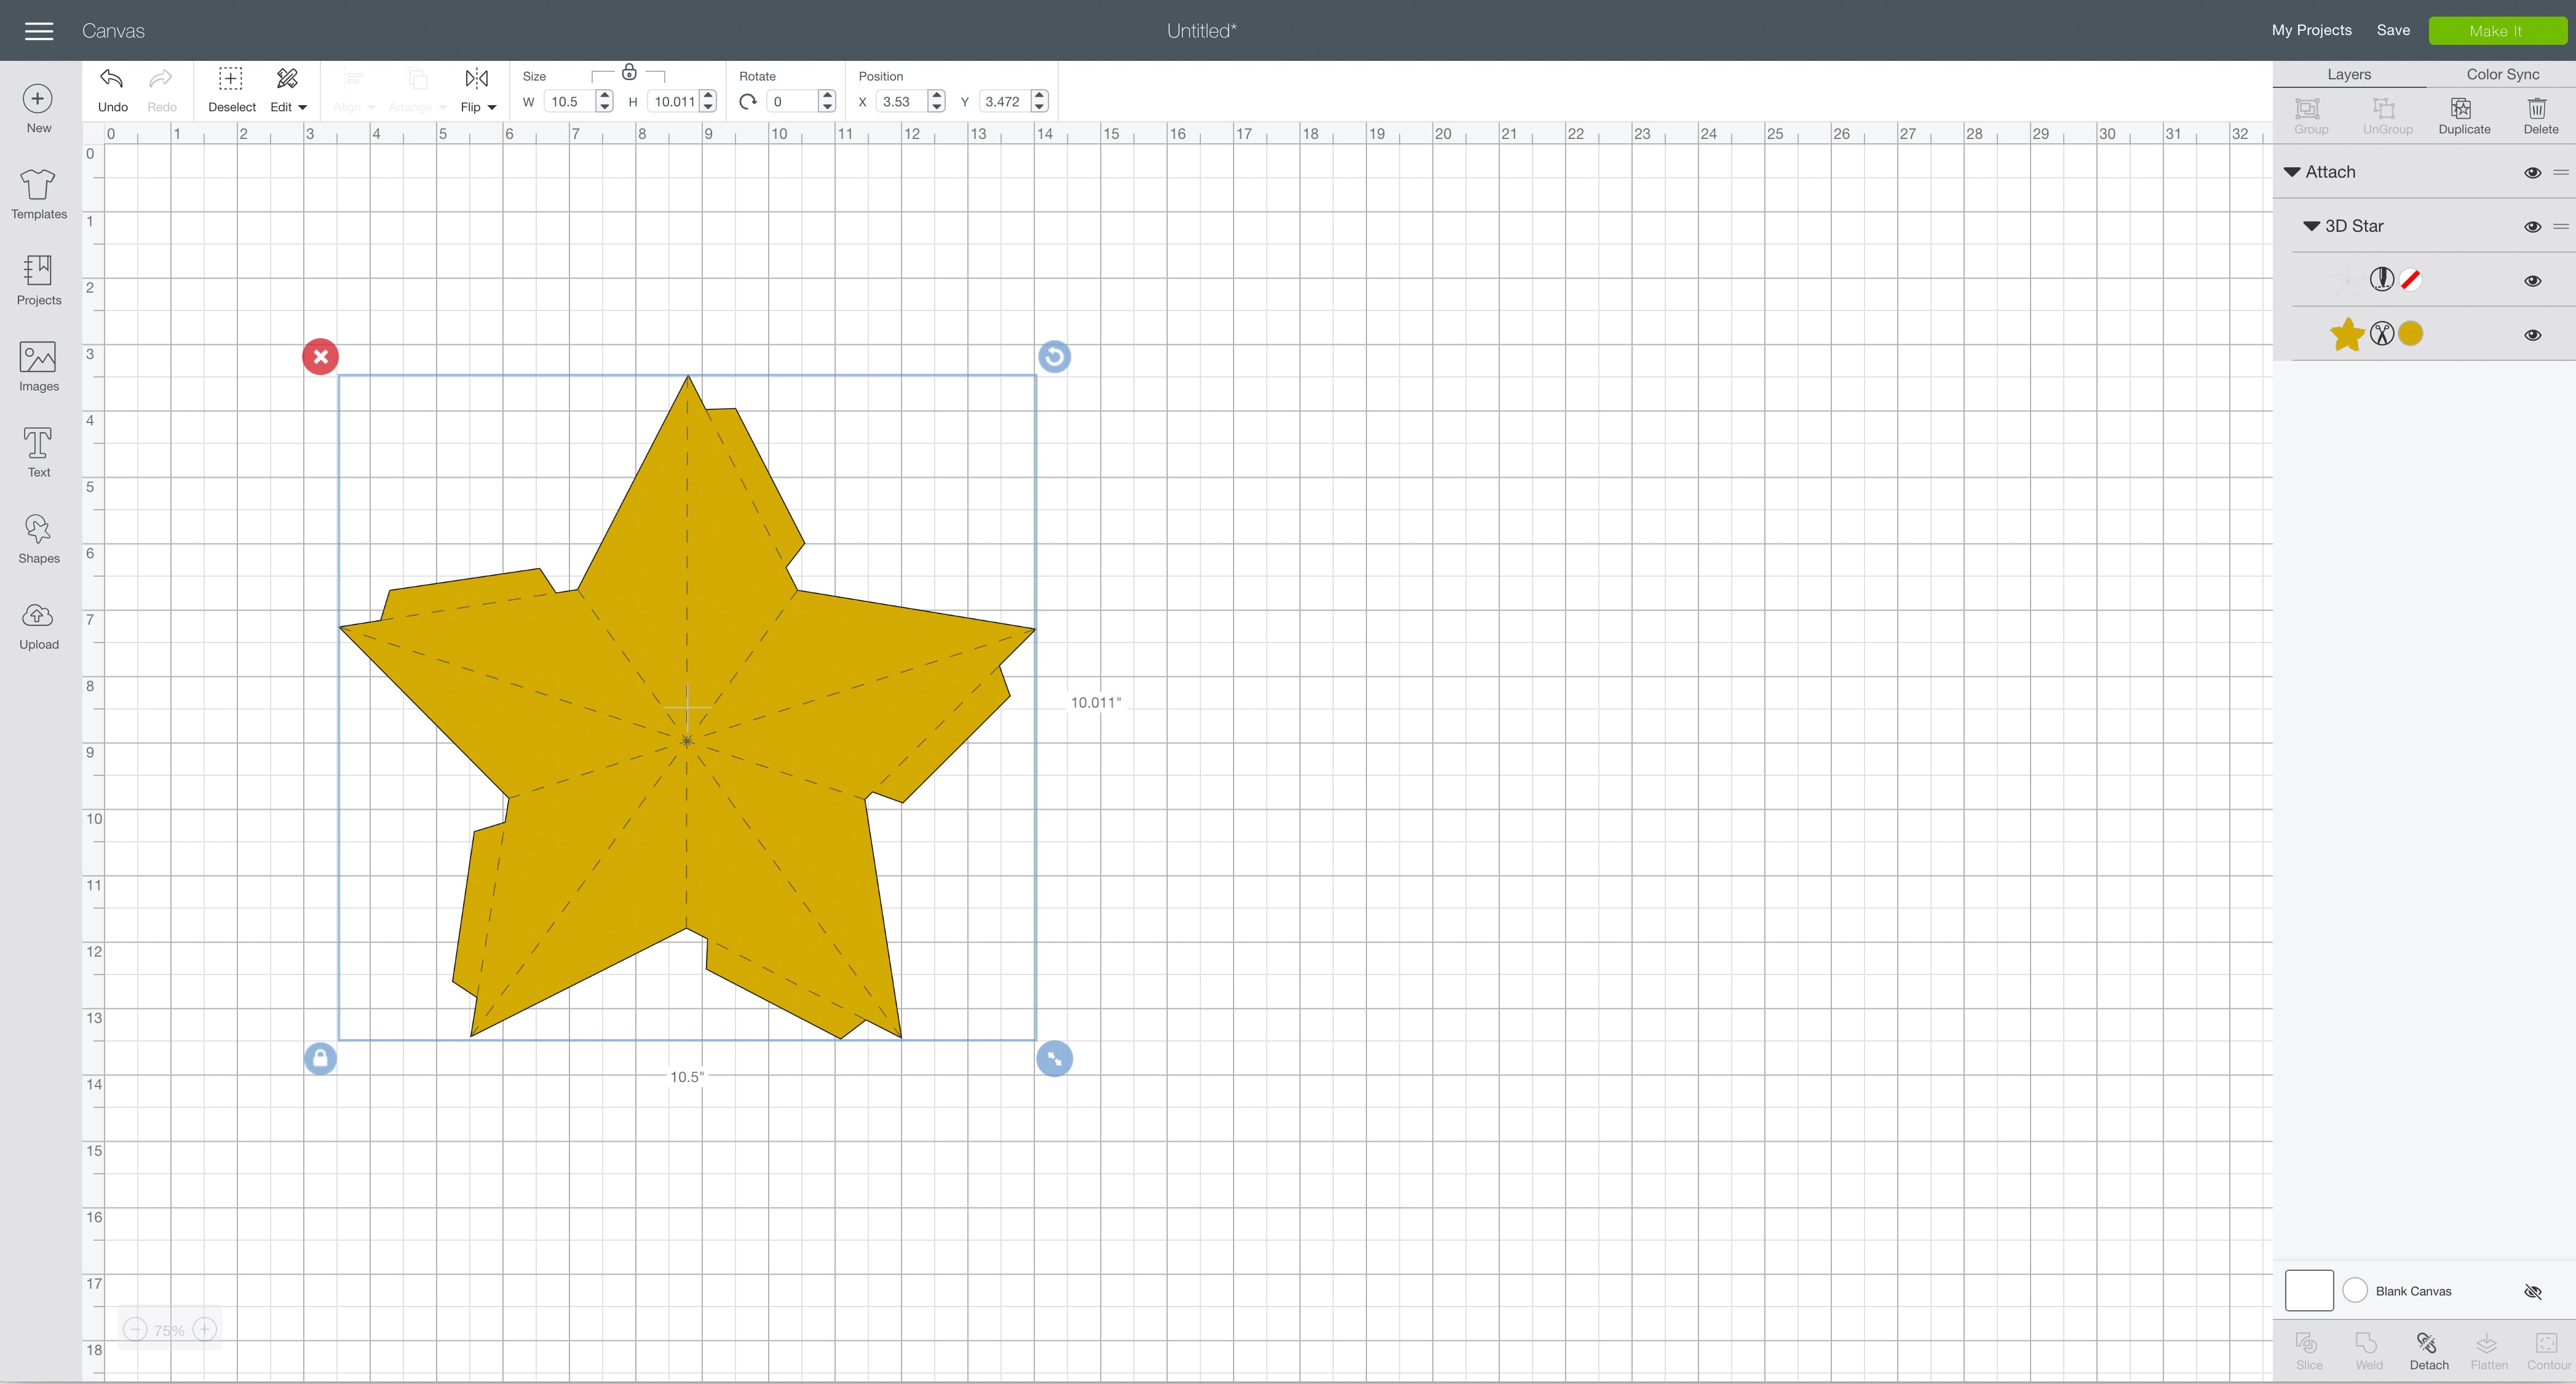
You will need to make a few layer adjustments so that Cricut Design Space knows how you want to create this project.
Change the layer with all of the score lines from Cut to Score. To do this, select the scissors icon next to the layer that has all of the score lines. It should be the first one in the Layers Panel on the right. Then, under Layer Attributes, select the score icon to switch the layer to Score.

Next, you will need to select both layers of the star. These layers are the score lines layer and the base star layer.
To select both layers, click on one layer, then hold down the Command key (on a mac) or Control key (on a PC) and select the other layer. You will see both of the layers highlighted gray once they have been selected.
Once they are all selected, click the Attach button at the bottom of the Layers Panel.

Cricut Tip: The Attach feature allows you to keep images in a specific configuration for cutting, writing, or scoring. It is like putting a pin in the image so that it is stuck in place. When you select Make It to start the cut process, attached images will not move around, but will stay in their attached location.
Make It
Now it’s time to make your project!
Click on the Make It button in the upper right of the screen.
The first screen you will see is the Mat Preview Screen. This will show you all of the different mats needed for your project. Each mat represents another piece of material.
There will only be one mat shown for this project. But, to make a 3D star, you will need to cut out the star shape twice to create the front and the back of the finished star decoration.
At the top of the Mat Preview Screen, under Project Copies, change the number from 1 to 2 and select Apply. This will create another mat so that you can cut out the image twice.

Click on the Continue button in the lower right of the screen.
Connect your Cricut machine. Then, adjust the settings as follows.
Material: Medium Cardstock – 80 lb
Pressure: Default
Make sure to set your material to the specific type of paper you are using.
Tools: Fine-Point Blade, Scoring Stylus
Click on Edit Tools to adjust which tools you are using.
You could also use the scoring wheel if you prefer and have the Cricut Maker.
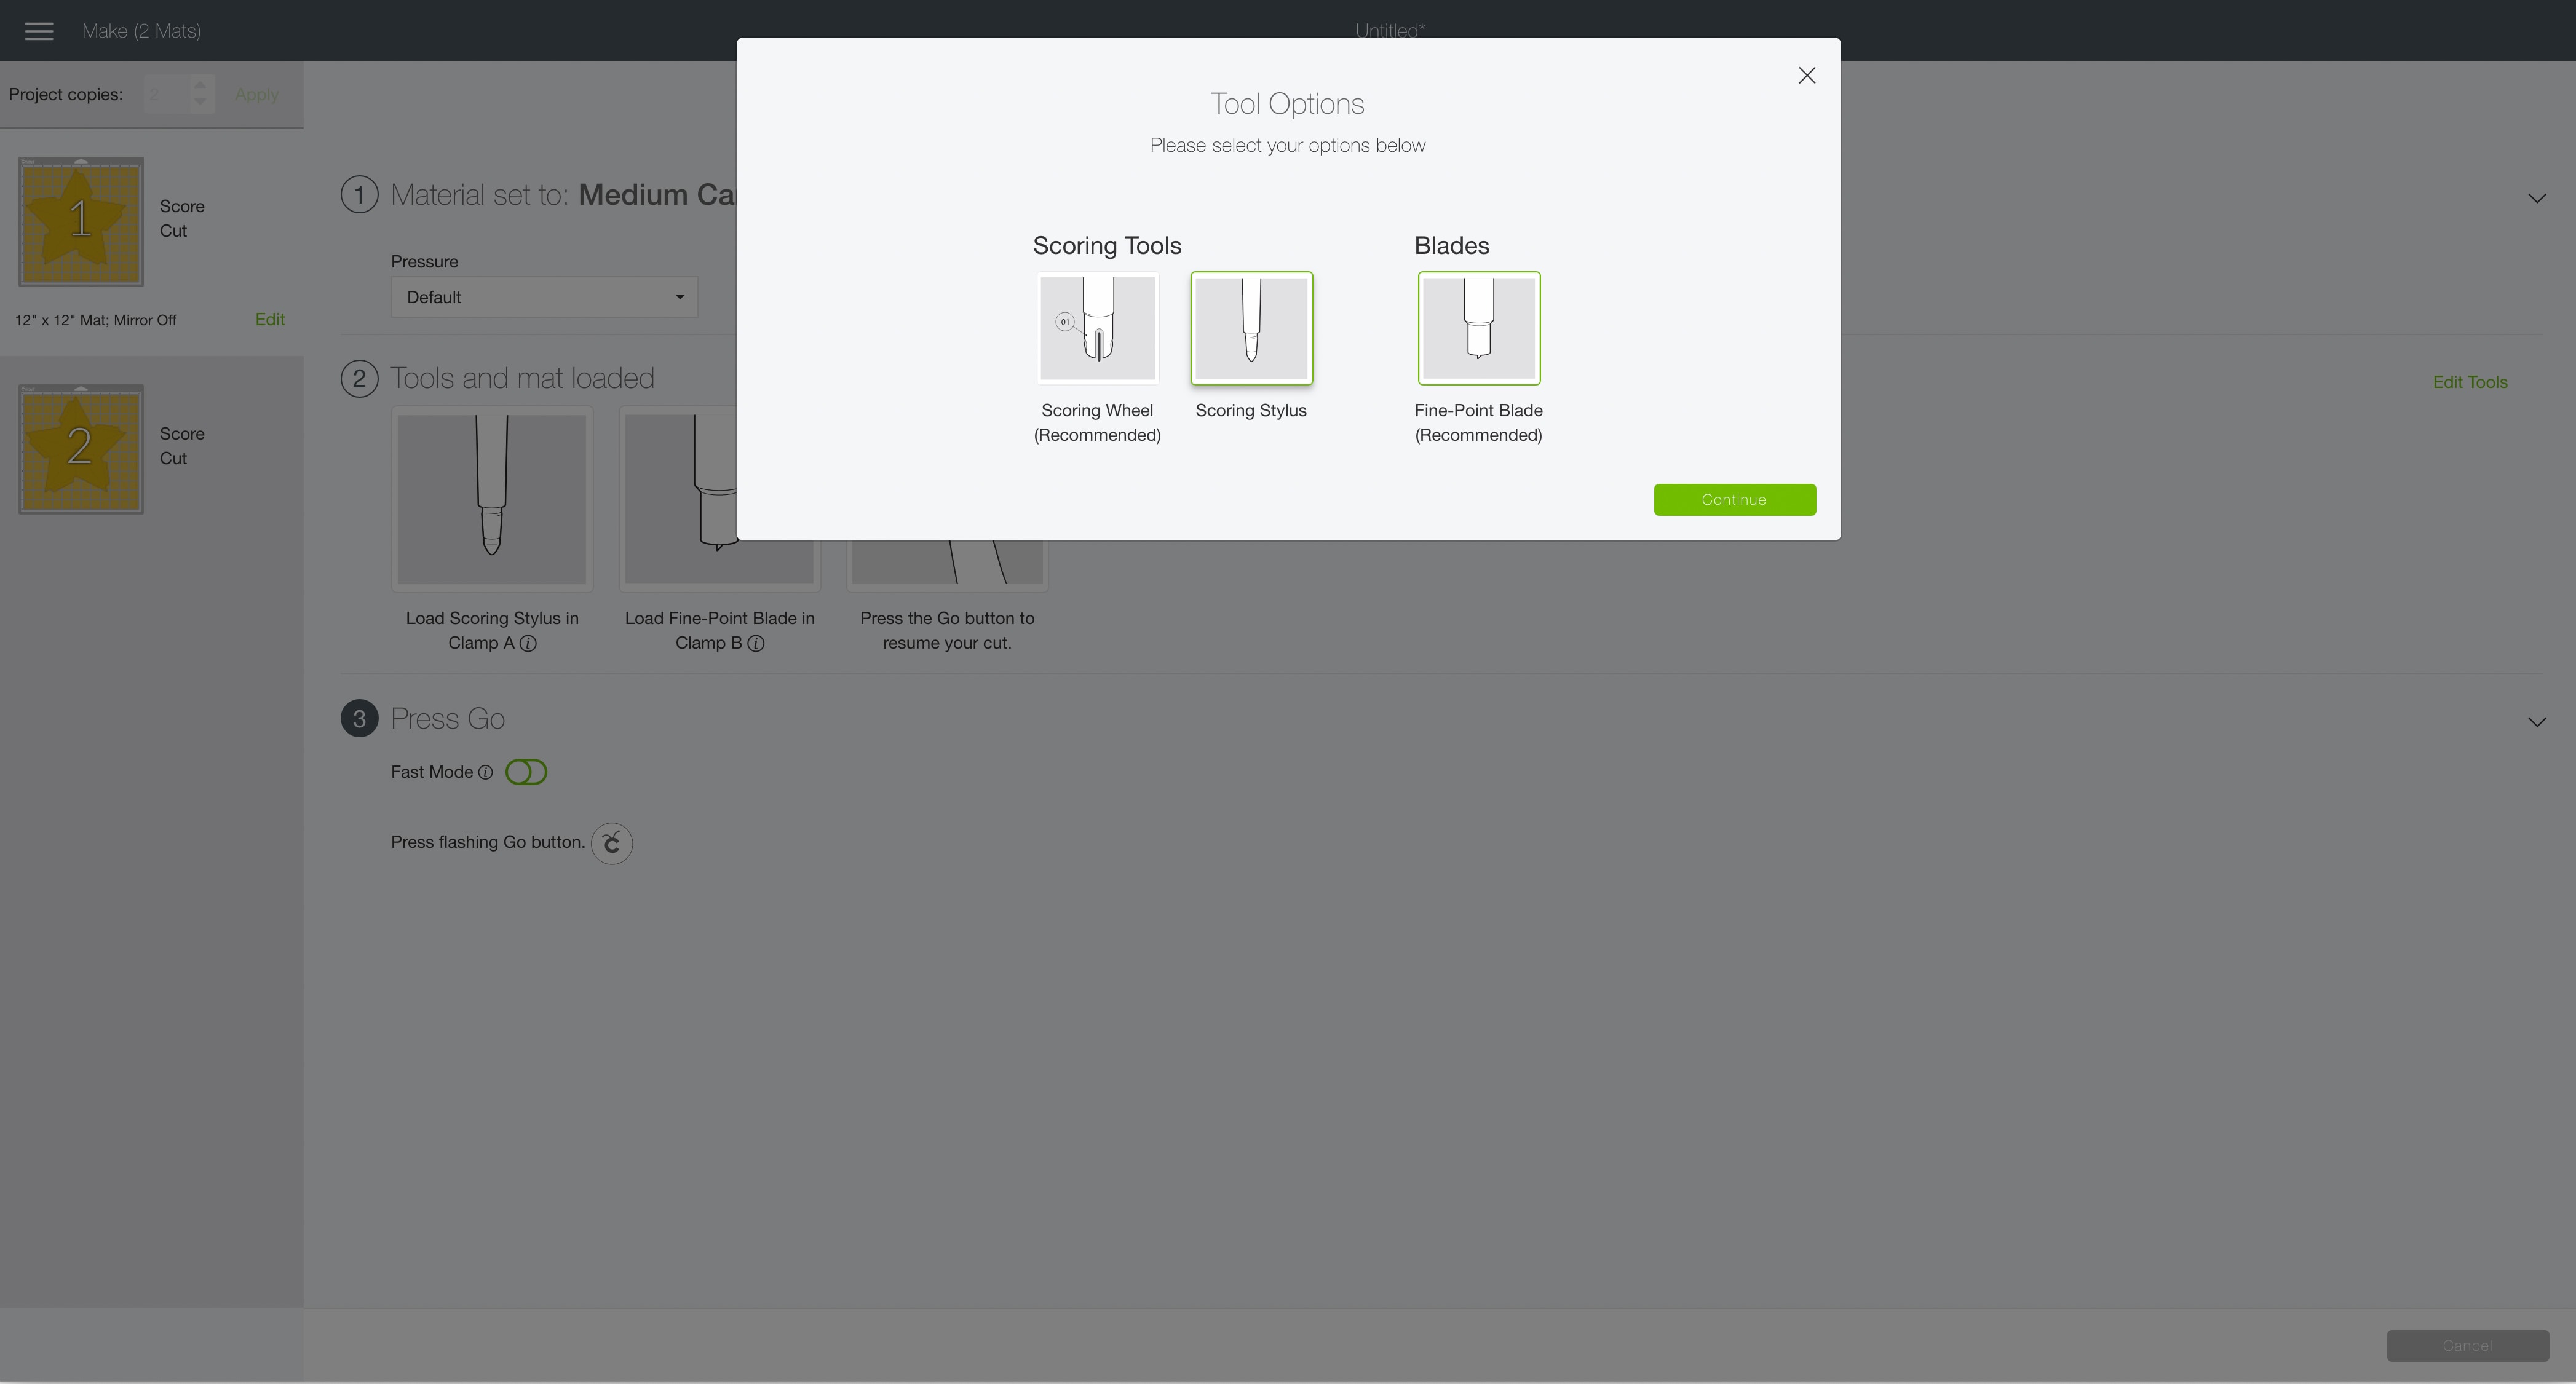
Load the standard grip cutting mat with your cardstock material into the machine. Then, press the flashing Go button to begin the cutting process.
Load each new material in order as shown by the mats on the left side of the screen until all of your pieces are cut out.
Cricut Tip: If you need to adjust the location of an image on the mat, click on Edit Mat. You can drag the image around to any location you want on the mat.
How to Assemble The Project
Once all of your pieces are cut out, it’s time to assemble the project.

On your star cutout you will see the score lines that the Cricut made. Start by taking the cutout and folding along one of the score lines.

Then, take a bone folder and use it to create a clean fold.

If you don’t have a bone folder, you could also use scissors or another tool with a rigid edge.
Continue folding on all of the score lines going across the star to each point.

Finally, fold all of the attachment flaps along the score lines.

Repeat this process with the second star cutout.
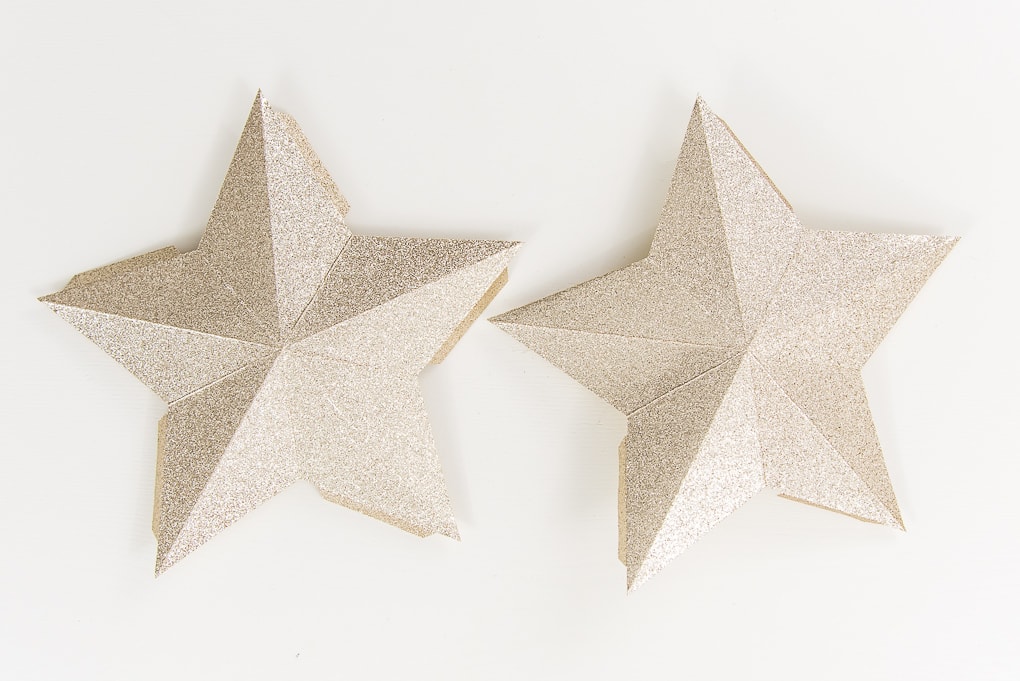
Now it’s time to put the two pieces together.
Take both star cutouts and line them up with one another. Each point should have an attachment flap on either side (from one side star cutout or the other side).

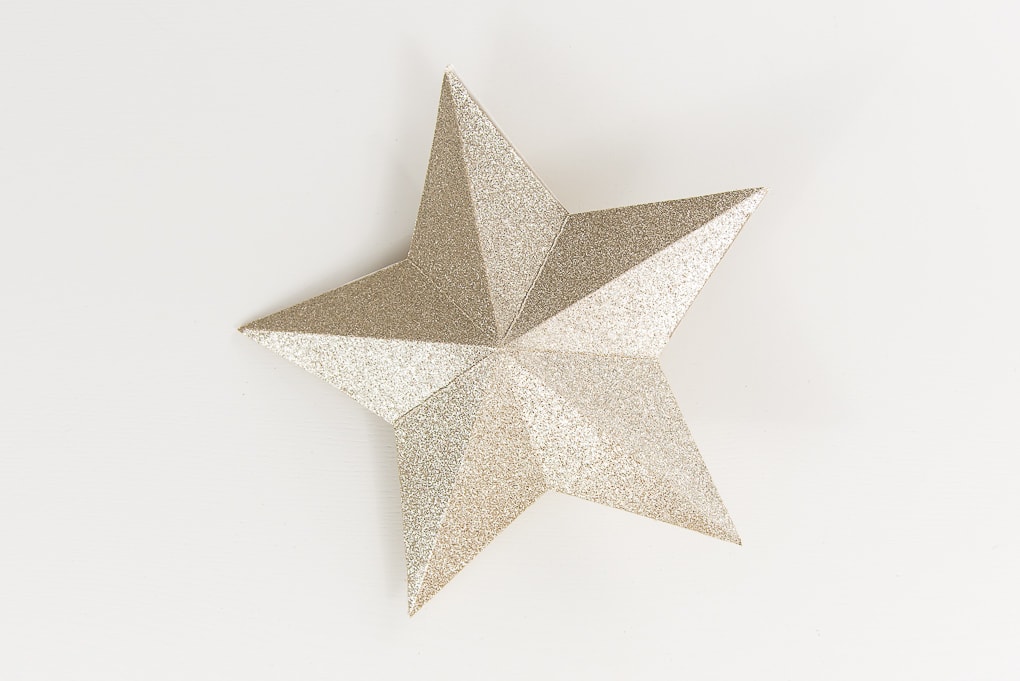
Use a hot glue gun and place some hot glue on one attachment flap. Attach it to the other side star cutout. Repeat with all of the attachment flaps working around the shape to assemble the 3D star.


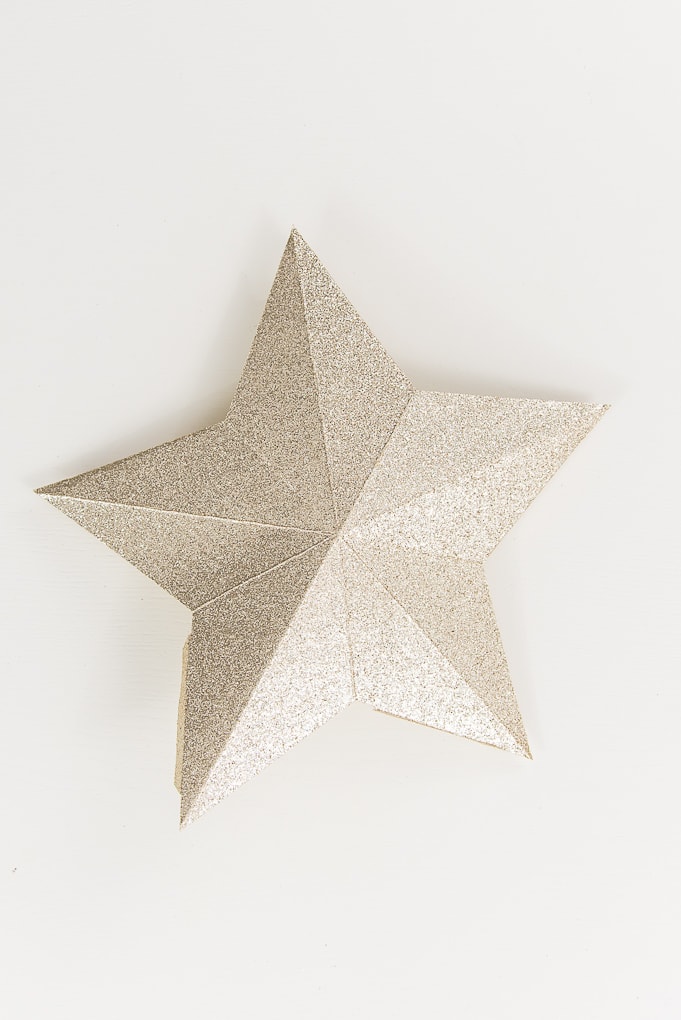
Now your 3D Star is ready!
I love how these stars turned out! They look beautiful and were quick to put together.

I think I might make a bunch of them in different sizes and display them all together hanging like a mobile. That would look so pretty in front of a window.
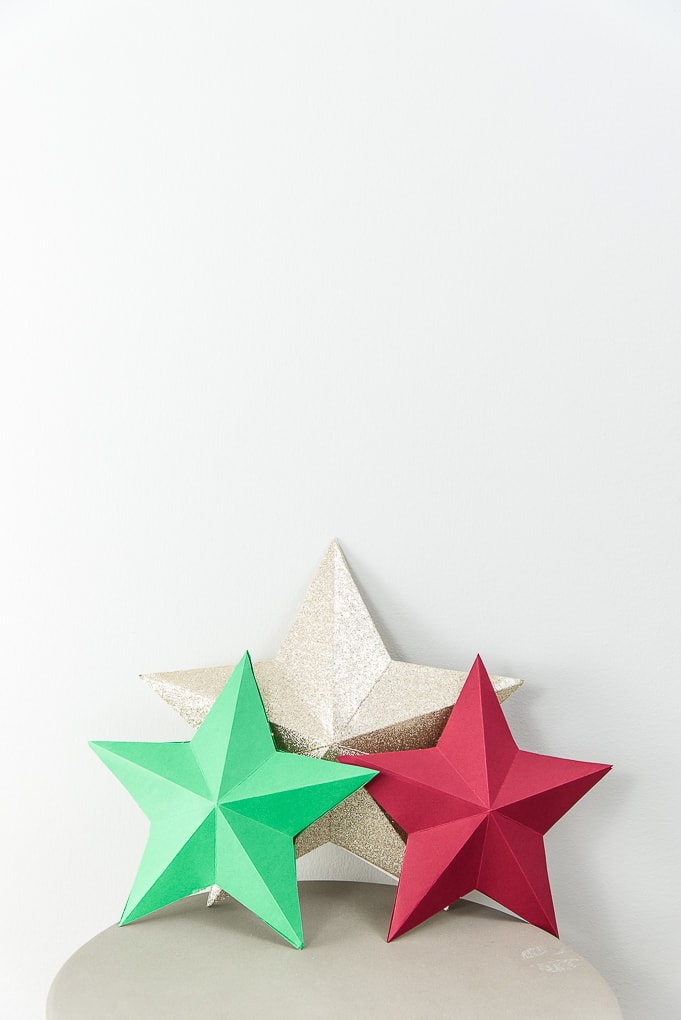
You can also use this pattern to make a paper star for the top of your Christmas tree.

I hope you love this 3D Star.
If you decide to make this project, I would love to see!
Tag me on Instagram. Use the hashtag #25daysofcricut so that we can all see each other’s projects too!
To see more projects from Have Yourself A Very Cricut Christmas: 25 Days of Homemade Holiday Crafts!, click here!
If you want to follow along and see all of the projects for Have Yourself A Very Cricut Christmas: 25 Days of Homemade Holiday Crafts!, you can bookmark this blog post and visit it each day to see the newest project.
>> Want to remember this? Save the 3D Star to your Pinterest boards by clicking here! <<


So pretty! I am going to try this for my sister in laws baby shower! I love your blog! I am so glad I found it.
I love the simple design and how beautiful they look. I can think of hundreds of ways to decorate with the star. I think they would look great on packages.
Thank you for the awesome project