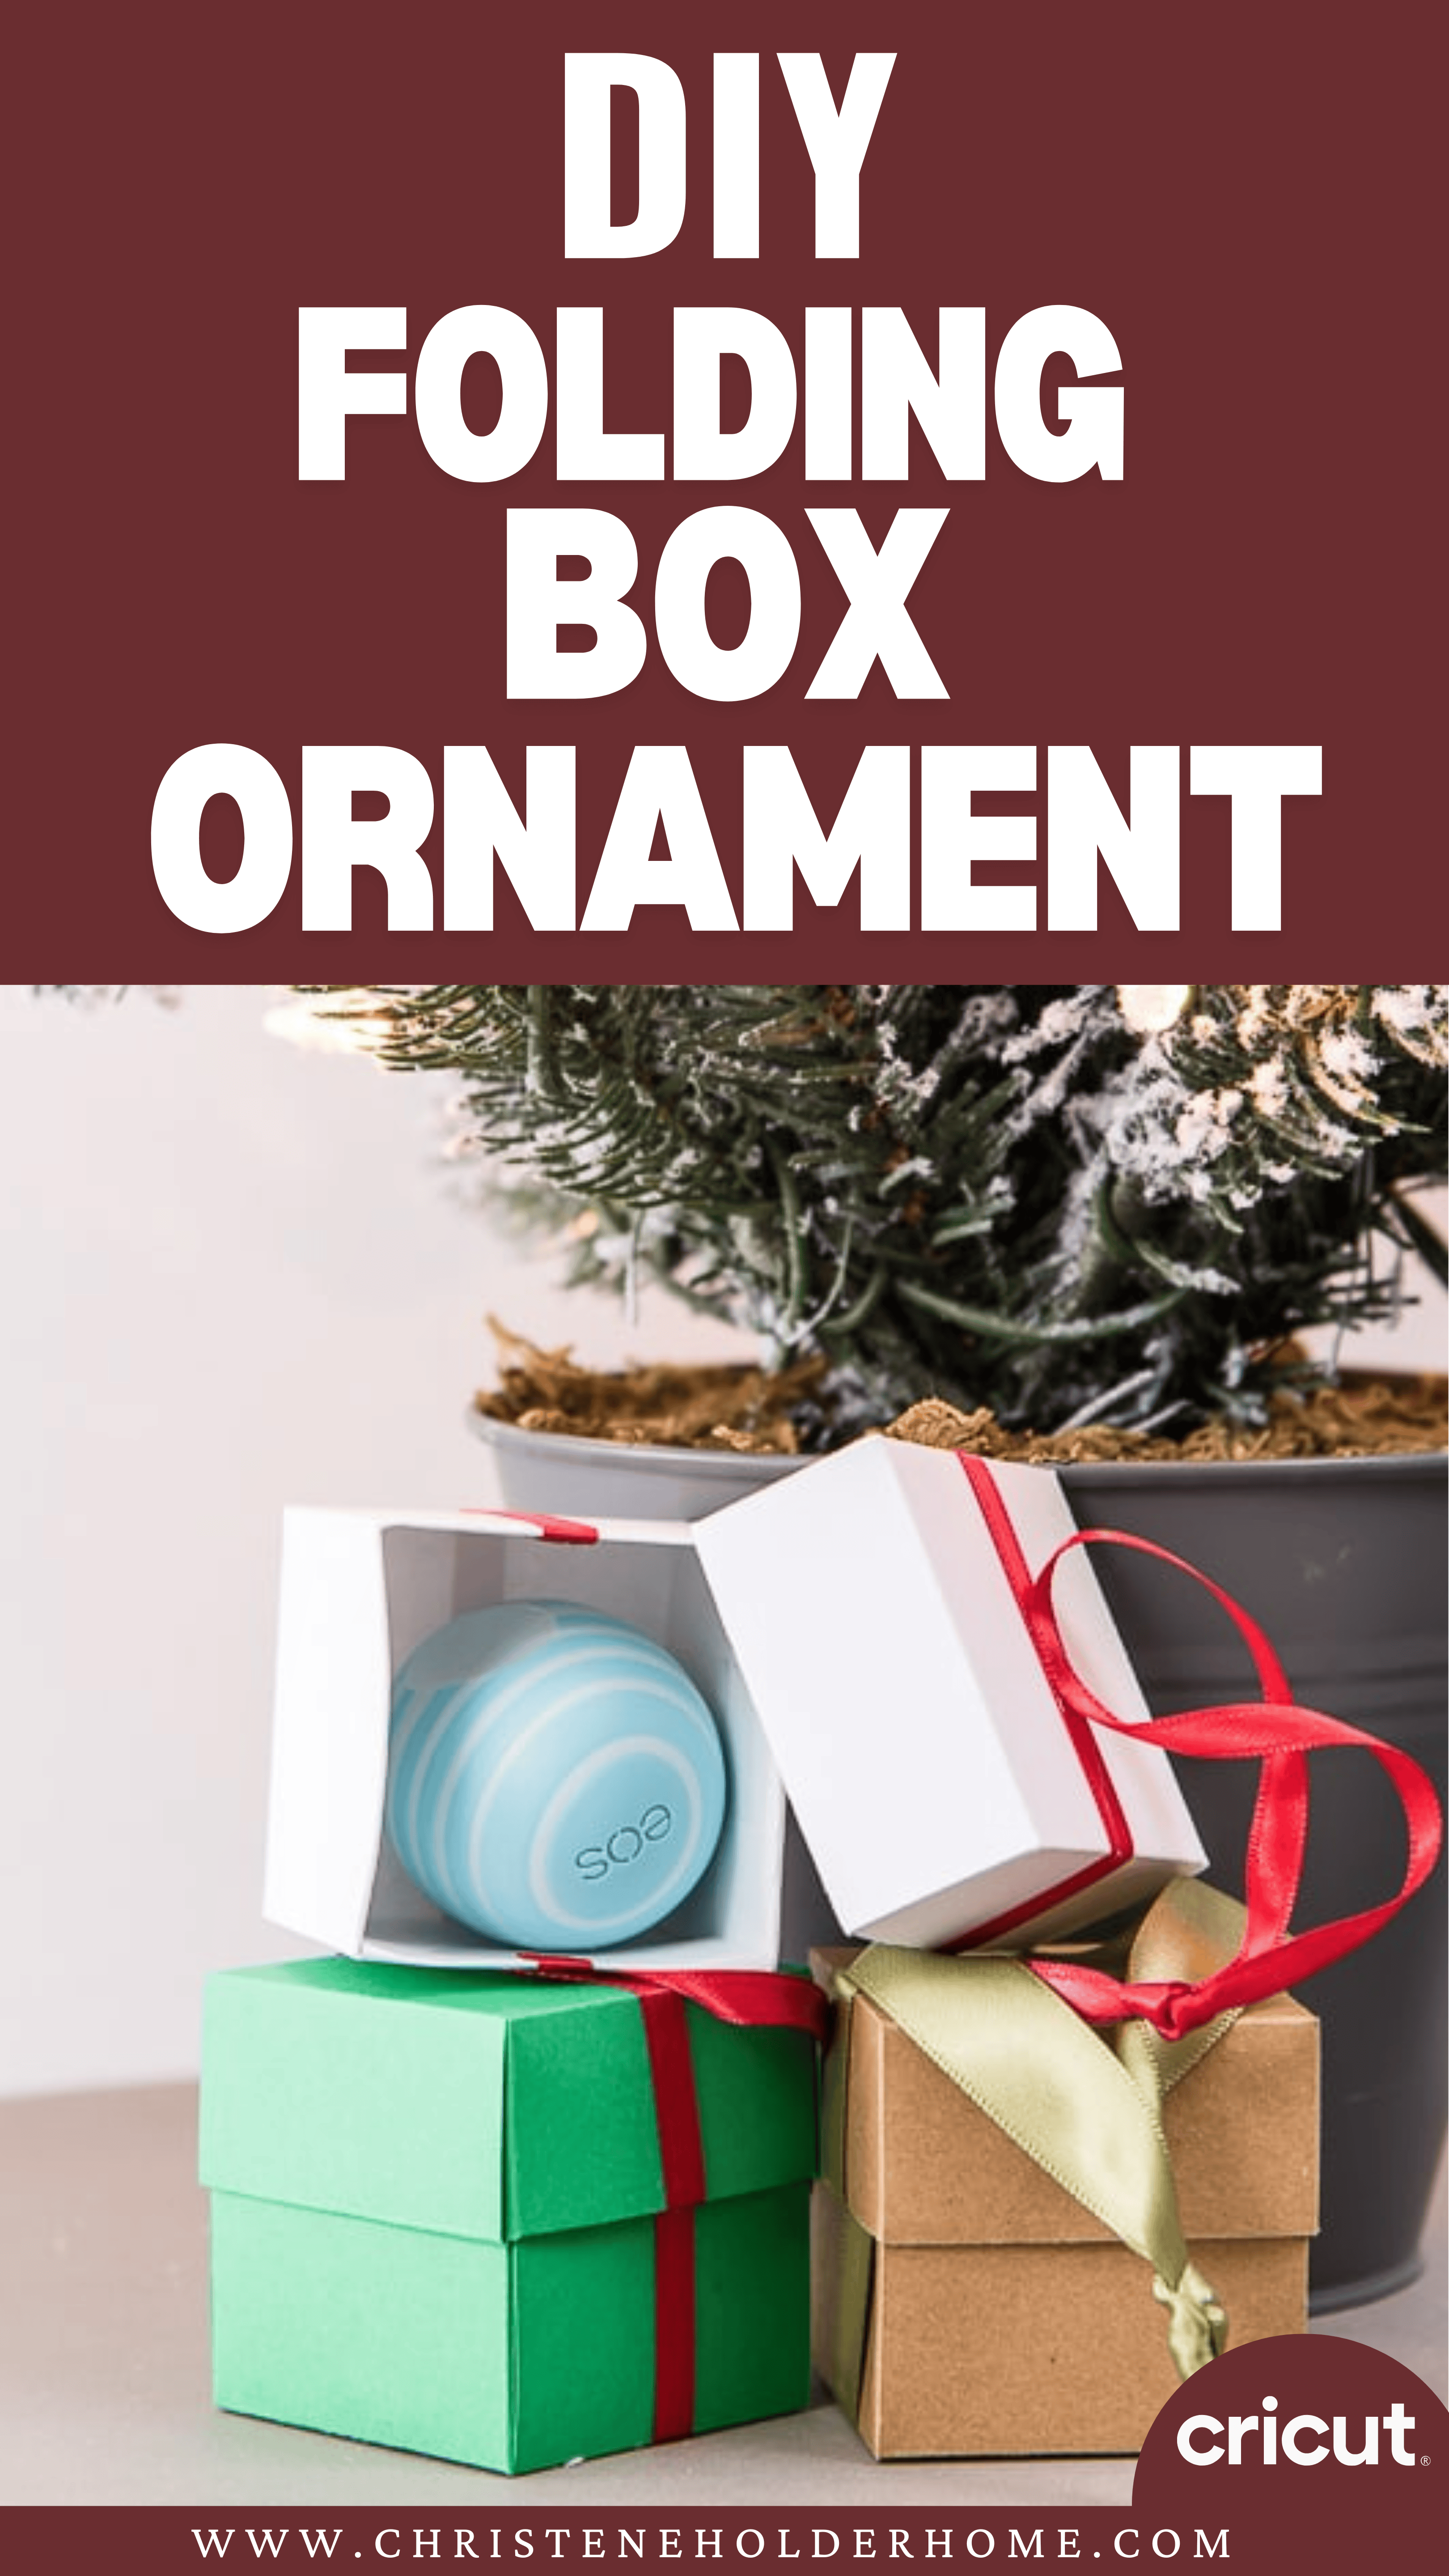
Create a simple folding box gift ornament using the Cricut Explore or Cricut Maker. This ornament can hold mini gifts and is so pretty on a Christmas tree!
Welcome to Have Yourself A Very Cricut Christmas: 25 Days of Homemade Holiday Crafts!
Each day in December, I’ll be sharing a new Christmas project that you can make using your Cricut. It’s going to be a blog version of an advent calendar! Come back every day to get a new “gift.”
Today’s gift is a Folding Box Gift Ornament.

If you’ve ever seen a picture of our Christmas tree, you will know that I have a thing for Christmas ornaments. I love to collect them! We have a wide variety of ornaments, but I also love to make new ornaments each year that we can add to our tree.
My great aunt used to make these small gift box ornaments using Christmas cards. She taught my mom, my sister, and myself how to make them too. We had a bunch on our Christmas tree growing up.
They are made to hold really tiny gifts that can be hidden on the Christmas tree. Every Christmas, we would search for the gift box ornaments, open them up, and see what was inside.
I designed my own version of these folding box gift ornaments that you can make using any paper you want.
You’re going to love this Folding Box Gift Ornament. Here’s how to make it!
How to Make a Folding Box Gift Ornament Using The Cricut
This post contains affiliate links for your convenience. For more information, see my disclosures here.
Materials:
- Folding Box Gift Ornament SVG file
- Cardstock (8.5” x 11”)
- Choose any colors you want
- You will need two sheets for each box, one for the base and one for the lid
- Ribbon
Tools:
- Cricut Machine (You can use a Cricut Explore or a Cricut Maker for this project)
- Light Grip Cutting Mat
- Cricut Fine-Point Blade (comes with all Cricut Machines)
- Cricut Scoring Stylus or Cricut Scoring Wheel (only can be used with the Cricut Maker)
- Bone Folder
- Scissors
- Hot Glue Gun and Hot Glue Sticks
- Clear Tape
How to Cut Out The Project Using The Cricut
First, you will need to download the Folding Box Gift Ornament SVG file.
Get the Free Folding Box Gift Ornament SVG File

Start by opening Cricut Design Space and creating a new project.
Upload the SVG File
Then, upload the SVG file by selecting the Upload button and then Upload Image. Next, drag and drop or select the SVG file you want to upload.
After the SVG is uploaded, add the image to your design canvas.

If you need a little more help uploading SVG files, you can learn more in this post.
The SVG file will already be sized properly for this project.
Layer Adjustments
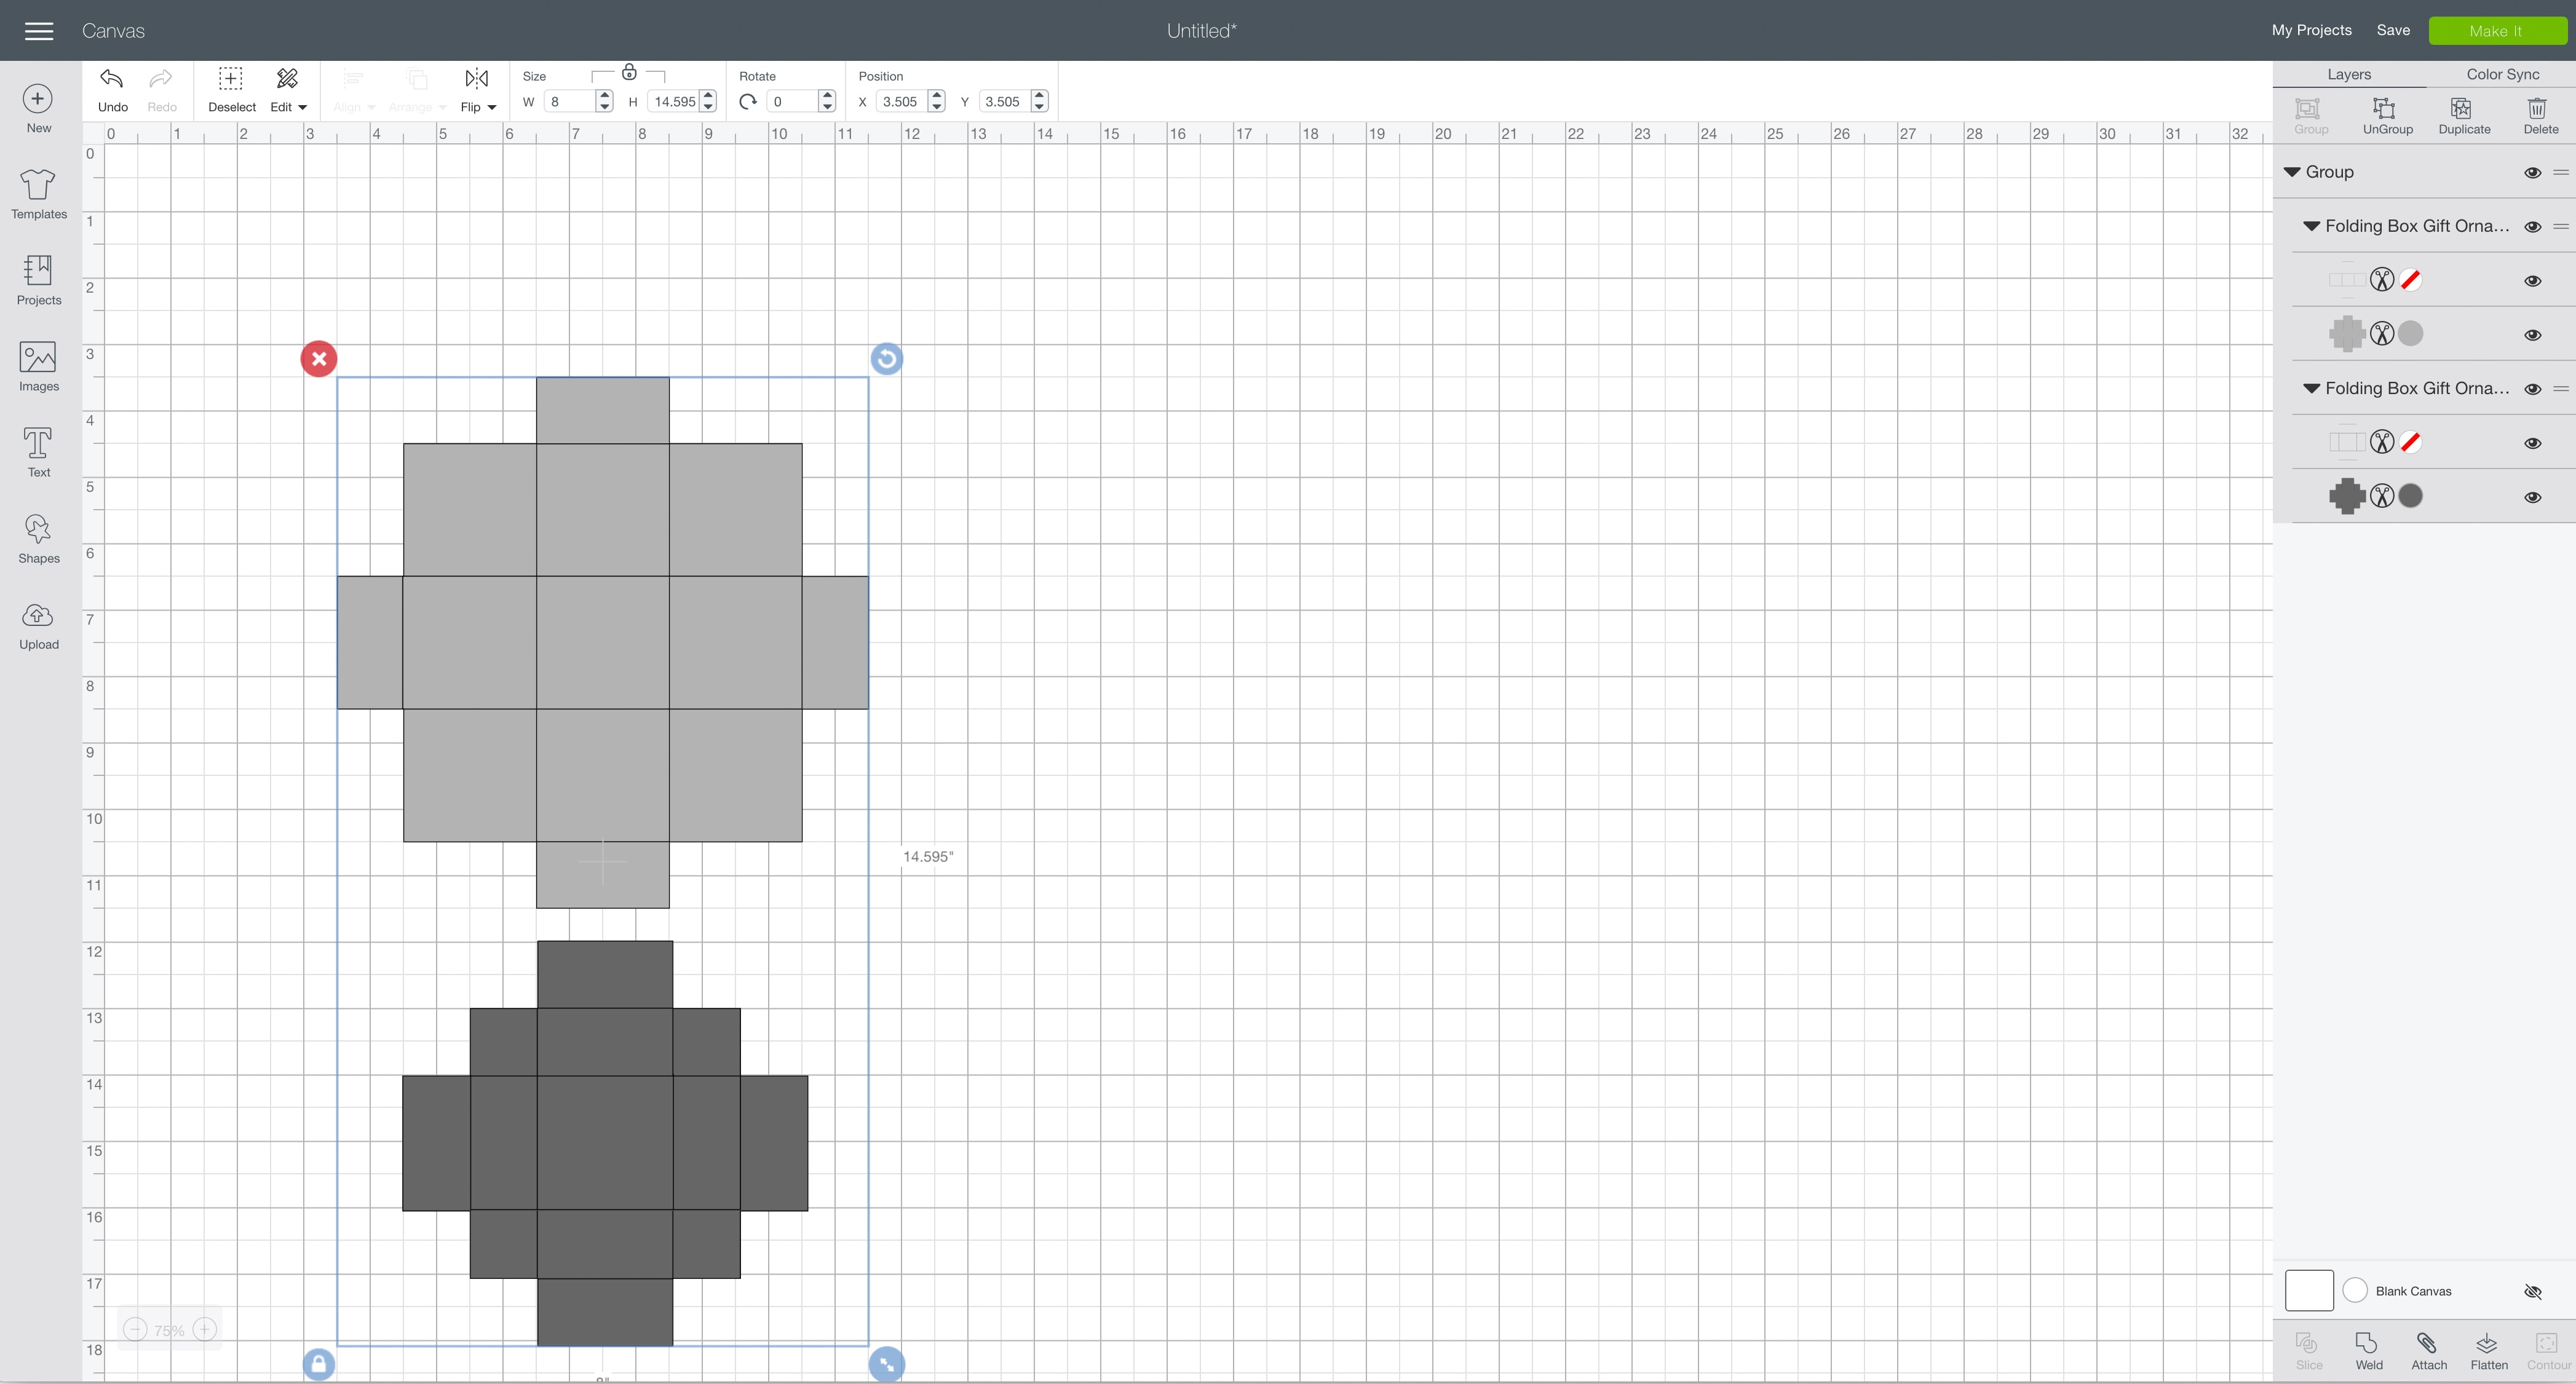
You will need to make a few layer adjustments so that Cricut Design Space knows how you want to create this project.
First, change the layer with all of the score lines on the box base from Cut to Score. To do this, select the scissors icon next to the layer that has all of the score lines. It should be the first one in the Layers Panel on the right. Then, under Layer Attributes, select the score icon to switch the layer to Score.
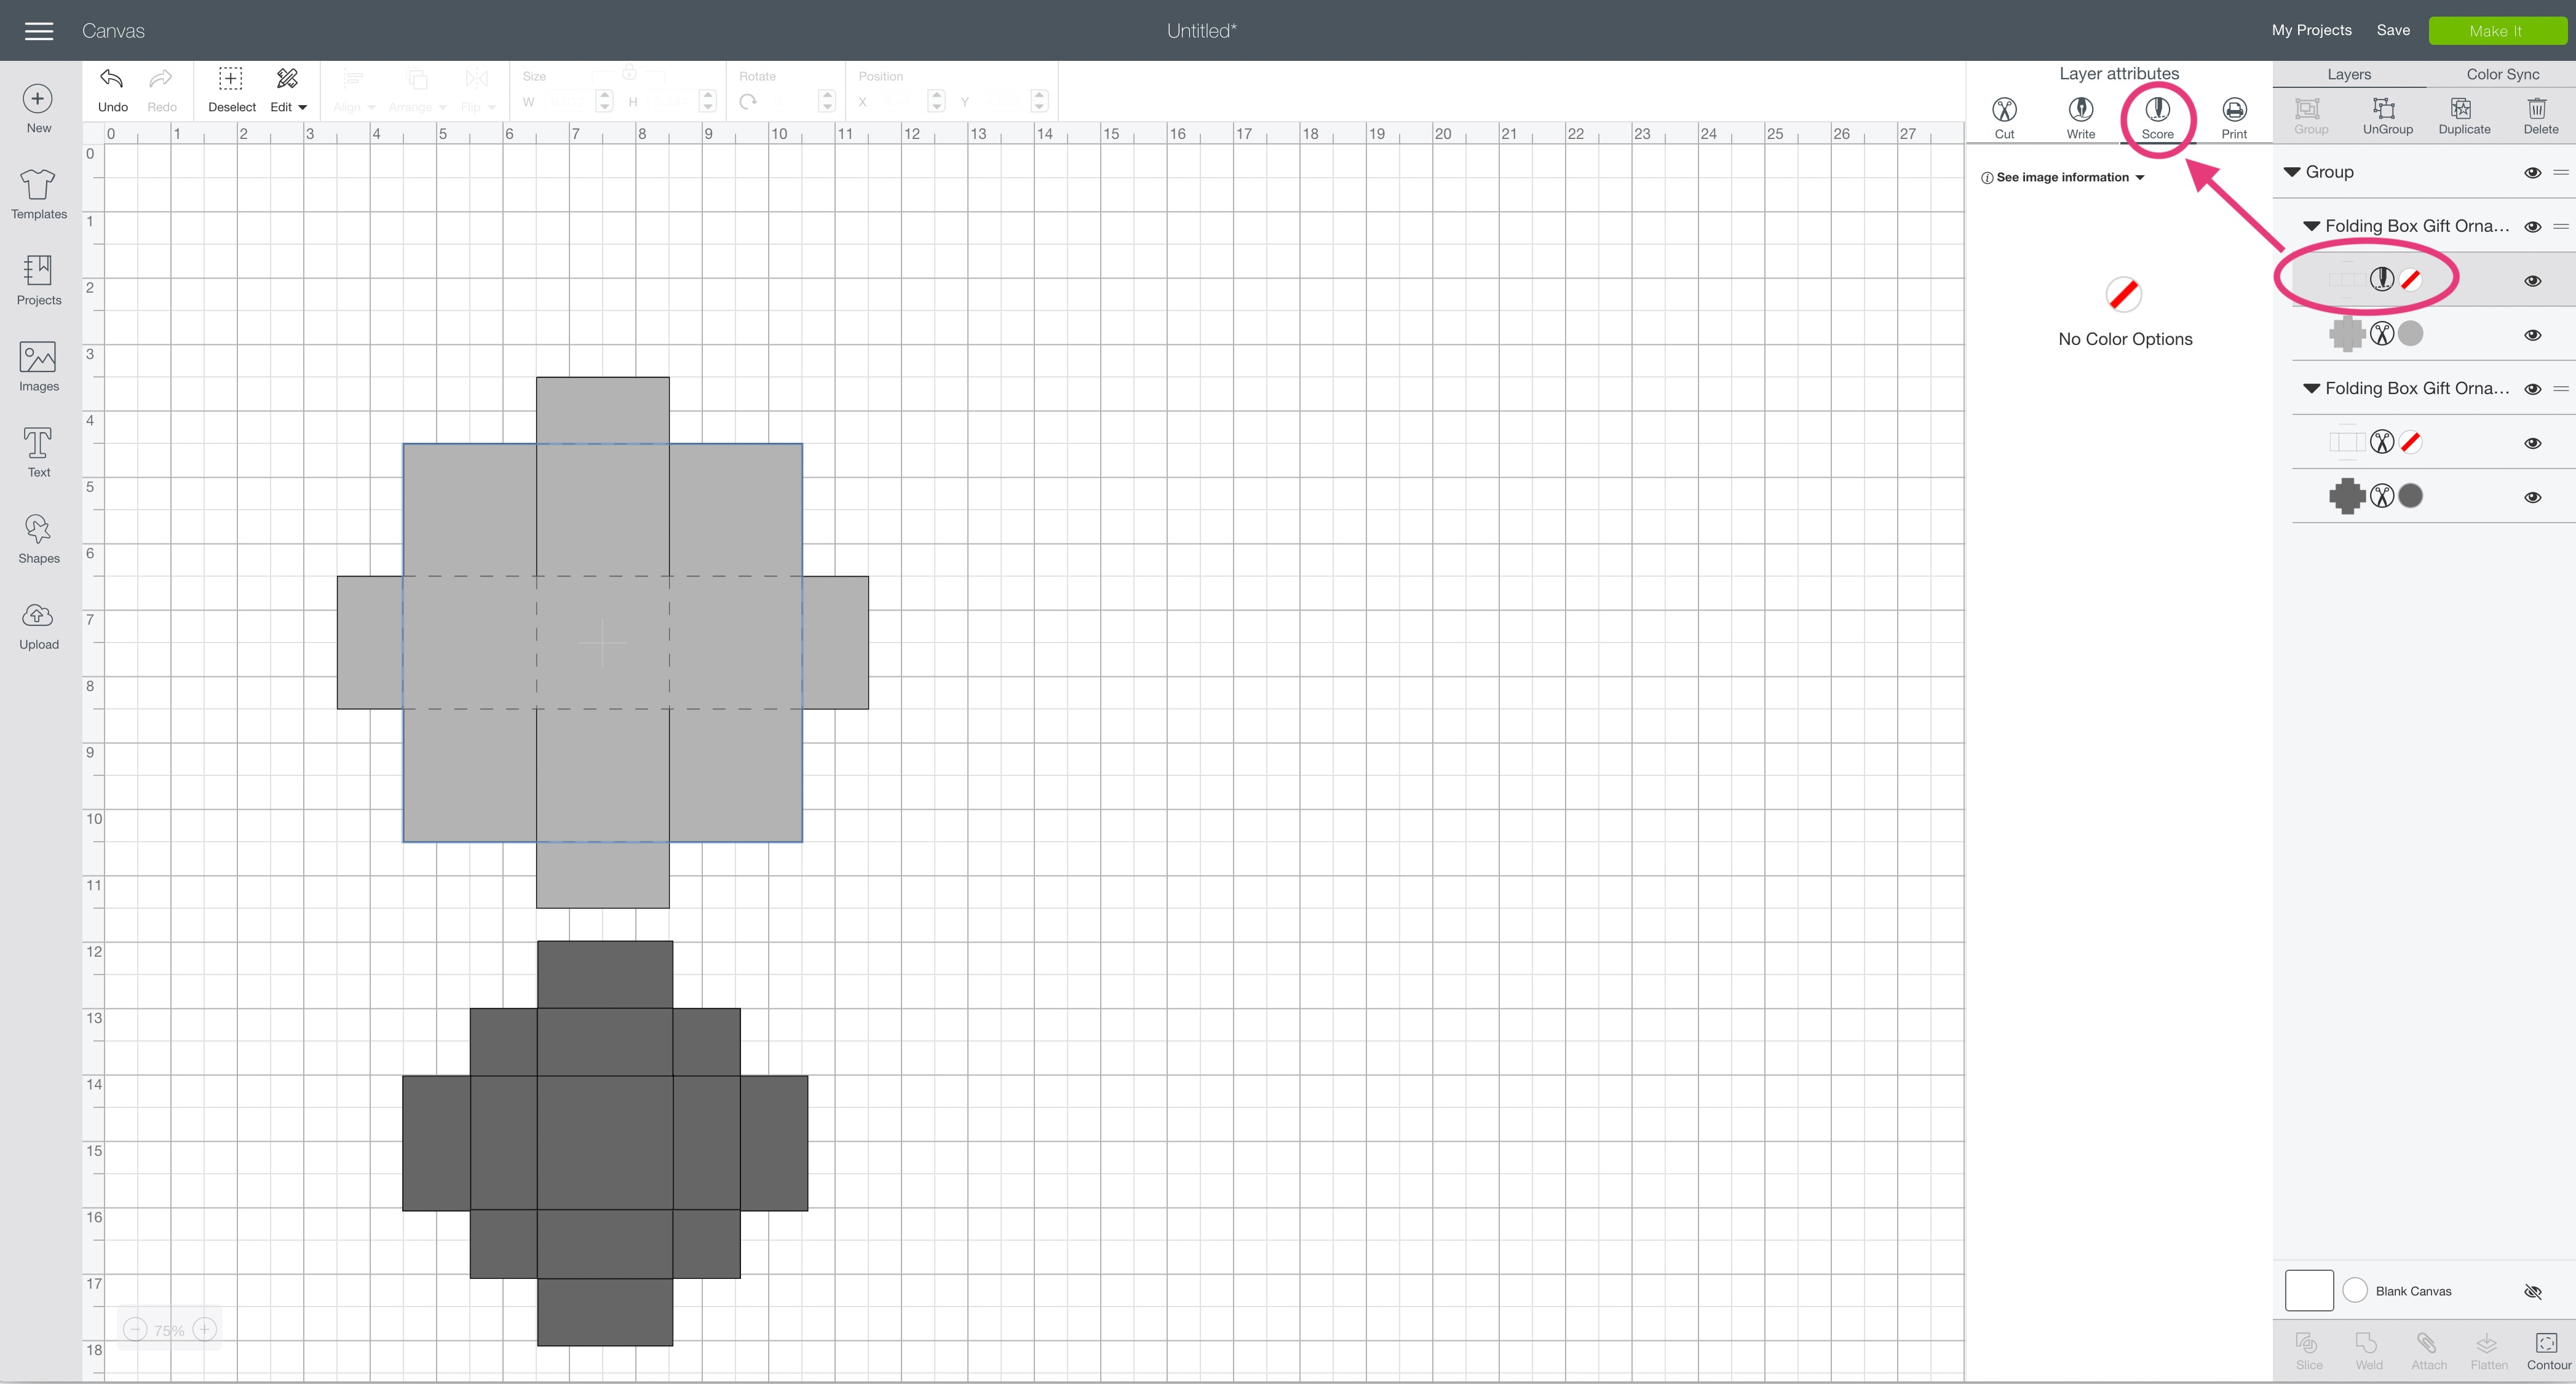
Next, change the layer with all of the score lines on the box lid from Cut to Score. To do this, select the scissors icon next to the layer that has all of the score lines. It should be the third one in the Layers Panel on the right. Then, under Layer Attributes, select the score icon to switch the layer to Score.

Now you will need to ungroup all of the layers. Select the word “Group” above all of the layers. Then, select Ungroup to ungroup everything.
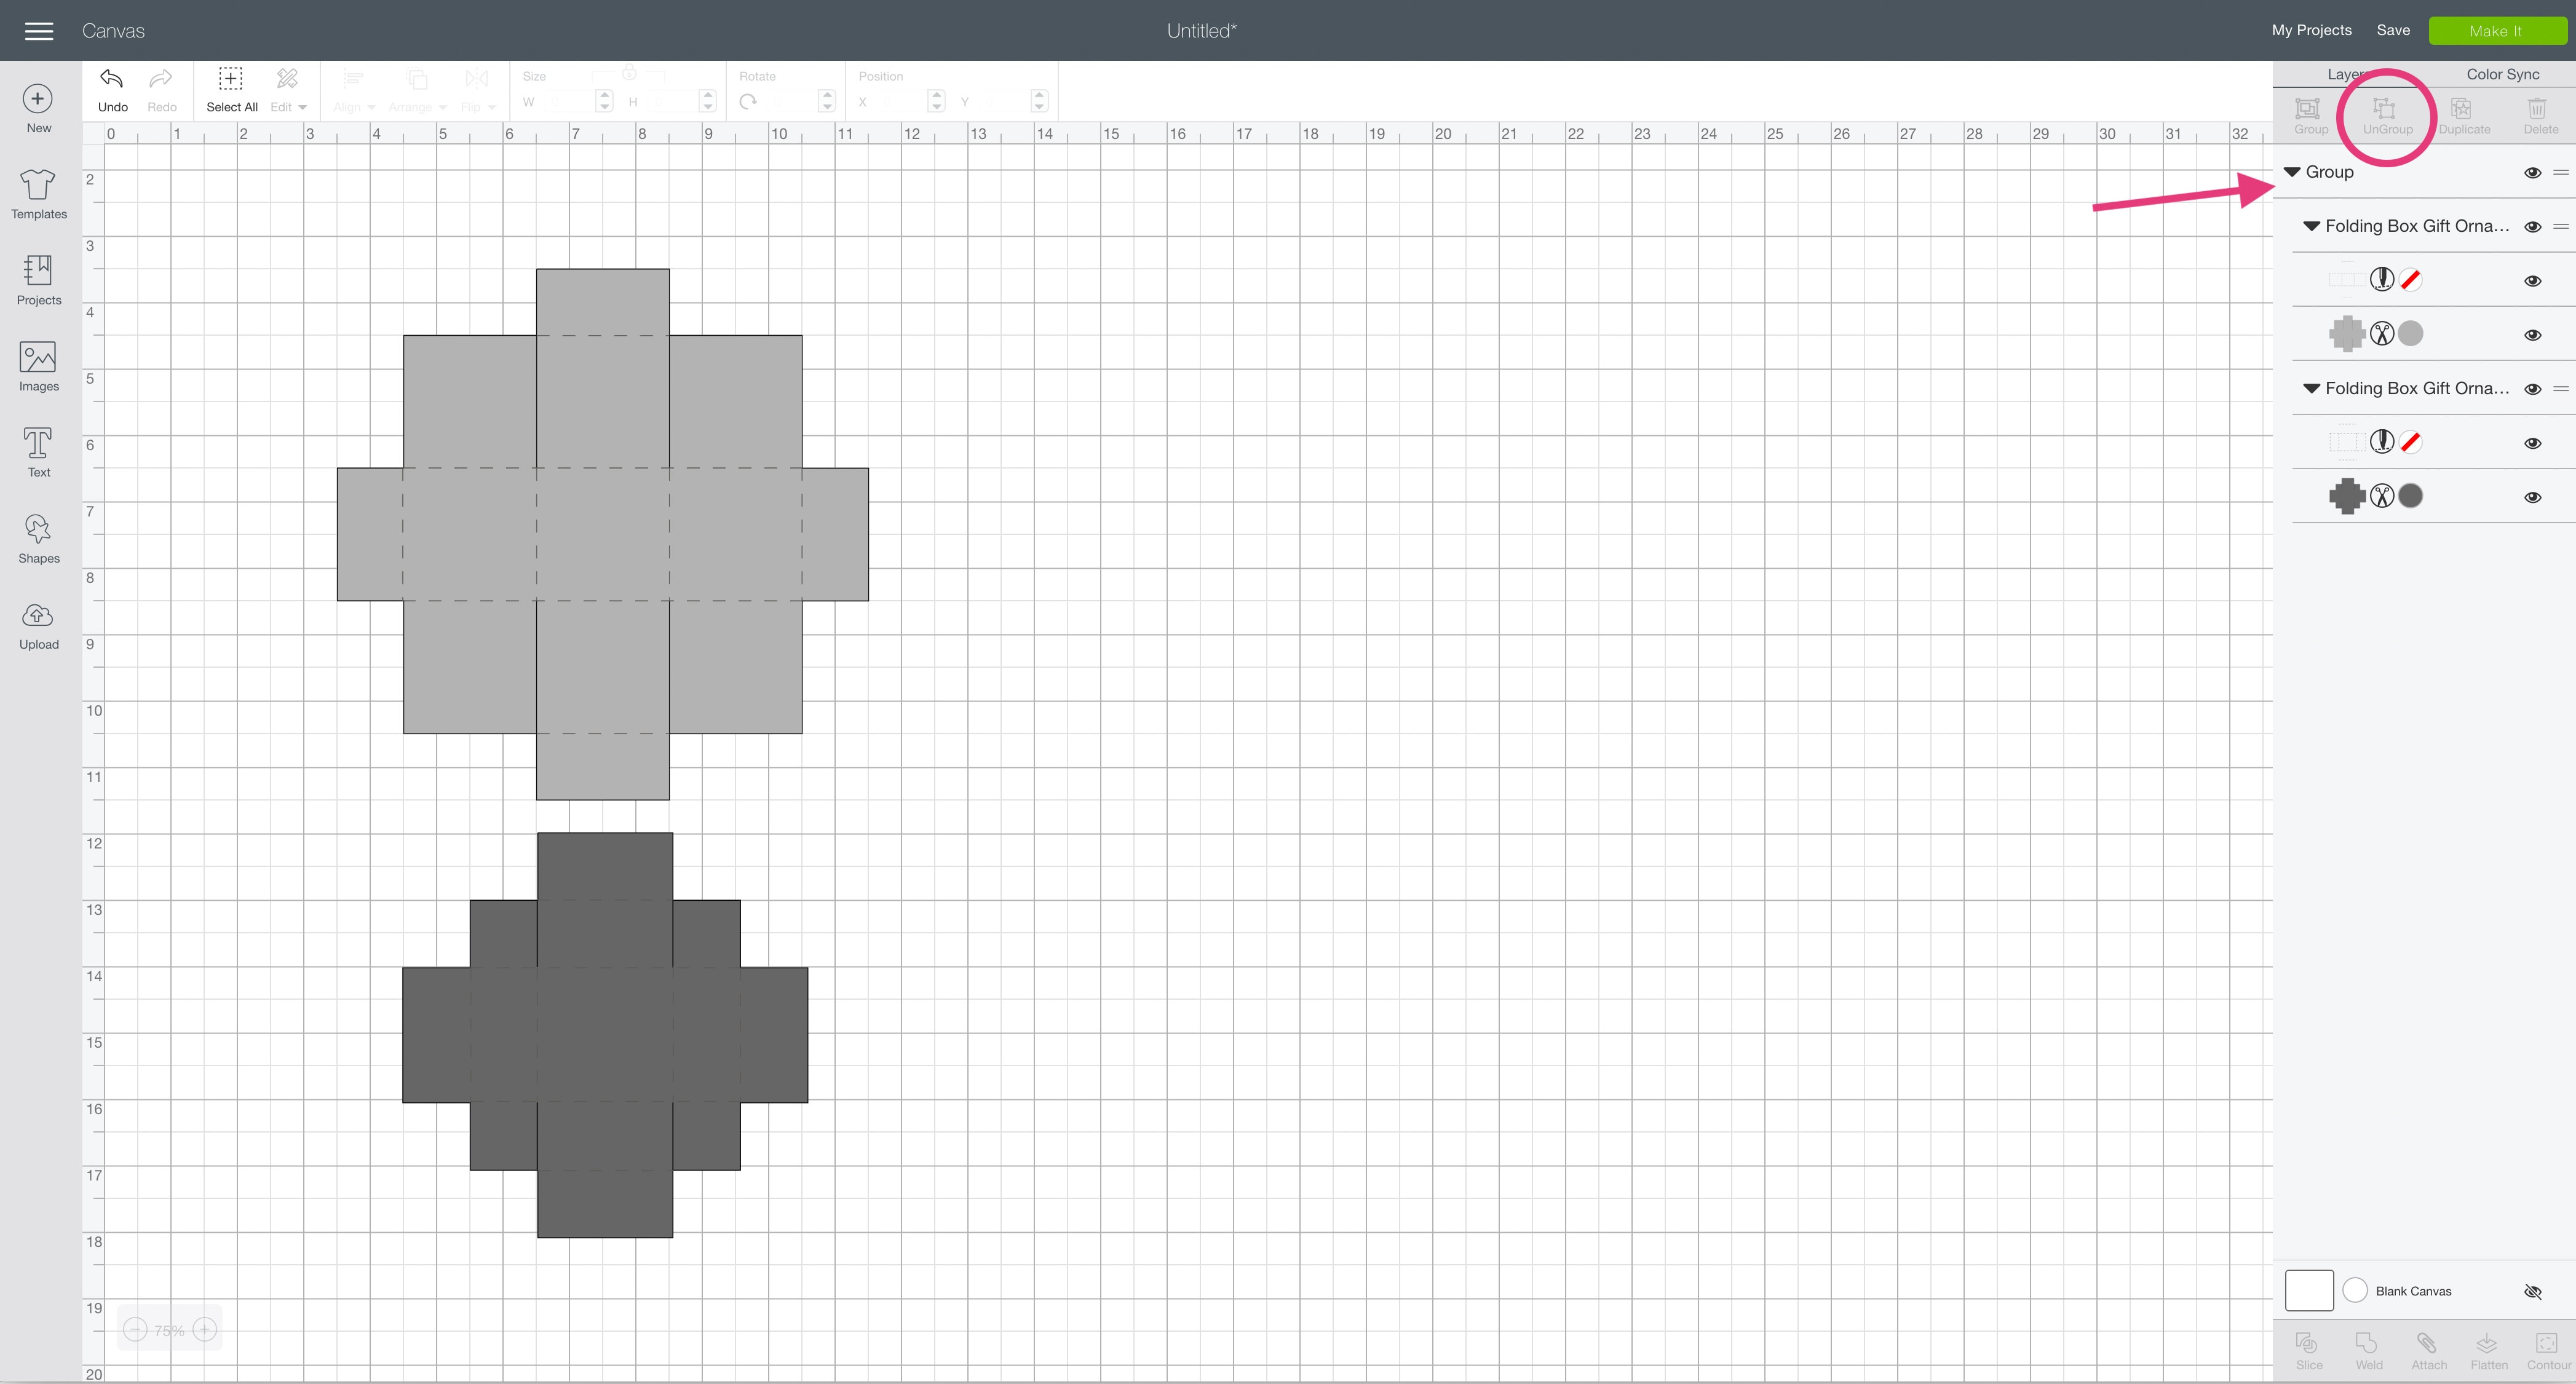
Next, you will need to select the two layers that belong to the box base layer. These layers are the light gray box base layer and the score lines layer.
To select both layers, click on one layer, then hold down the Command key (on a mac) or Control key (on a PC) and select the other layer. You will see both of the layers highlighted gray once they have been selected.
Once they are all selected, click the Attach button at the bottom of the Layers Panel.

Next, you will need to select the two layers that belong to the box lid layer. These layers are the dark gray box lid layer and the score lines layer.
To select both layers, click on one layer, then hold down the Command key (on a mac) or Control key (on a PC) and select the other layer. You will see both of the layers highlighted gray once they have been selected.
Once they are all selected, click the Attach button at the bottom of the Layers Panel.
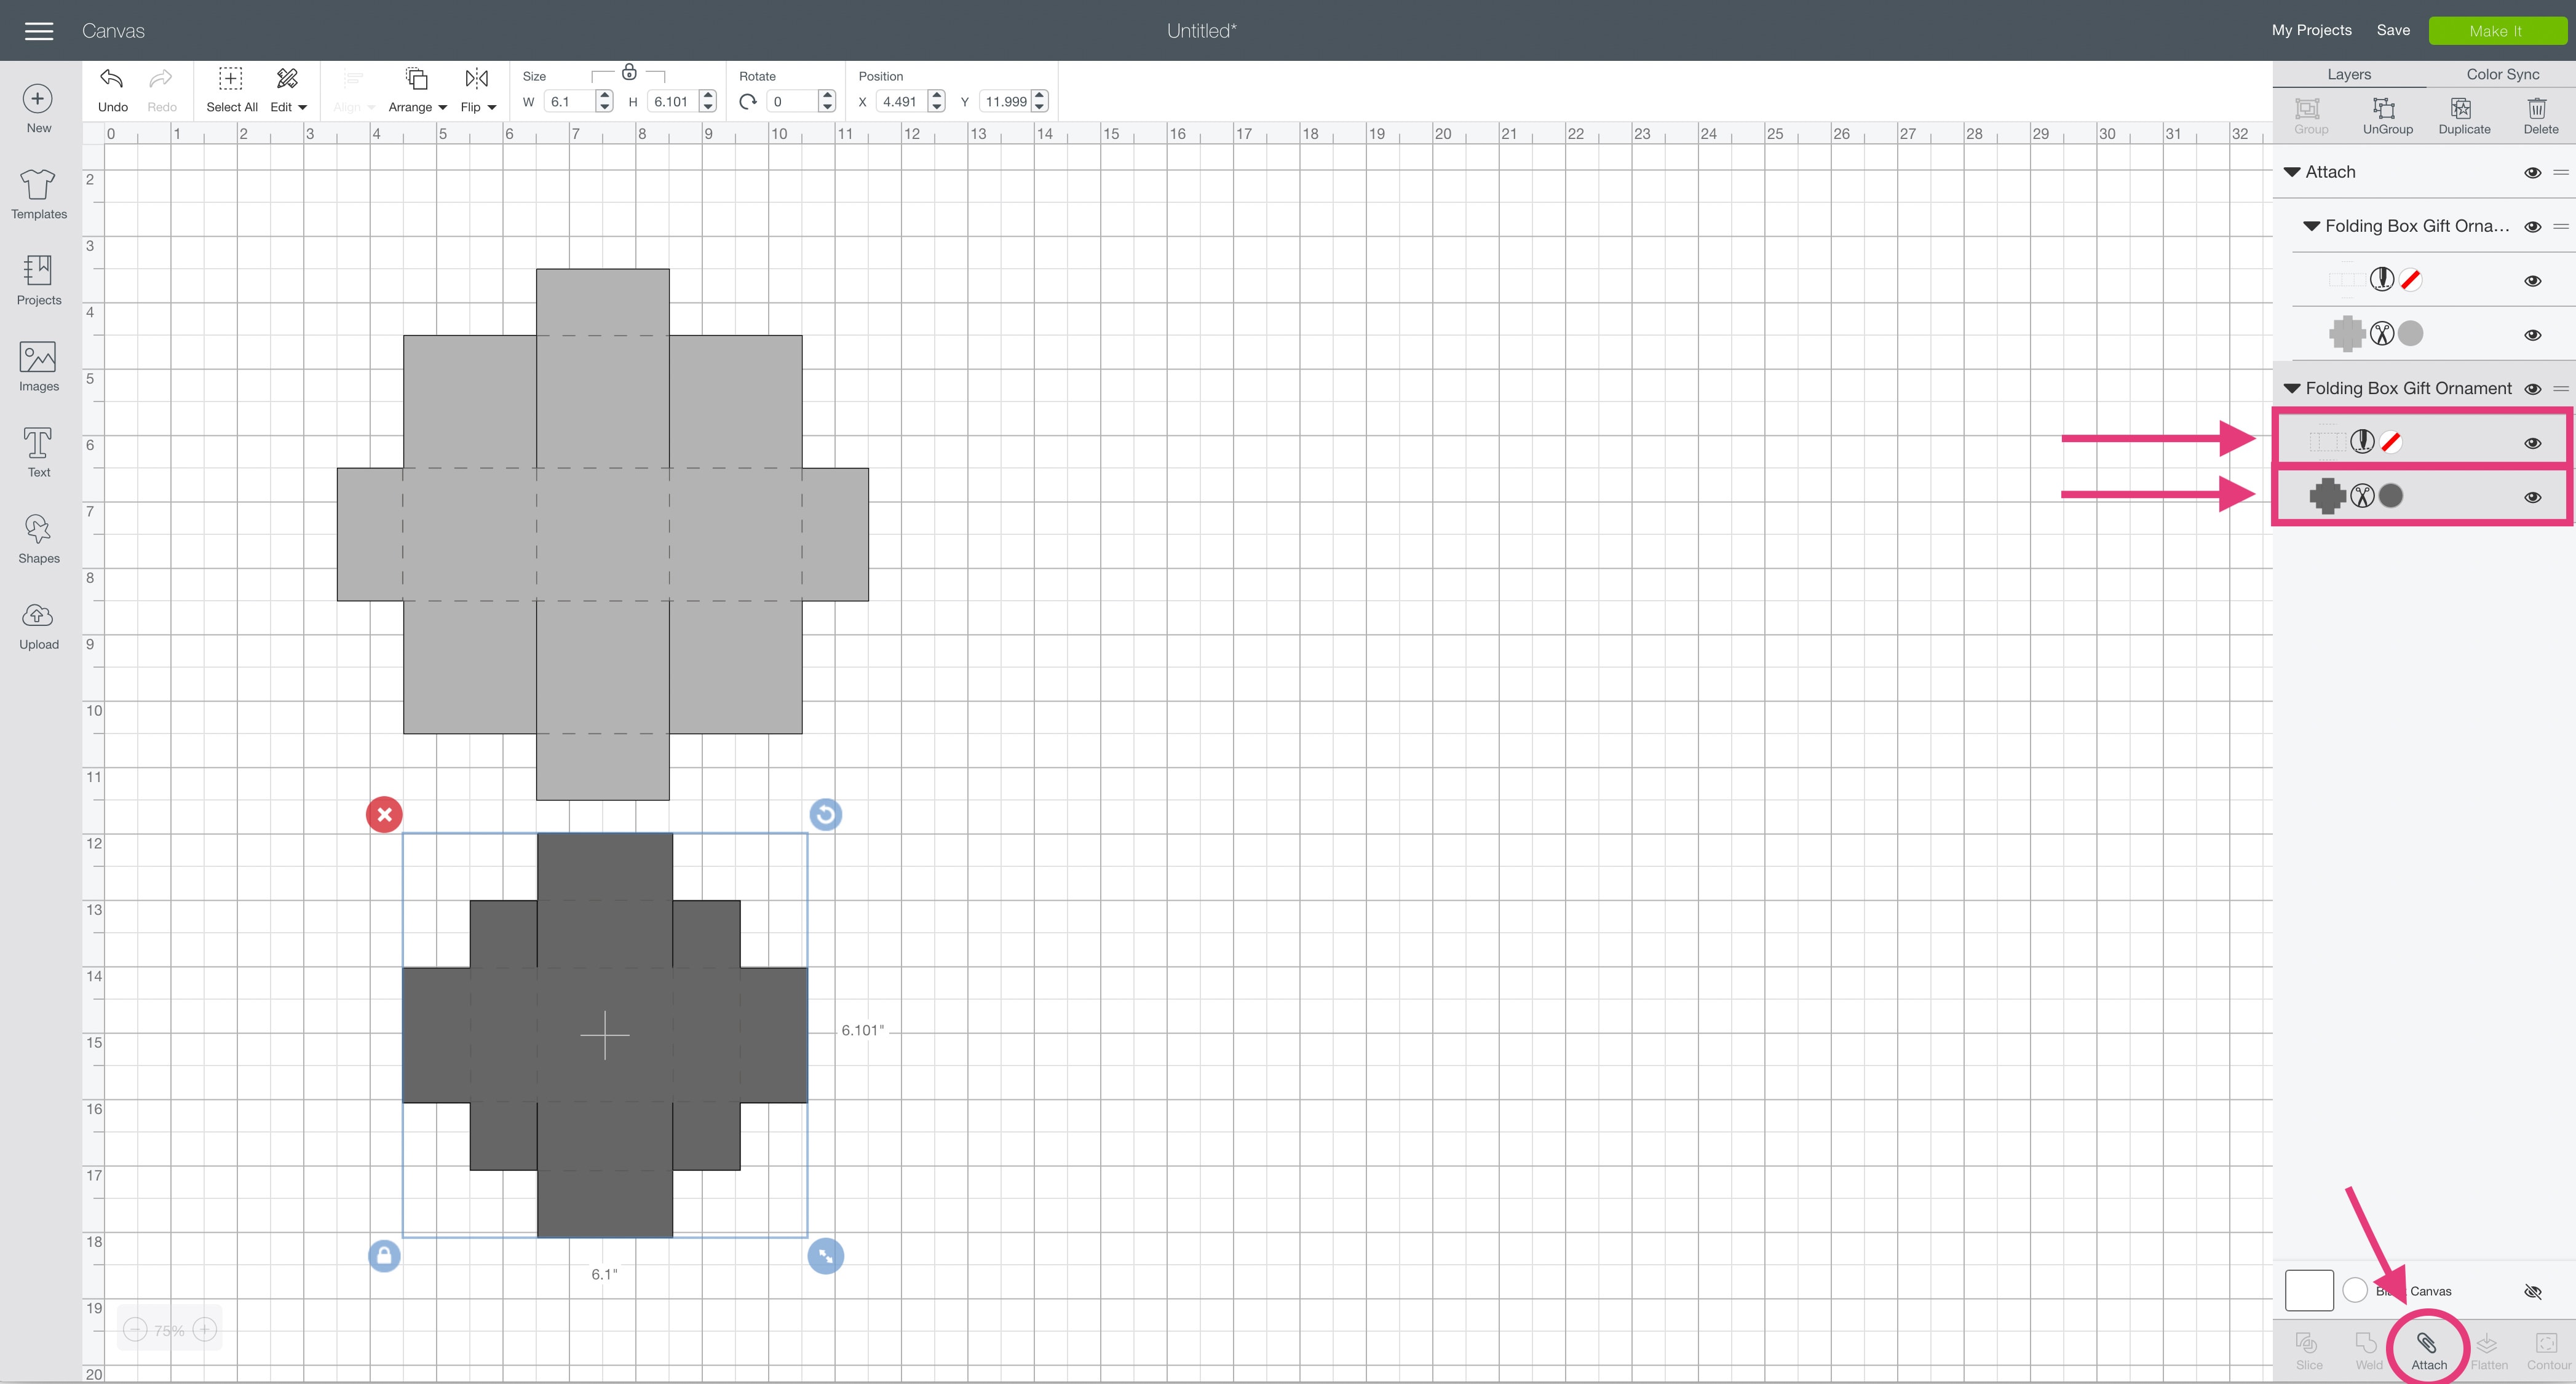
Cricut Tip: The Attach feature allows you to keep images in a specific configuration for cutting, writing, or scoring. It is like putting a pin in the image so that it is stuck in place. When you select Make It to start the cut process, attached images will not move around, but will stay in their attached location.
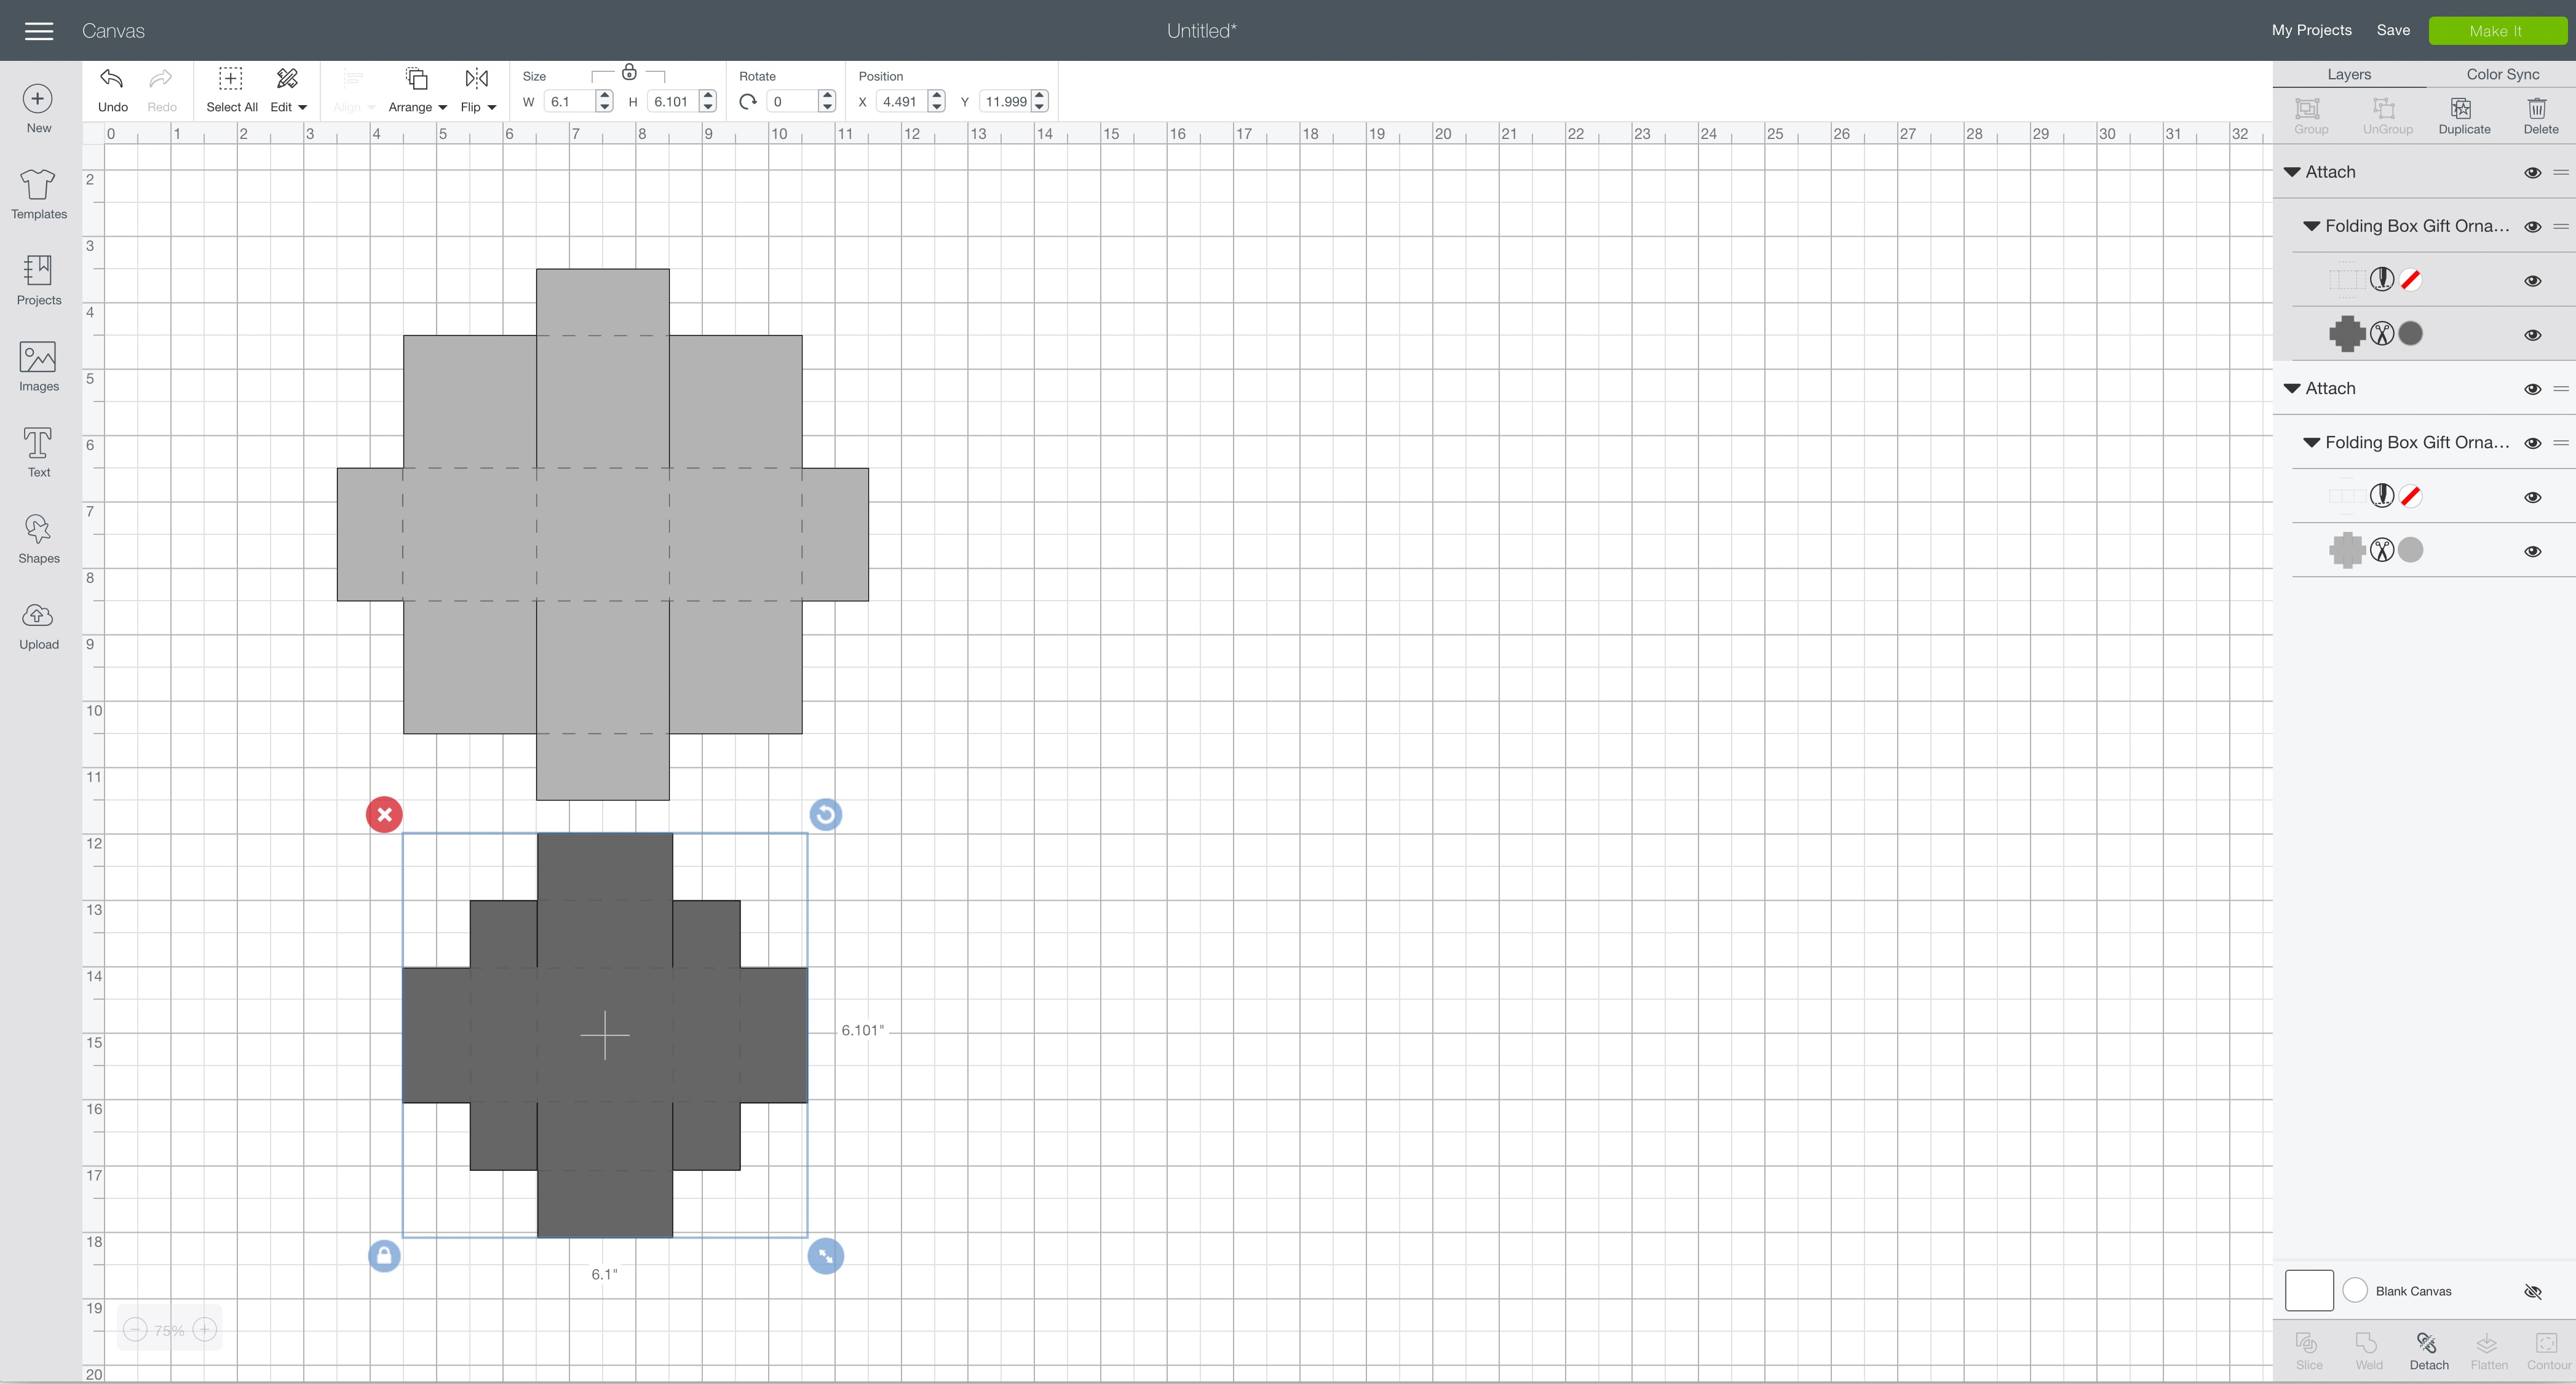
Now you should have two attached sets — one for the box base and one for the box lid. Each of these layers will be cut out of a single sheet of material.
Make It
Now it’s time to make your project!
Click on the Make It button in the upper right of the screen.
The first screen you will see is the Mat Preview Screen. This will show you all of the different mats needed for your project. Each mat represents another piece of material.

Click on the Continue button in the lower right of the screen.
Connect your Cricut machine. Then, adjust the settings as follows.
Material: Light Cardstock – 60 lb
Pressure: Default
Make sure to set your material to the specific type of paper you are using.
Tools: Fine-Point Blade, Scoring Stylus
Click on Edit Tools to adjust which tools you are using.
You could also use the scoring wheel if you prefer and have the Cricut Maker.
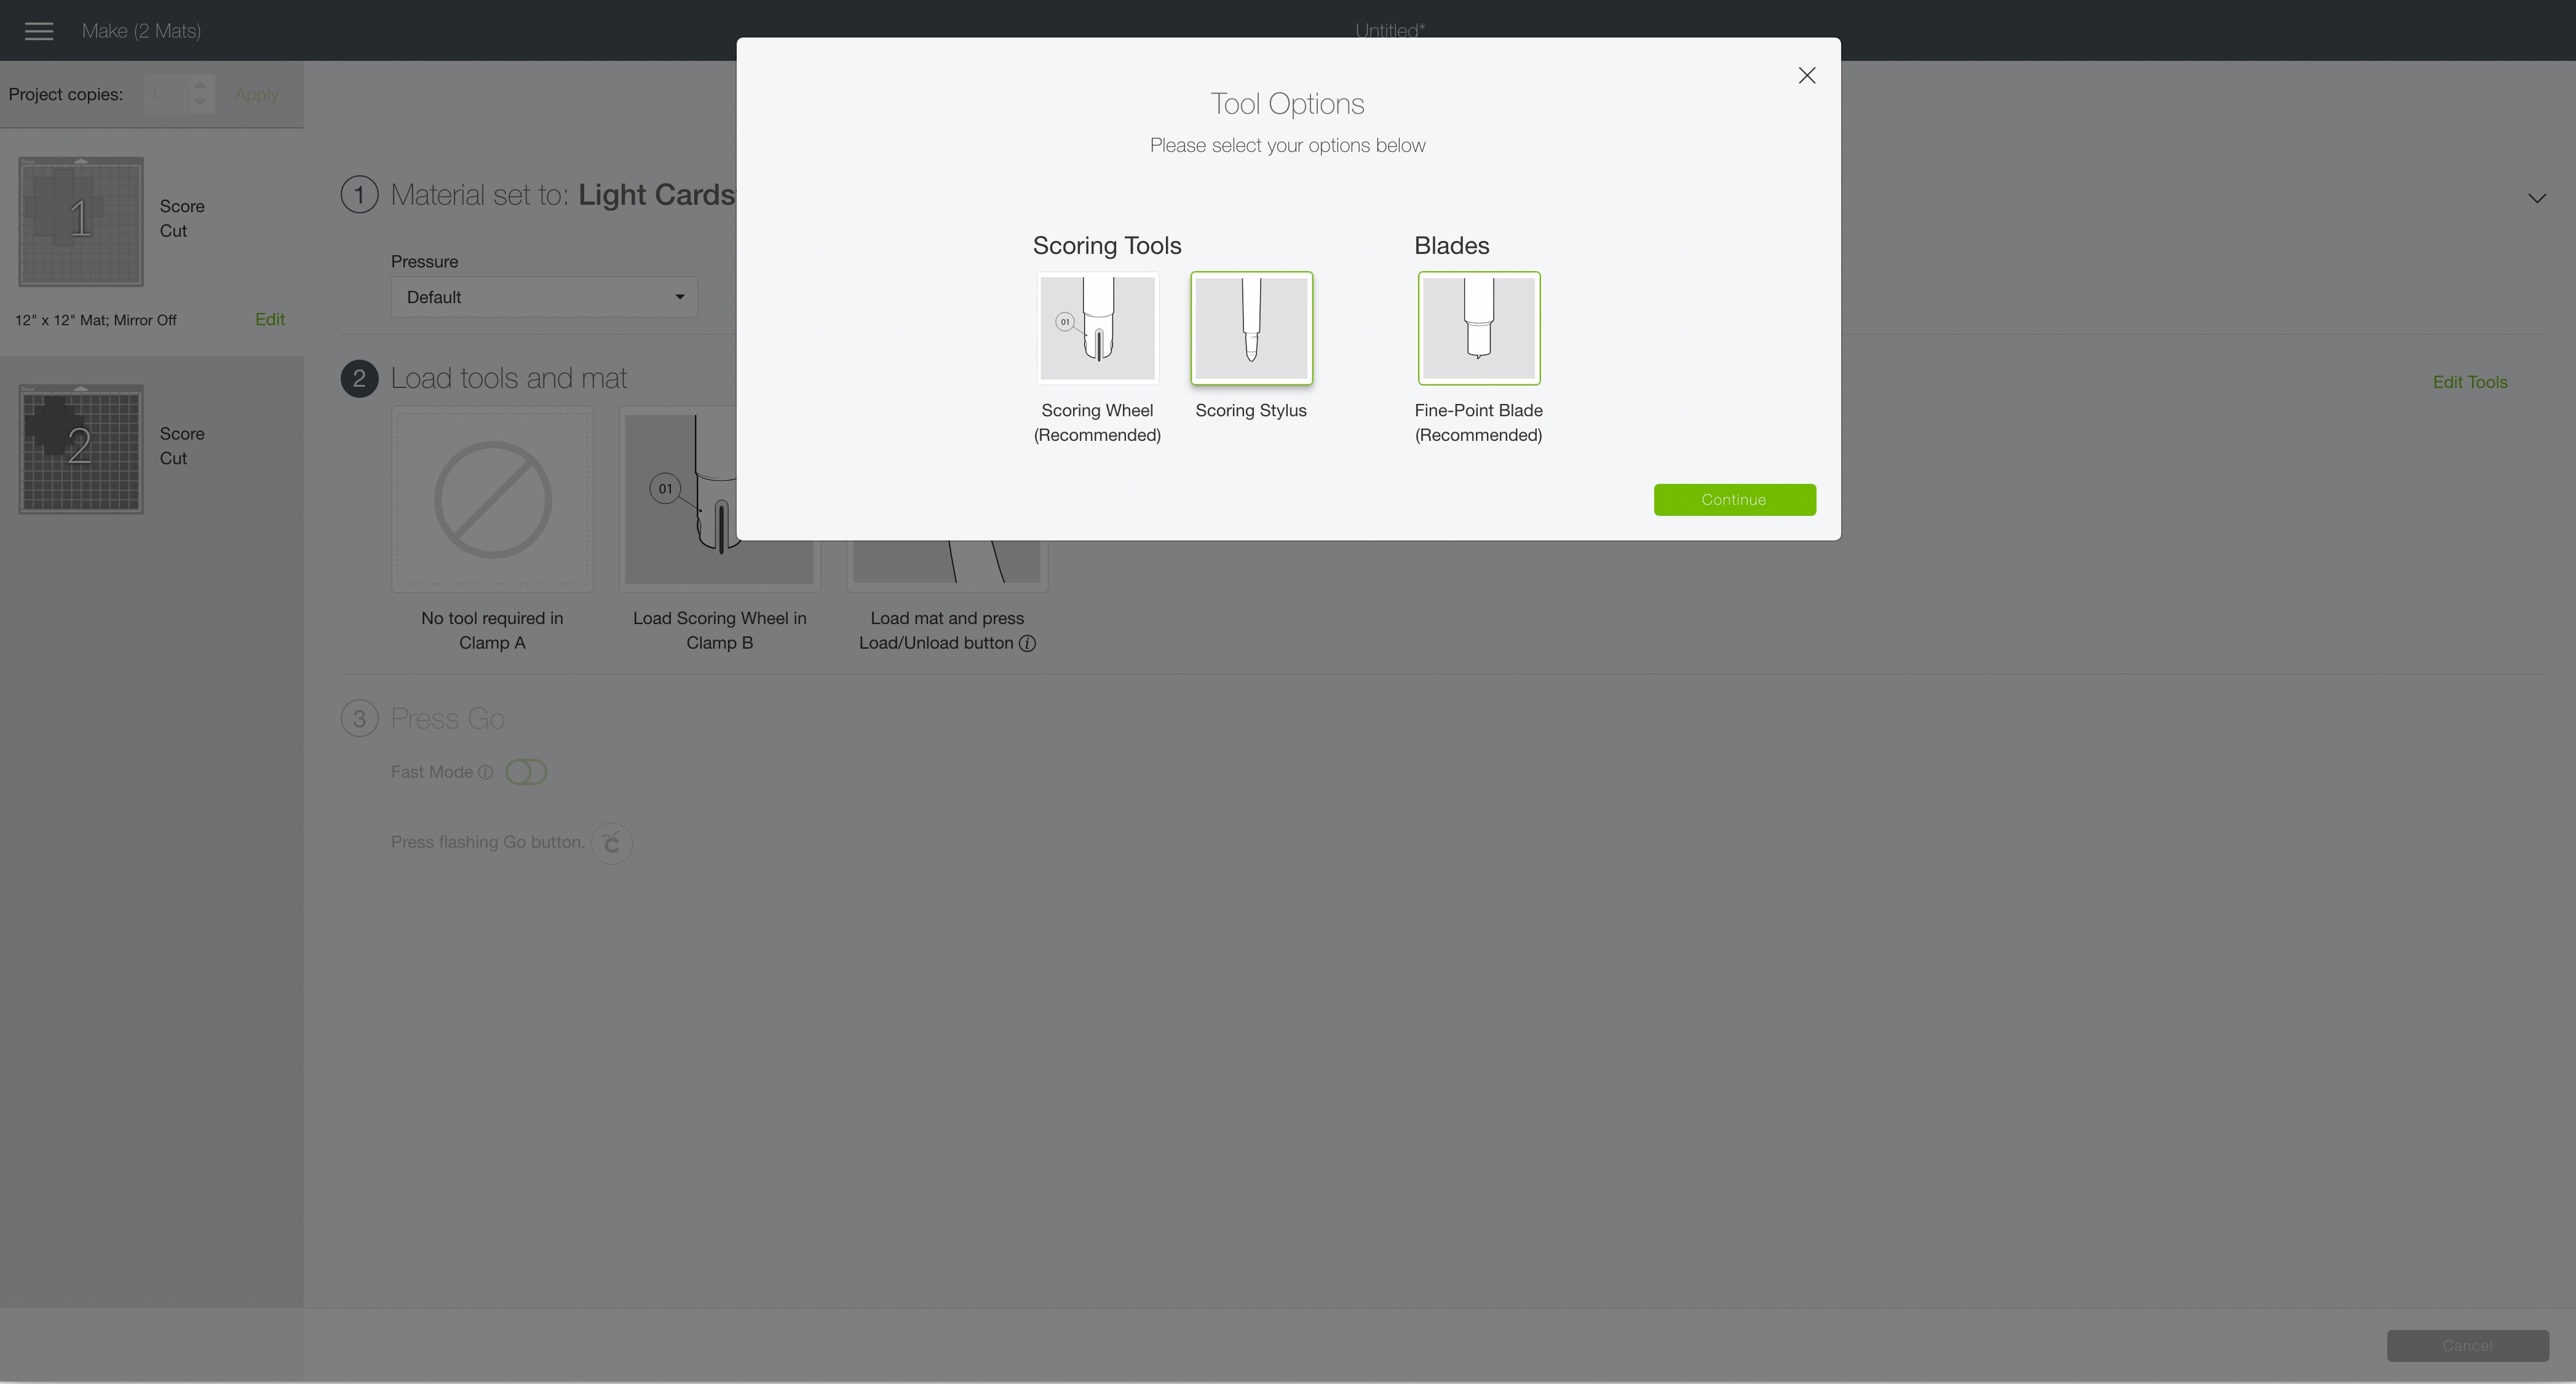
Load the light grip cutting mat with your first material into the machine. Then, press the flashing Go button to begin the cutting process.
Load each new material in order as shown by the mats on the left side of the screen until all of your pieces are cut out.
How to Assemble The Project
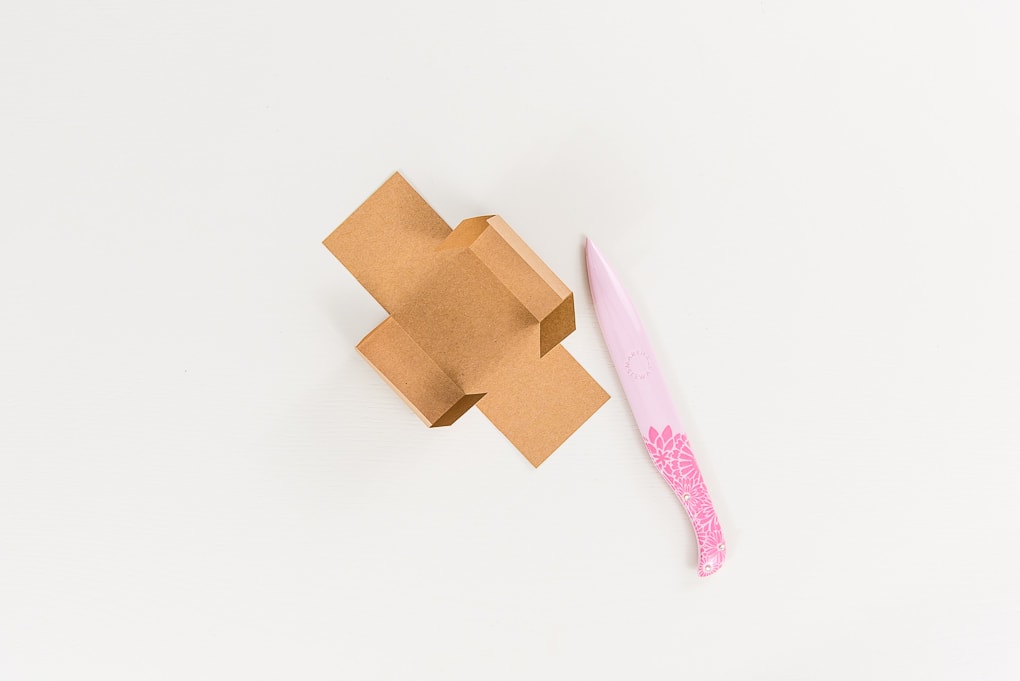
Once all of your pieces are cut out, it’s time to assemble the project.

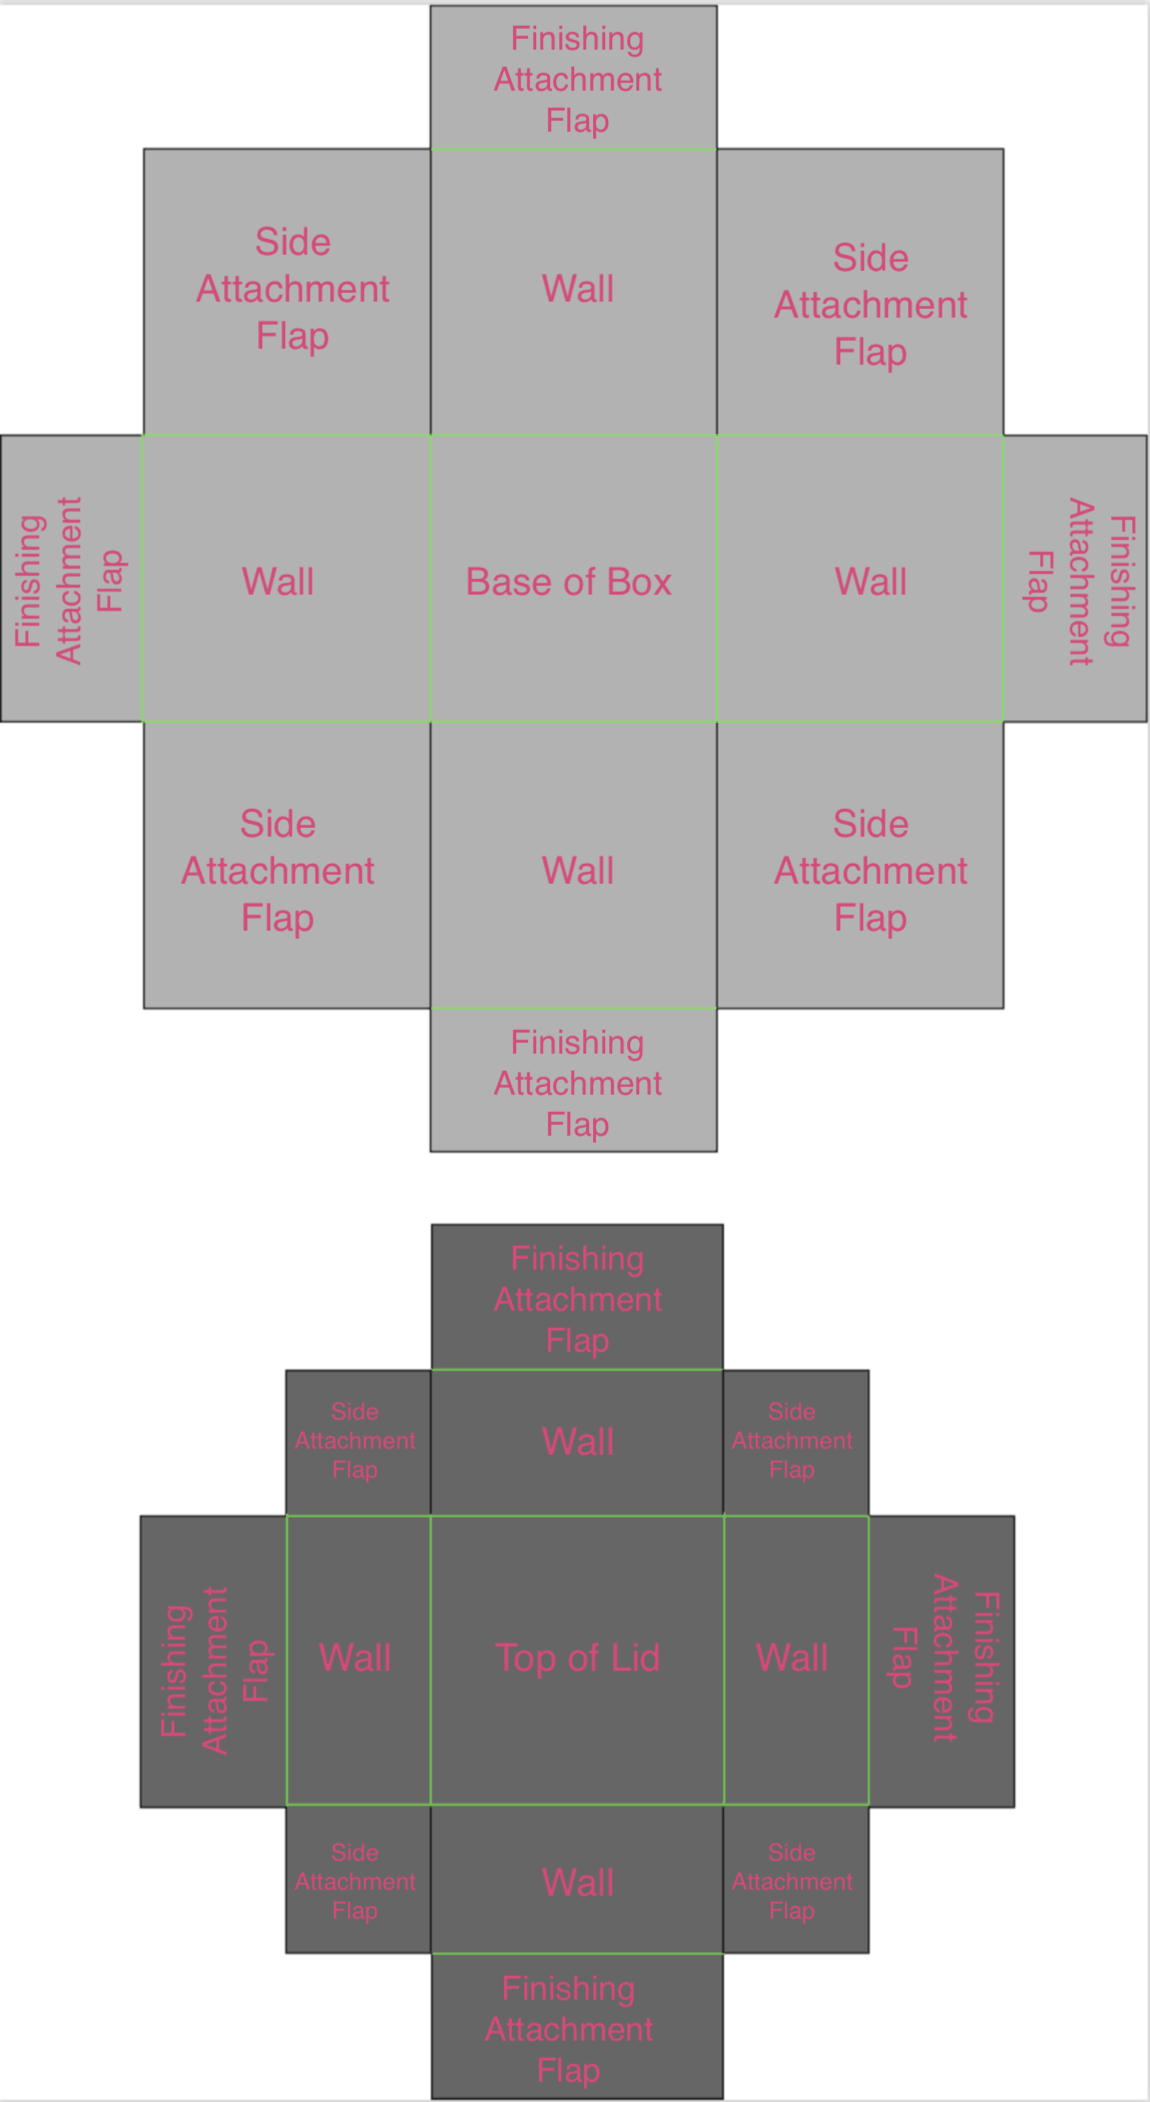
It’s kind of hard to explain how these boxes are folded. So, here’s a diagram showing what each piece is that I’ll be talking about during the assembly of the box and lid.
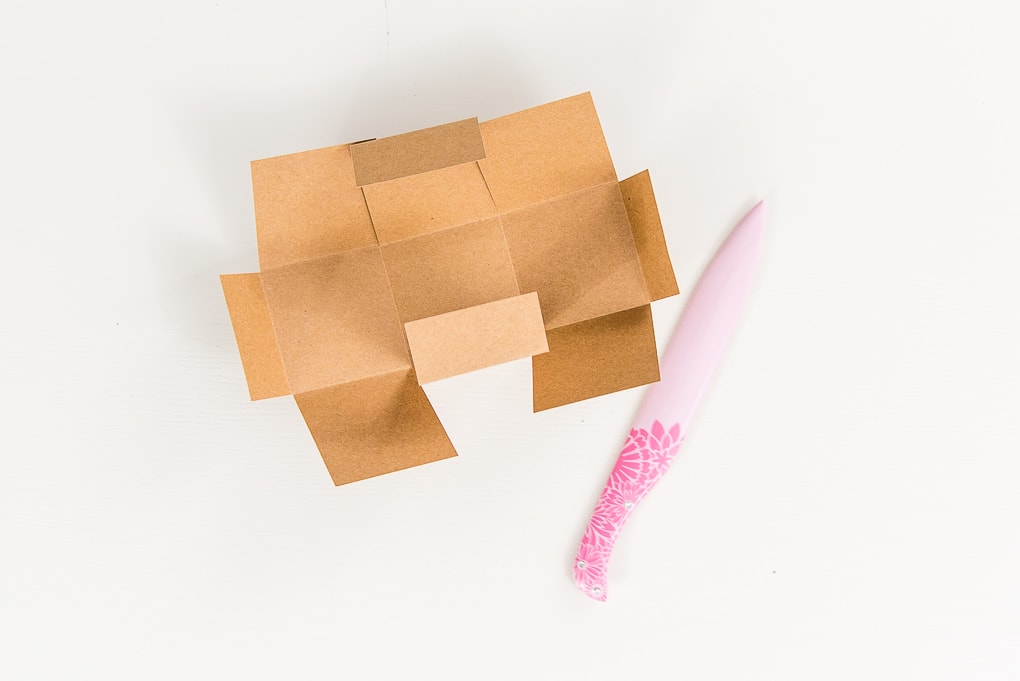
Since the Cricut has already done all of the scoring work for you, it’s time to fold along the score lines.
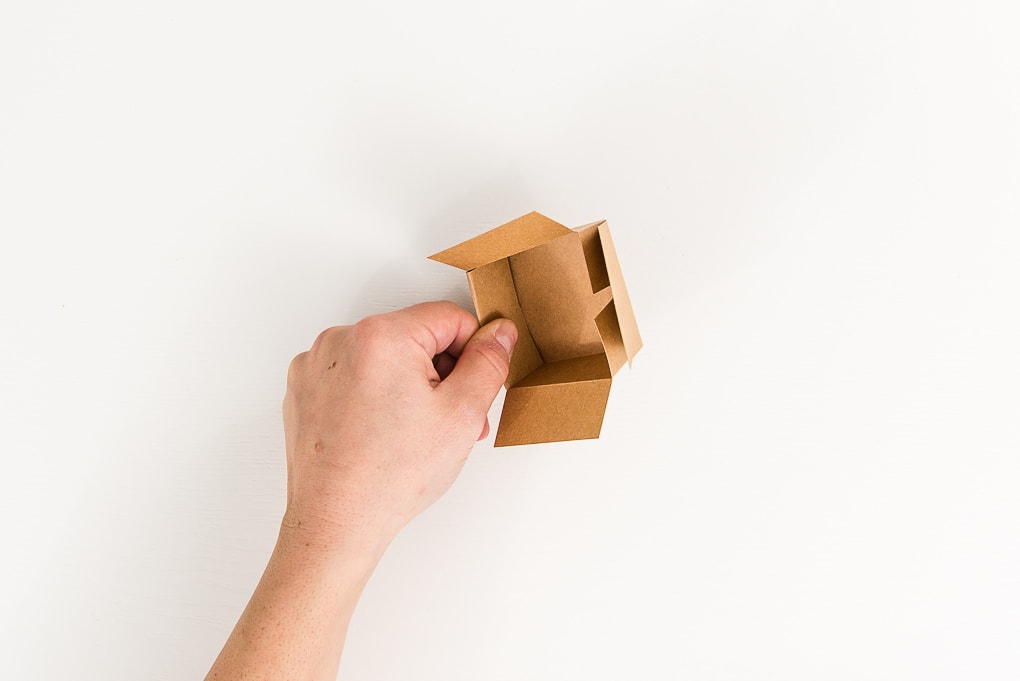
Start with the lid cutout, which is the smaller one.
Using a bone folder, fold along the score lines and crease as you go.


To assemble the lid, fold the side attachment flaps in towards the wall.
Then, fold the finishing attachment flap over to cover the side attachment flap pieces and the wall pieces.
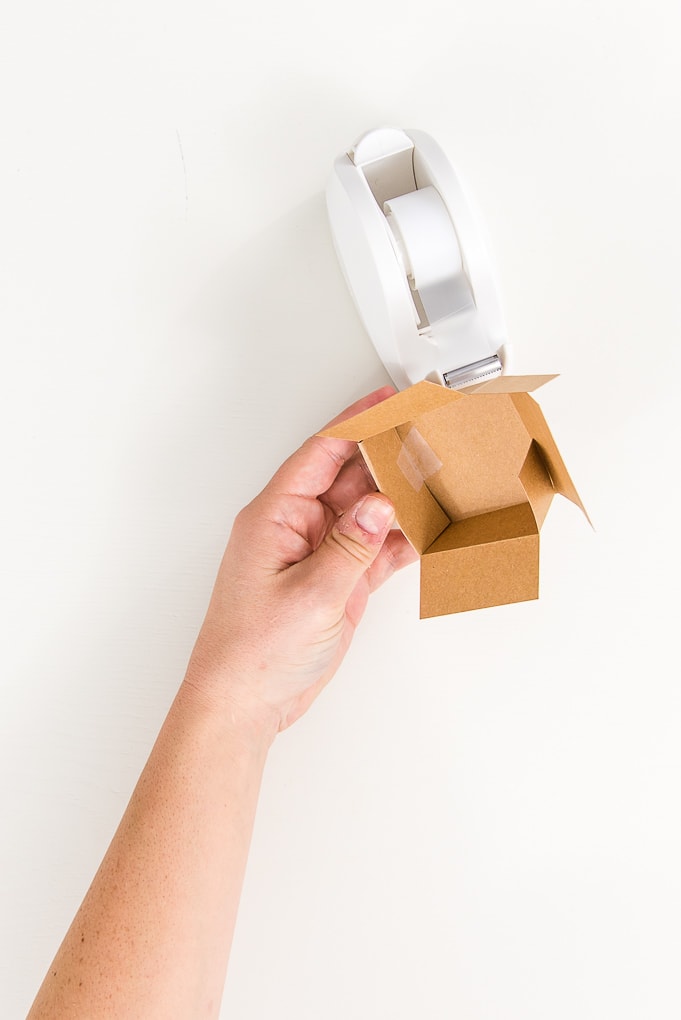
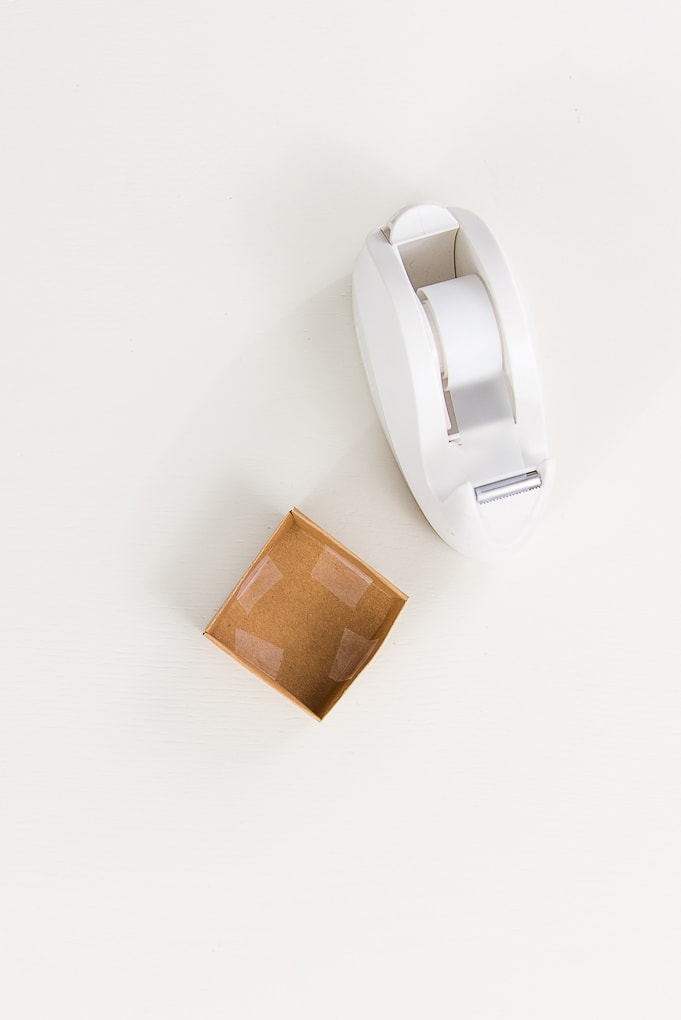
Place a piece of clear tape to hold these pieces in place.
Repeat on the opposite side of the lid.

Finally, fold the finishing attachment flaps above the other two walls down and place a piece of clear tape to hold the piece in place. This will finish the lid assembly.
Next, continue with the box cutout, which is the larger one.
Using a bone folder, fold along the score lines and crease as you go.

To assemble the box, fold the side attachment flaps in towards the wall.
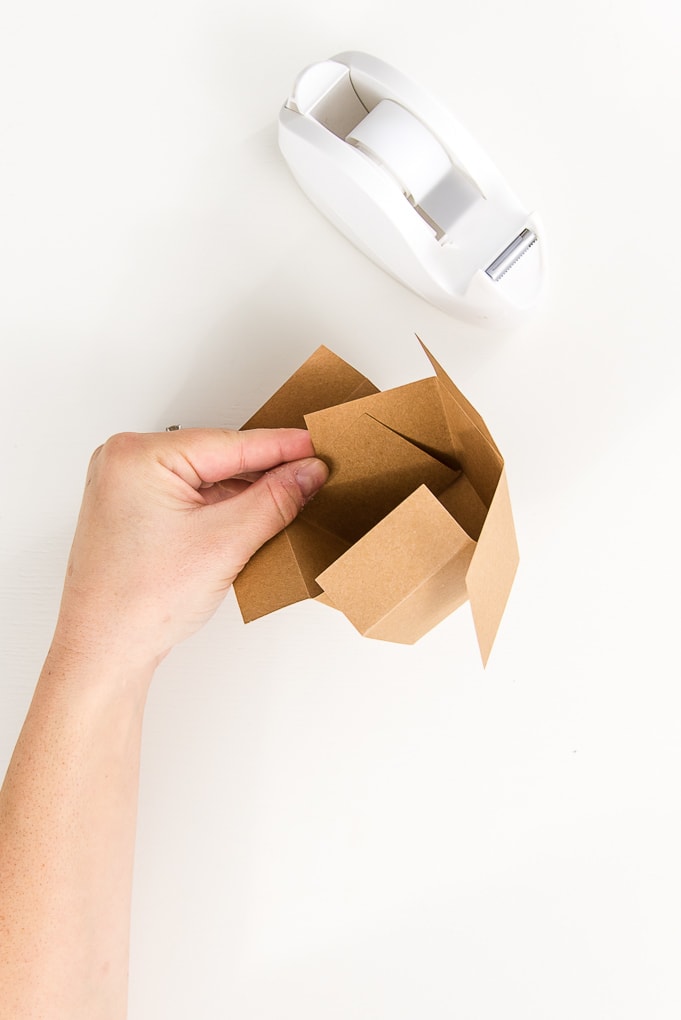
Then, fold the finishing attachment flap over to cover the side attachment flap pieces and the wall pieces.

Place a piece of clear tape to hold these pieces in place.

Repeat on the opposite side of the box.

Finally, fold the finishing attachment flaps above the other two walls down and place a piece of clear tape to hold the piece in place. This will finish the box assembly.

The lid and the box pieces will be almost the exact same size. So, they will fit together very snug. That’s what you want because when the ornament is hanging on your tree, you don’t want the box to fall off from the lid.
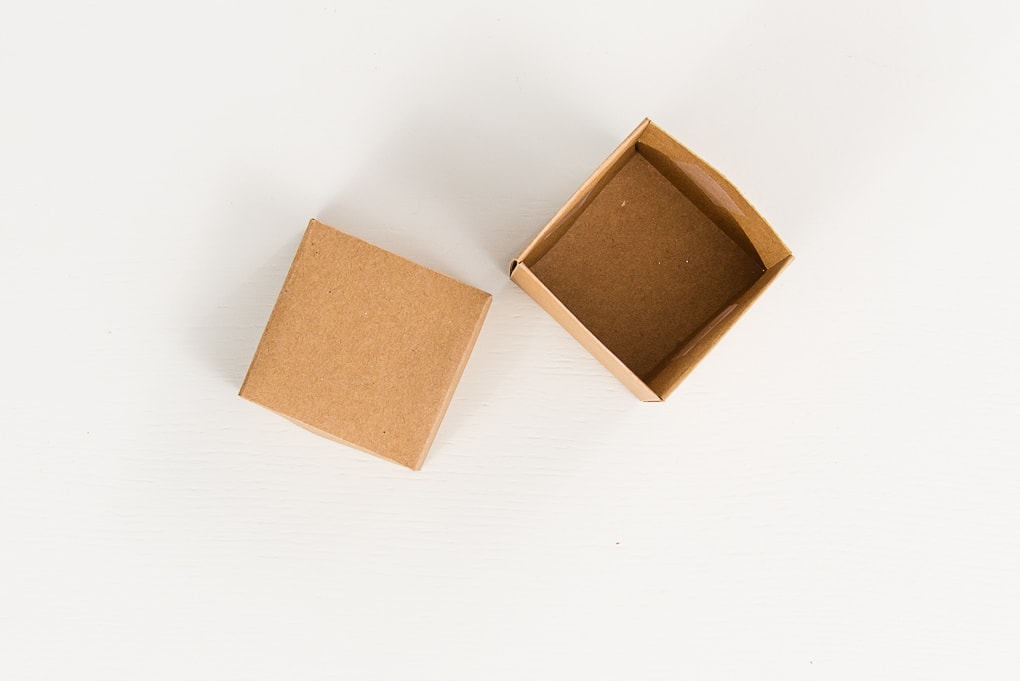
If you have trouble getting the lids onto the boxes, squeeze the box slightly to compress the box and make it smaller and to get the lid on top.

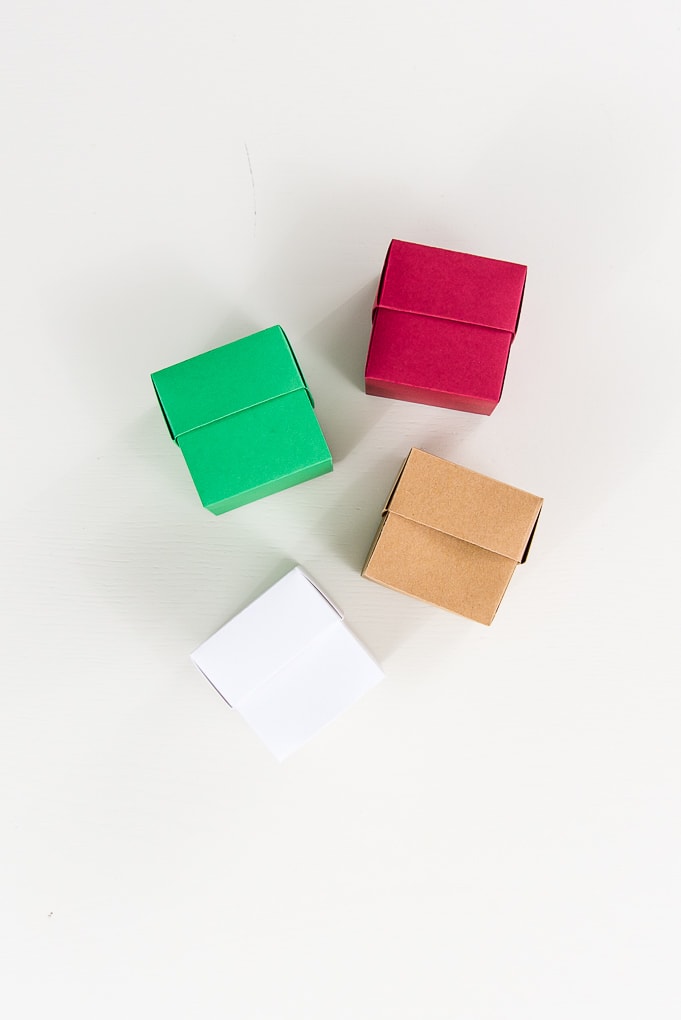
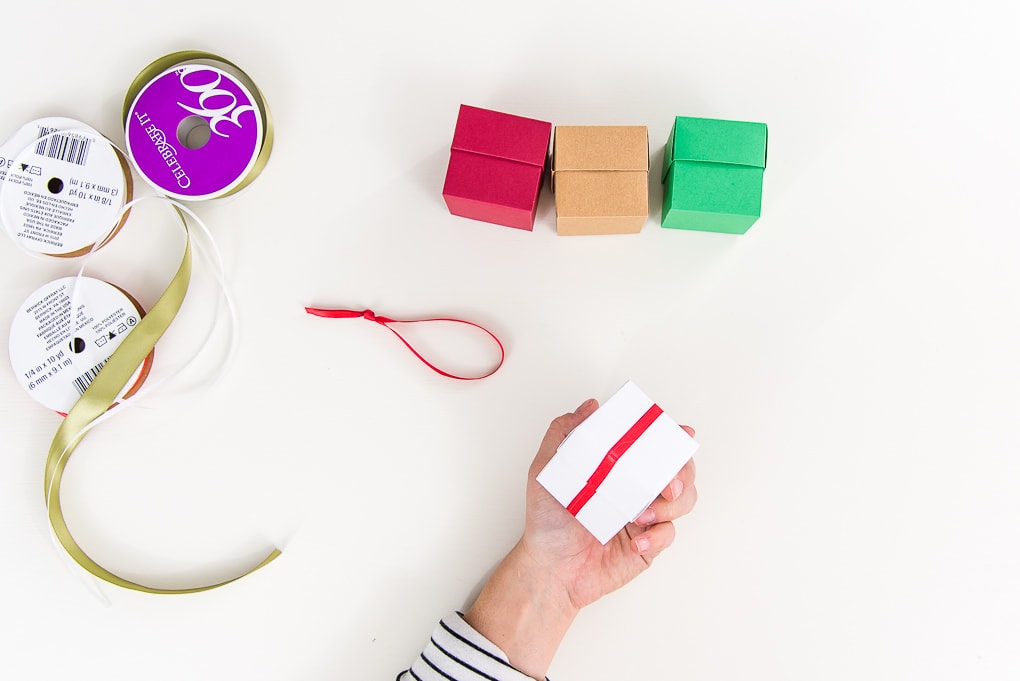
To finish the boxes, you can add some ribbon to make the boxes look like Christmas presents.
Cut a piece of ribbon and center it on one side of the box base.

Use a hot glue gun and hot glue to attach the ends of the ribbon to the inside of the box. Repeat this process for the lid.


Make sure the ribbons are centered so the lid ribbon lines up with the box ribbon.
Finally, cut a small piece of ribbon, create a loop, and tie the ribbon at the top.
Place a small bit of hot glue on the ribbon on the lid and attach the bottom of the looped ribbon to the lid. This will be the ornament hanger.

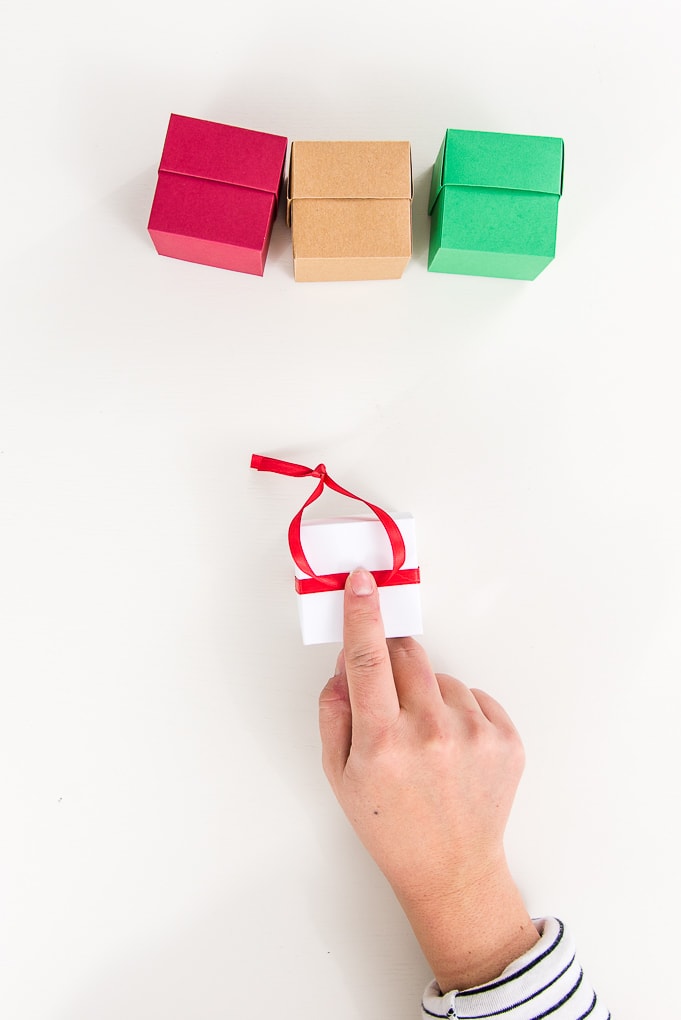

You can also add some hot glue between the ribbon and the lid to keep everything in place.

Repeat this for all of your folding box ornaments.
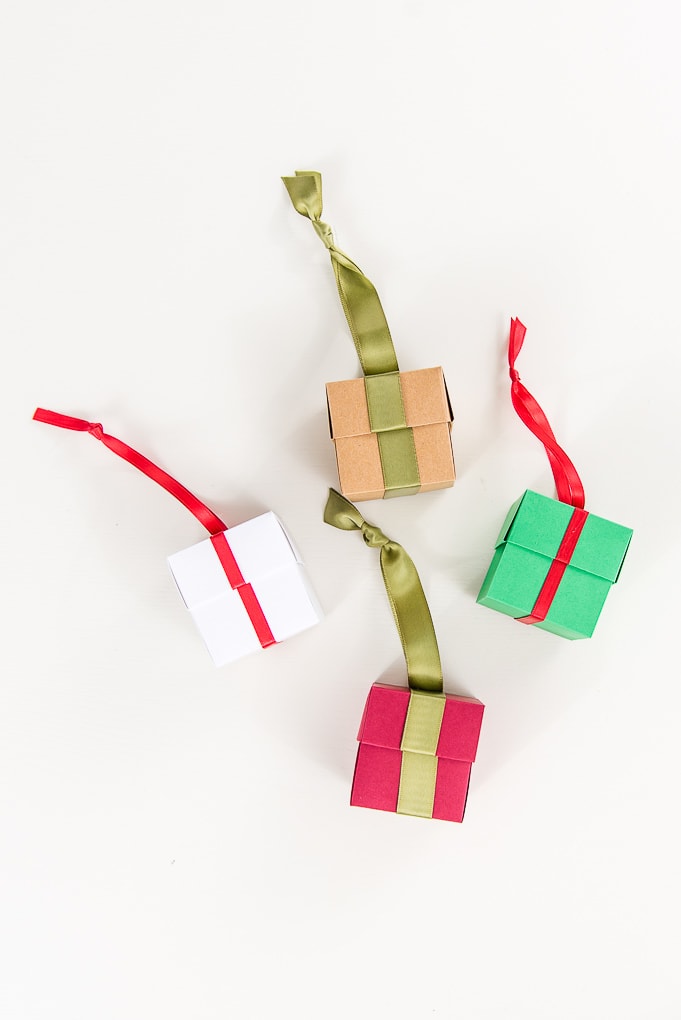
Now your Folding Box Gift Ornament is ready!

These ornaments look so beautiful on a Christmas tree. And the best part is, they can be used to hide little gifts inside for Christmas morning.

To customize the gift boxes, you can even write each person’s name on the side or bottom. Then, on Christmas morning they can search for their ornament gift box.

I hope you love this Folding Box Gift Ornament.
If you decide to make this project, I would love to see!
Tag me on Instagram. Use the hashtag #25daysofcricut so that we can all see each other’s projects too!
To see more projects from Have Yourself A Very Cricut Christmas: 25 Days of Homemade Holiday Crafts!, click here!
If you want to follow along and see all of the projects for Have Yourself A Very Cricut Christmas: 25 Days of Homemade Holiday Crafts!, you can bookmark this blog post and visit it each day to see the newest project.


One Comment