Learn how to make a beautiful felt Christmas greenery wreath using the Cricut Maker. This is a festive and easy project for the holiday season!
Welcome to Have Yourself A Very Cricut Christmas: 25 Days of Homemade Holiday Crafts!
Each day in December, I’ll be sharing a new Christmas project that you can make using your Cricut. It’s going to be a blog version of an advent calendar! Come back every day to get a new “gift.”
Today’s gift is a Christmas Greenery Wreath.


It’s no secret that I love greenery! I decorate with it all over my house. During the Christmas season, I love the look of mixed greenery. Both faux and fresh can be used to create a cozy vibe in your home.
I’ve seen so many gorgeous felt wreaths and I just love how they look. So, I decided to design my own version for Christmas!
I used a muted olive green felt to give the wreath the cozy Christmas feeling. I think it’s perfect for just about any style of home decor.

You’re going to love this Christmas Greenery Wreath. Here’s how to make it!
How to Make a Christmas Greenery Wreath Using The Cricut
This post contains affiliate links for your convenience. For more information, see my disclosures here.
Materials:
- Christmas Greenery Wreath SVG file
- Olive Felt Sheets 9” x 12” (I used 10 sheets for my wreath)
- 12” Wreath Form
- Green Ribbon (I used a brighter green, but a darker olive green would look great!)
Tools:
- Cricut Machine (You will need a Cricut Maker for this project)
- Fabric Grip Cutting Mat
- Cricut Rotary Blade (comes with the Cricut Maker)
- Cricut Brayer Tool
- Hot Glue Gun and Hot Glue Sticks
How to Cut Out The Project Using The Cricut
First, you will need to download the Christmas Greenery Wreath SVG file. Just fill out the form below to get the file for free!
Get the Free Christmas Greenery Wreath SVG File

Start by opening Cricut Design Space and creating a new project.
Upload the SVG File
Then, upload the SVG file by selecting the Upload button and then Upload Image. Next, drag and drop or select the SVG file you want to upload.
After the SVG is uploaded, add the image to your design canvas.
If you need a little more help uploading SVG files, you can learn more in this post.
The SVG file will already be sized properly for this project.


Cricut Machine Requirement
For this project, you will need to have the Cricut Maker machine. The Cricut Maker comes with a rotary blade that is designed to cut fabric and felt.
I just got this machine and I love it! I feel like I can create so many more things now that I can cut fabrics. This project was the first “fabric” project that I made and I’m so happy with how it turned out!
The rotary blade is designed to be used with the fabric grip cutting mat. This mat is the pink one and is made for fabrics.
If you buy a Cricut Maker, you will get the rotary blade and a fabric grip cutting mat in the box. The best part is, you don’t need any backing for the Cricut Maker to cut fabrics. It just cuts out the pieces perfectly using the rotary blade!
Make It
Now it’s time to make your project!
Click on the Make It button in the upper right of the screen.
The first screen you will see is the Mat Preview Screen. This will show you all of the different mats needed for your project. Each mat represents another piece of material.
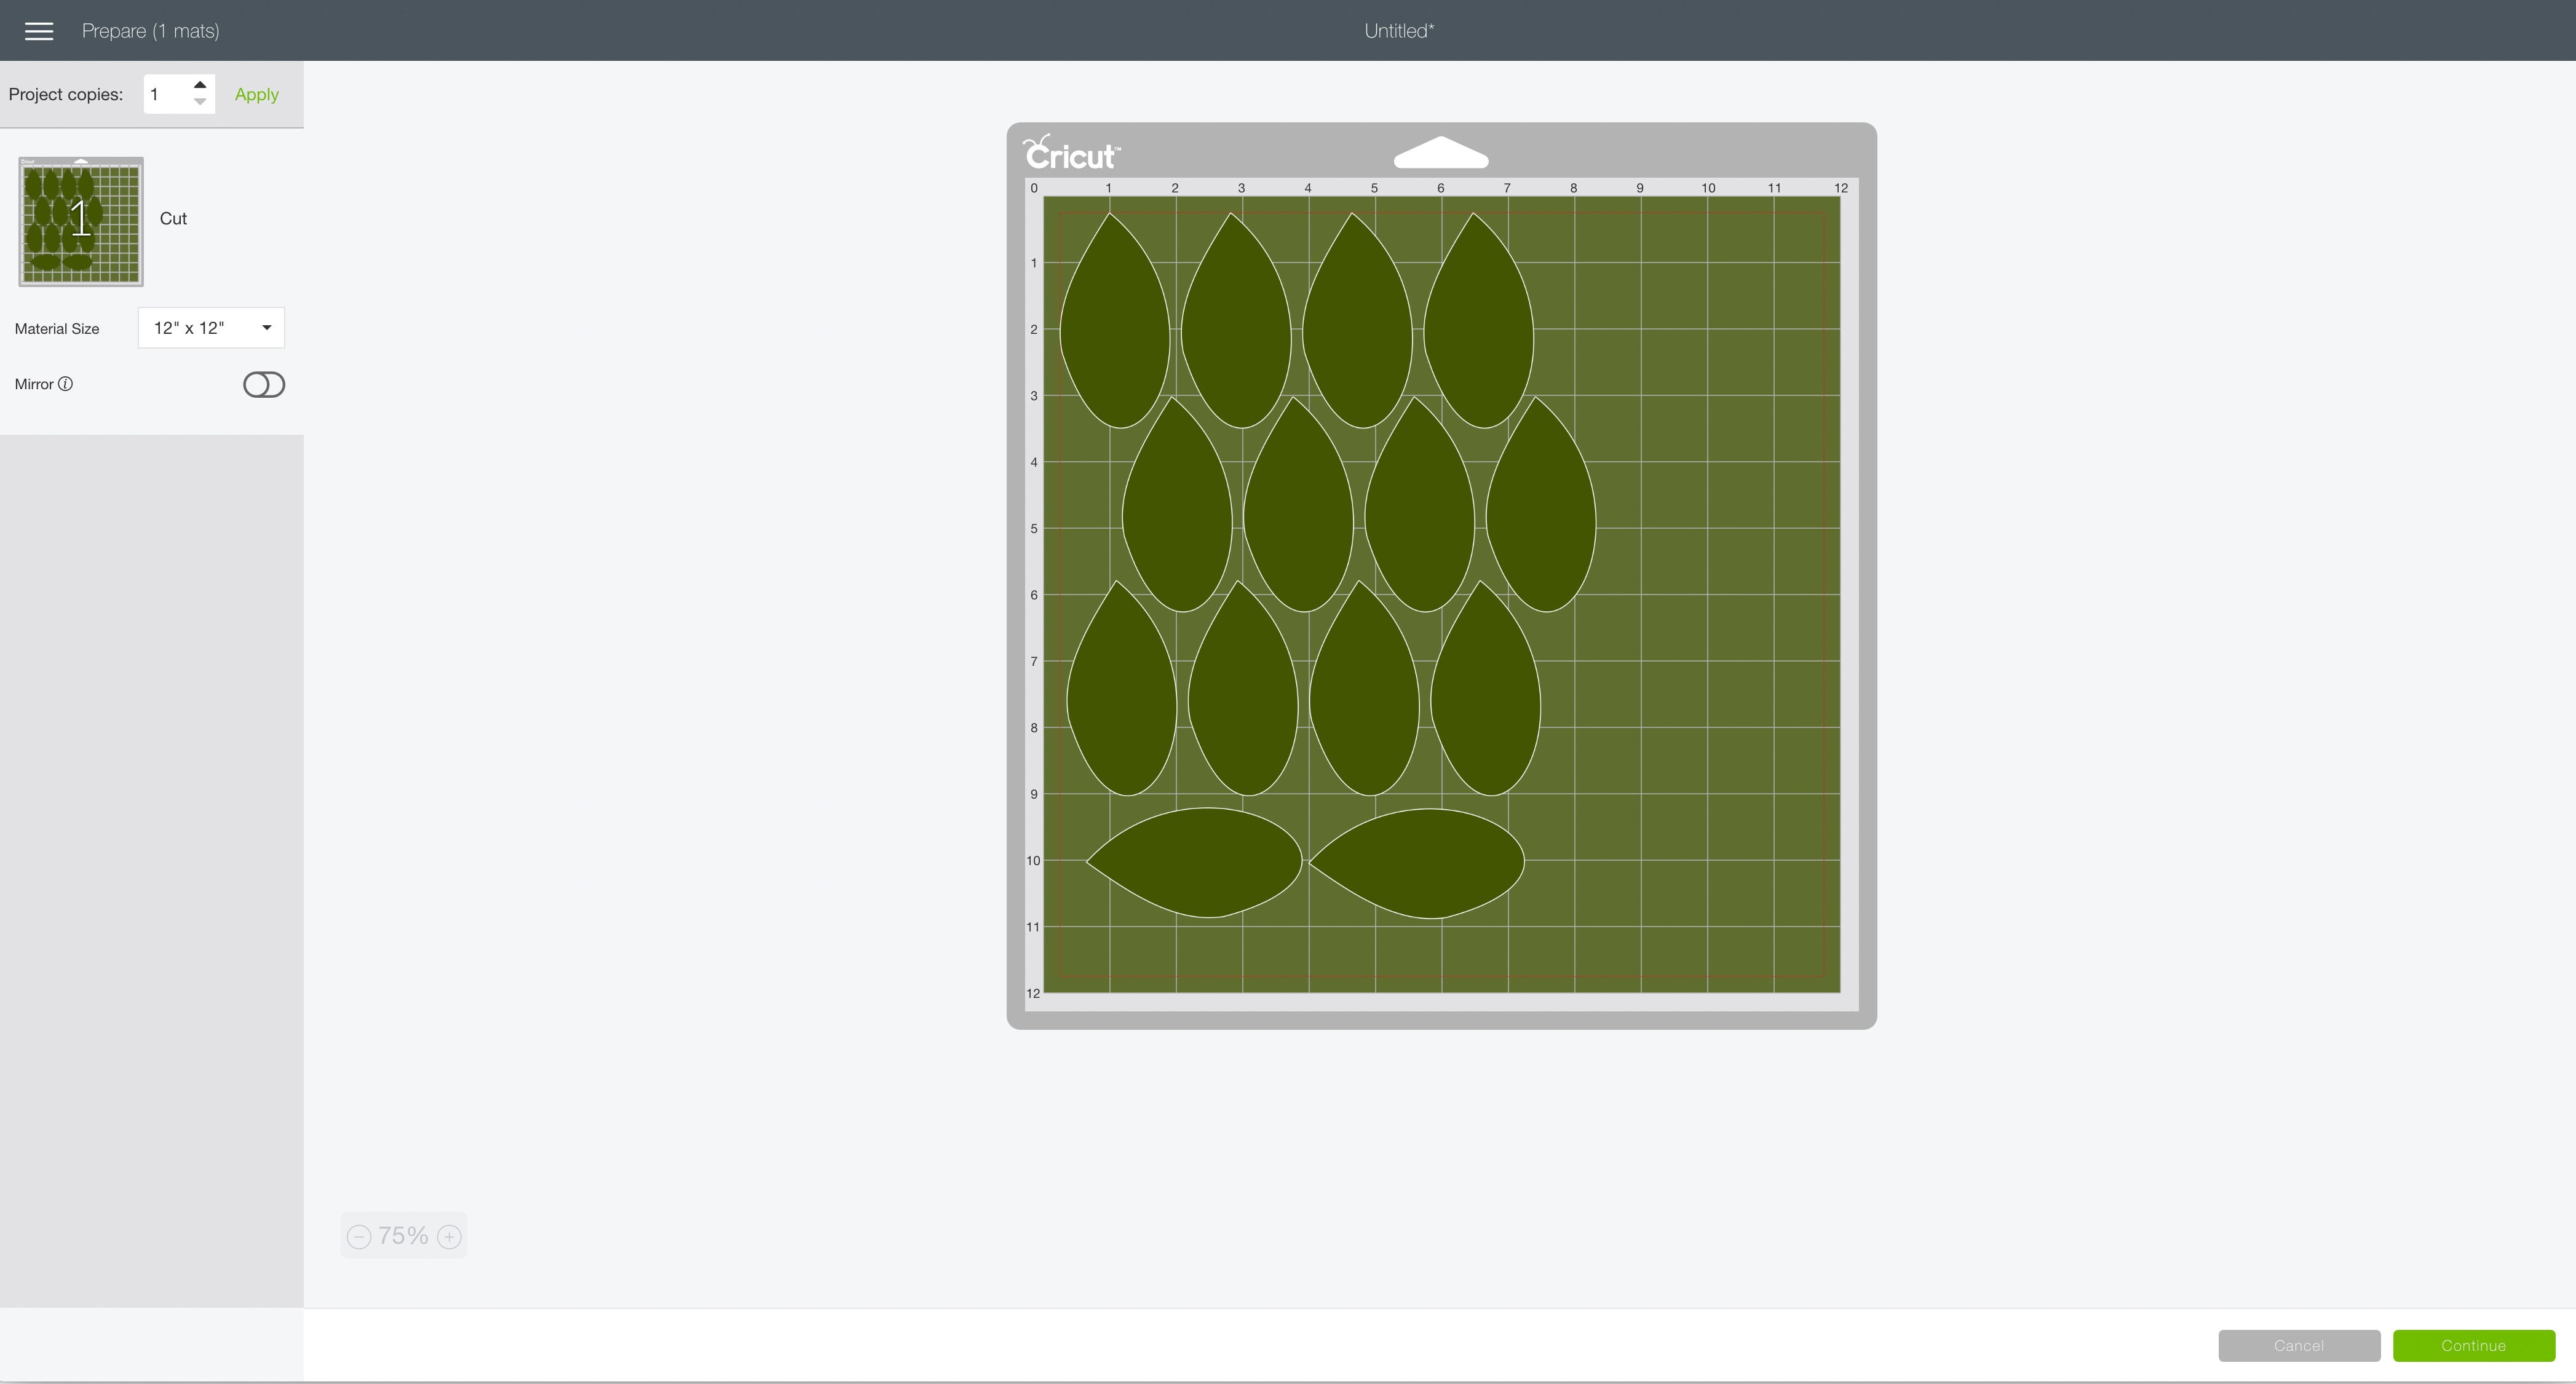
For this project, there is only 1 mat with the leaves design. To get enough leaves to cover your entire 12” wreath form, you will need 10 sheets of olive felt. So, you will need to cut out this design 10 times.
Click on the Continue button in the lower right of the screen.
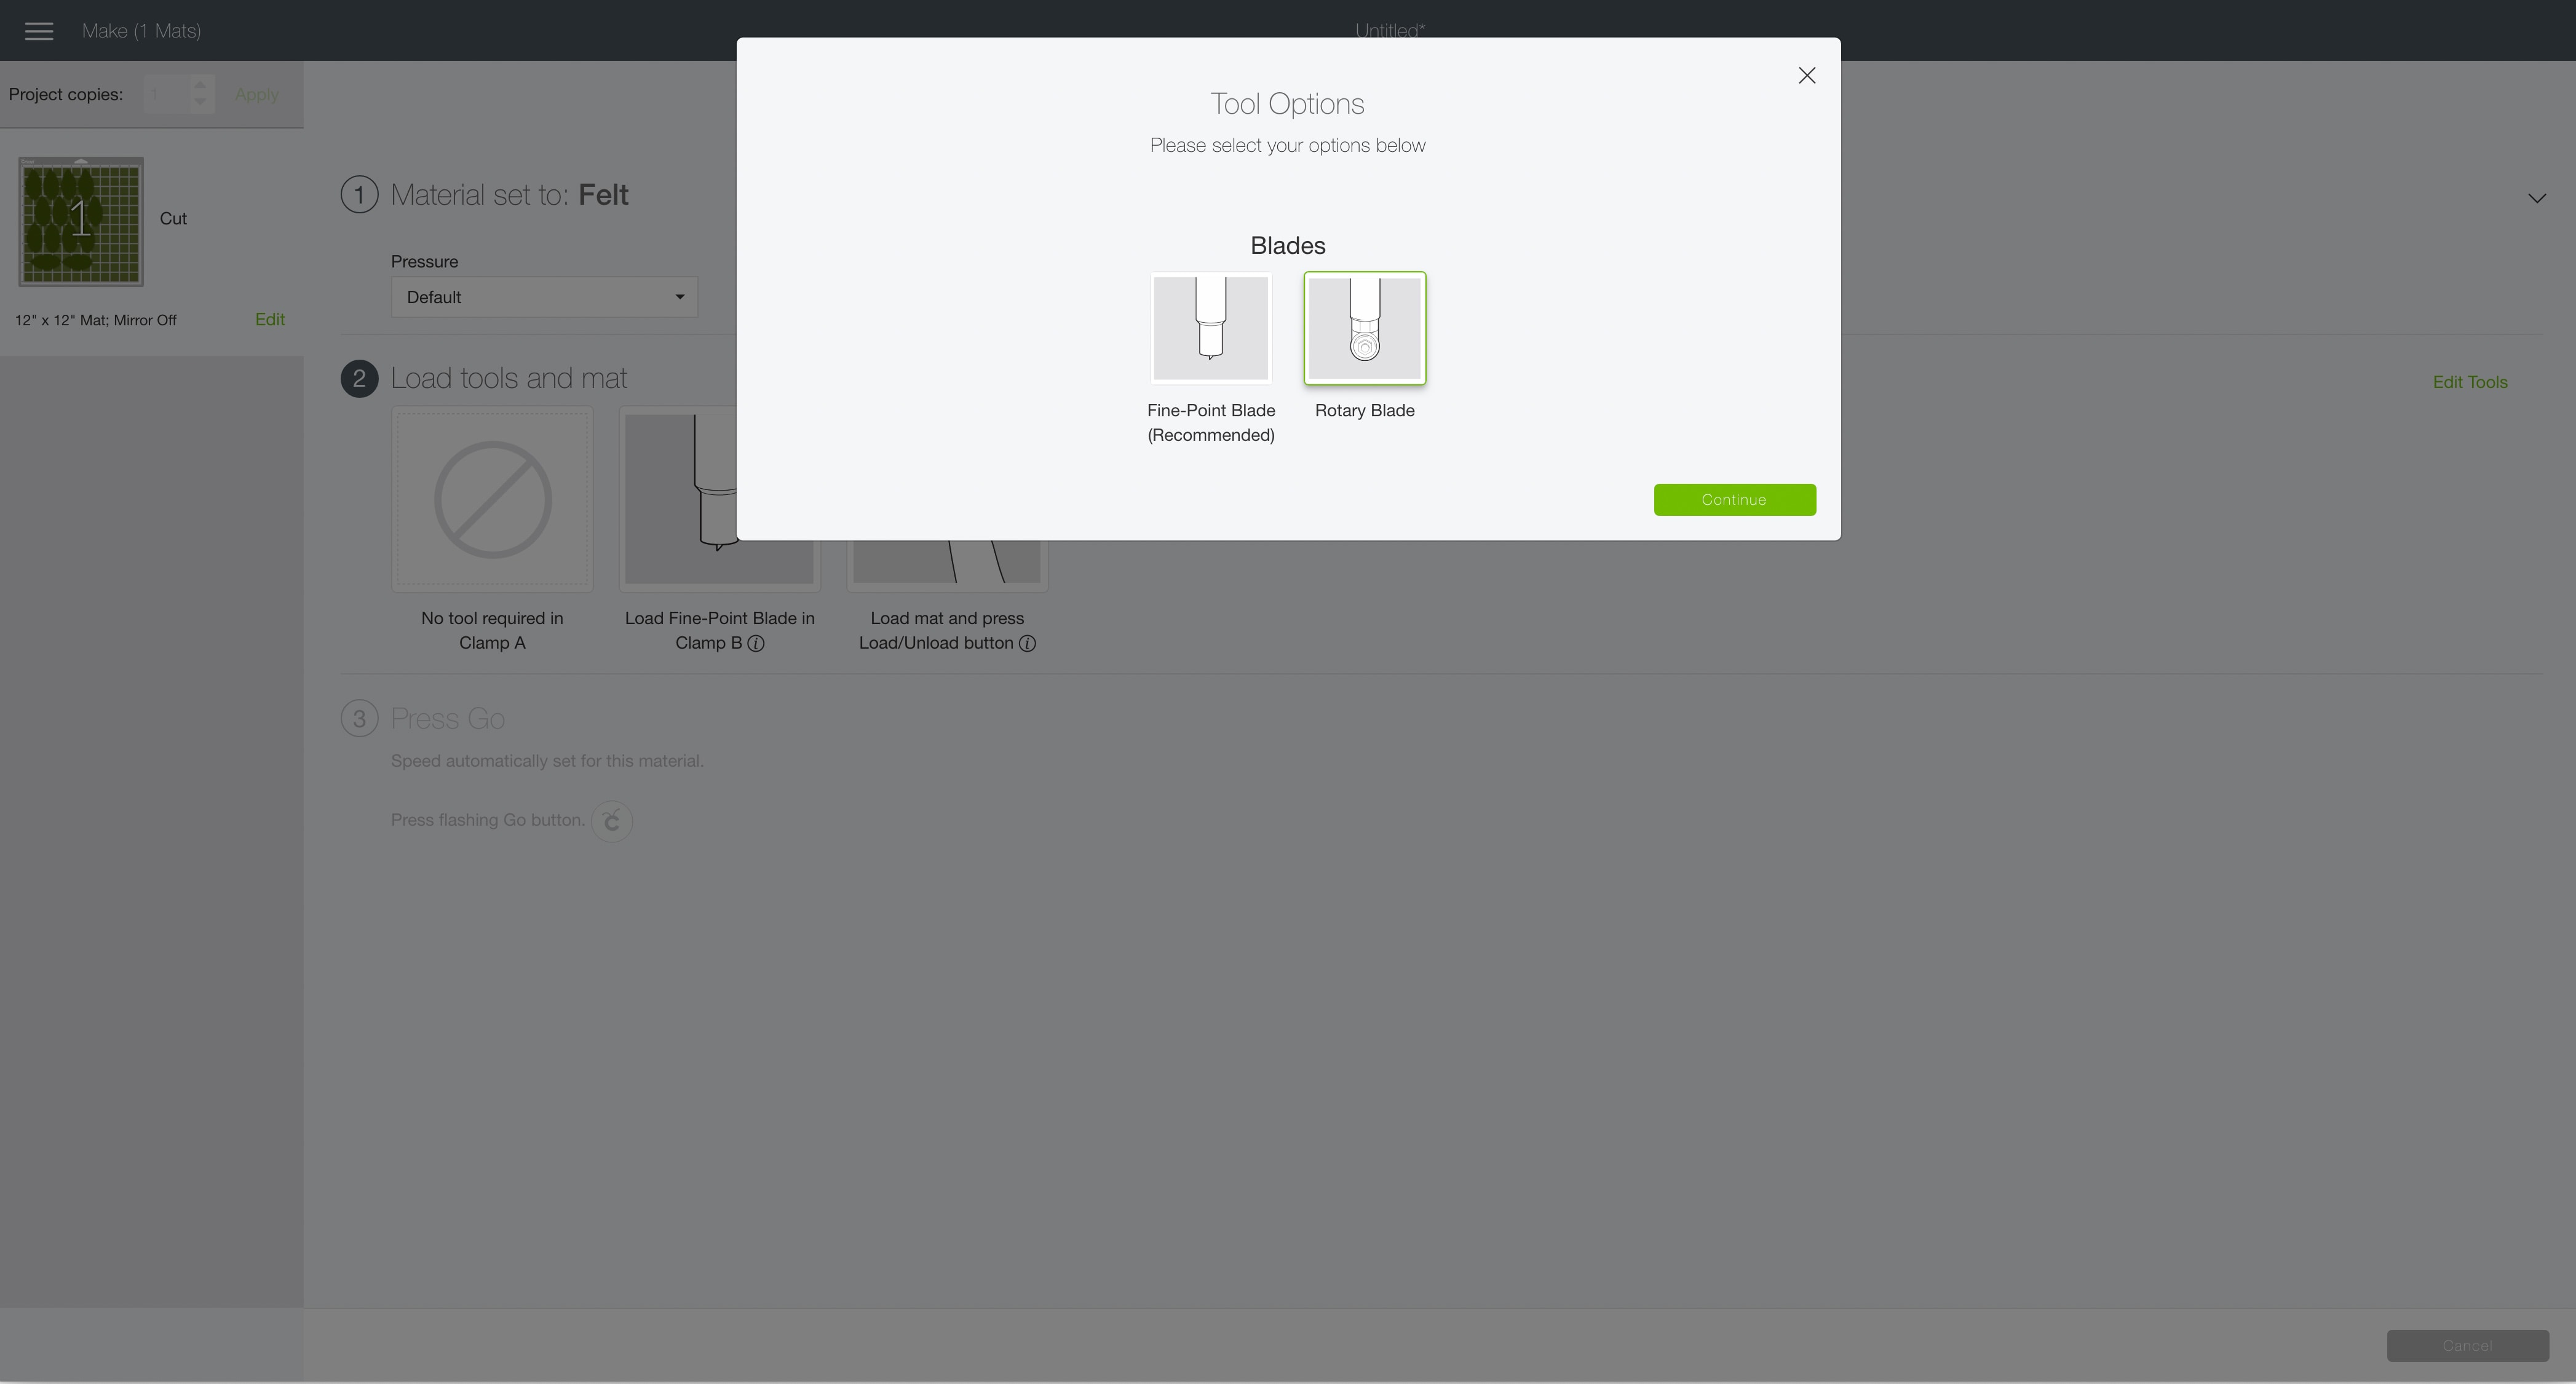
Connect your Cricut machine. Then, adjust the settings as follows.
Material: Felt
Pressure: Default
Tools: Rotary Blade
Click on Edit Tools to adjust which tools you are using.
Load the fabric grip cutting mat with your first material into the machine. Then, press the flashing Go button to begin the cutting process.
Load each new piece of felt and press the flashing Go button to duplicate the cut until all of your leaves are cut out.

Cricut Tip: Use the Cricut Brayer tool to get fabric and felt to stick to the fabric grip cutting mat in the best way. I love this tool because it really helps me to smooth down any material onto the cutting mats.
How to Assemble The Project
Once all of your pieces are cut out, it’s time to assemble the project.

To give the wreath a three-dimensional look, you will need to shape each of the leaves. Take a leaf and place a small circle of hot glue in the bottom section (the part that’s wider).

Then, pinch the two sides of the leaf together to create a fold. This gives the leaves a more realistic, 3D look.


Repeat this process until all of your leaves have been shaped. This is not hard, but it does take some time. It’s the perfect activity to do while watching a movie!


After your leaves are ready, it’s time to prepare your wreath form. I decided to use a 12” foam wreath form. You could definitely use a larger wreath, but remember you will need to cut out more leaves to cover it.

Take some green ribbon and hot glue one end to the wreath form. Wrap the wreath form with the ribbon until it’s completely covered. This will hide the foam and give it a more finished look.


When you get all the way around the wreath, cut the ribbon and attach it to the wreath base using hot glue.


Now it’s time to add the leaves to your wreath. Decide on a direction that you want to the leaves to go in a stick with it. This will give your wreath the best look.

Take a leaf and place some hot glue into the base section on the back of the leaf. Then, attach the leaf to the ribbon on the wreath form. Keep attaching leaves to give the wreath a full look.

There was no real pattern to how I attached the leaves. I just tried to cover up the wreath base and to not make the leaves look too uniform. That way they looked more natural. Here are a few pictures of the “in-process” leaf attaching so you can see how I placed the leaves.


Once I covered the entire wreath, I still had a few leaves leftover.
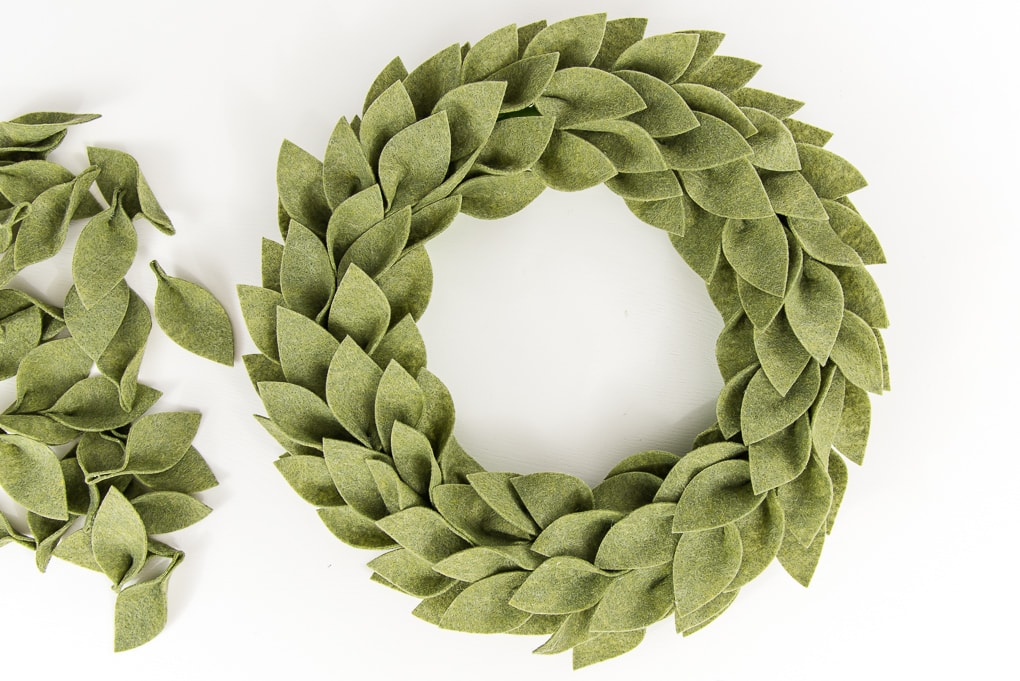
So, I flipped the wreath upside down and glued the leaves to the inside section of the wreath form.


This really filled out the middle section of my wreath. You can use extra leaves however you want to add more fullness to your wreath.


After all of the leaves are attached your wreath is complete!
This is one of my favorite projects from this whole series! I’m so happy with how it turned out. Now I want to make so many more felt wreaths for all the seasons.

To give this wreath an extra Christmas touch, you could add a big red bow to the front, or any other Christmas decorations.

I hope you love this Christmas Greenery Wreath.

If you decide to make this project, I would love to see!
Tag me on Instagram @keystoinspiration. Use the hashtag #25daysofcricut so that we can all see each other’s projects too!
To see more projects from Have Yourself A Very Cricut Christmas: 25 Days of Homemade Holiday Crafts!, click here!
If you want to follow along and see all of the projects for Have Yourself A Very Cricut Christmas: 25 Days of Homemade Holiday Crafts!, you can bookmark this blog post and visit it each day to see the newest project.


This is such a pretty wreath. I love the idea to use ribbon to cover the frame.
Thanks! I like that it looks a little more finished.
>> Christene
Please send the SVG File!
Hello. Love the look. Sorry but for some reason I can not download the leave pattern. Would you Be able to send it to me
Sure – I’m not sure why there are issues with the file. But if you email me at christene@keystoinspiration.com I can send the files to you directly.
>> Christene
The svg file folder was empty. Will you please resend?
I’m sorry you were having problems with the download. It comes as a zip file that you have to unzip. Can you email me and I’ll send you the file if you are still having problems? christene@keystoinspiration.com
>> Christene
Can I please have your leaf sag file
Hi – please send me a direct email and I’ll get it to you. Sorry that the email sign up isn’t working right.
christene@keystoinspiration.com
>> Christene
I love the felt greenery wreath! Please send me the SVG file.
Thank you so much!
Hey Melissa,
There’s an image in the post that you can click on to get the SVG file emailed directly to you.
Thanks,
Christene
I do not have a cricut machine. What size are the leaves after you use the cricut? I can make a paper template and hand cut, just curious what the size is.
Hi Kim,
No problem! Each leaf is approx. 3.25″ tall and 1.75″ wide.
Hope this helps! >> Christene
Cute, adding this to the project list.
Hi, I attempted both the link and the picture, but the cut file just downloads a zip file with nothing in it. Is there some place else it is posted? Thank you!
Hi Christine,
could you please send me the svg file . Thank you
I love the felt greenery wreath! Please send me the SVG file.
Thank you so much!
I love the felt greenery wreath! Please send me the SVG file.
Thank you so much!