Learn how to create a beautiful grid board and batten wall in your home. This custom accent wall will have such an impact on your home design.
I can’t even explain how excited I am to share this post with you today! This project has probably made more of an impact in our house than any of our other projects to date. And, I couldn’t be happier with the final result.
Today I’m going to share with you all the details of our new grid board and batten wall in our master bedroom!
Ever since we did a walkthrough of our home when it was still just studs, I’ve been looking forward to creating this feature wall. I know that kind of sounds dramatic, but hear me out.
It all started one day when Ben and I were walking through the house while it was under construction, we stopped in the master bedroom. At the time, the room was unfinished, and the drywall was actually stacked and leaning against the wall where our bed is now.
I started envisioning what the room would look like when we actually moved in. How it would all be set up and where things would go. And right then, I got this picture in my head of a beautiful, white, grid board and batten wall as the the focal point for the room. I could see it in my mind as clear as if it was actually there.
Since then, I’ve known exactly what I wanted to do in that room. I knew that the grid board and batten wall was going to be a reality someday, so I started planning the room around it. Eventually, I came up with a design plan for the master bedroom. You can see all of the details for that here.
After our design was finalized, we got to work creating my dream grid board and batten feature wall!
Now, before I get into all of the details, I have to clarify a few things. Just being honest with you, I was kind of intimidated by this project.
I’ve seen big grid board and batten walls before and normally they were part of a custom designed home. I wasn’t exactly sure how our version would compare and if we would be able to stick to a budget.
Thankfully, Ben was there to calm my fears and convince me that we could totally DIY this ourselves. All we had to do was sketch it out, make a plan, and make sure we knew what it would cost before we started.
And he was definitely right! This project looks much more complicated in its final form that it actually was to create. It’s literally just boards and paint. The best part is, we managed to do the entire wall for under $200!
Let’s get into all the details.
How to Build a Grid Board and Batten Wall
This post contains affiliate links for your convenience. For more information, see my disclosures here.
Materials:
- 1×4 Primed MDF Boards
- Paintable White Caulk
- Wood Putty
- Wood Glue
- Primer – we used Bullseye Primer
- Paint – we used Valspar Base A White Semi-Gloss Paint
Materials Used for Framing the Window:
*Only needed if you have a window as part of your wall
- 1×2 Primed MDF Boards
- 1×6 Primed MDF Boards
- ¼” Piece of inexpensive plywood to use as a spacer behind the window trim boards
Tools:
- Miter Saw
- Razor Saw
- Ryobi Airstrike – Cordless Brad Nailer
- Caulk Gun
- Glue Bottle
- Tape Measure
- Level
- Small Paint Roller
- Paint Brush
- Putty Knife
- Caulk Edging Tool
- Sandpaper
- 2” Brad Nails
Before we could start building, we needed to create a sketch plan for the design. Ben and I measured the length and height of the wall and created a few different sketches for the grid wall. Each sketch had different sized squares.
We had already decided that we were going to use 1×4 MDF boards, which are actually 3.5” wide. This helped us to create an accurate sketch and really see how the wall would look with each different design. Eventually, we decided on the one that was 4 squares vertically, and 8 squares horizontally.
Here’s a graphic I created showing the basic design for the wall. I know the squares aren’t perfect, but you can get an idea of the design as a whole.

One aspect of our wall that is a little different than a standard wall is the window on the far left. When we created our sketch designs, we had to remember that on the left side, instead of more squares there would be a window with craftsman style trim.
After our sketch was done, it was time to purchase the materials.We used our sketch to add up how many feet of 1×4 MDF boards we would need for the entire wall. Then, we purchased the materials for the wall design and some extra materials for the trimming the window.
Preparing the Wall
Once we got all of the materials home, it was time to prepare the wall. Since we knew that the grid wall would eventually be painted white, we needed to prime it to cover the existing dark paint. We put two coats of primer on the wall and didn’t really worry about the edging or making it look perfect since the MDF boards were going to cover the edges anyway.

Trimming the Window
After we primed the wall, we started by trimming the window to give it a craftsman style. We followed the same trimming method that we used in the powder room, except on a larger scale.

>> Read How to Build DIY Modern Craftsman Window Trim Here <<
I didn’t get any pictures of this process for this specific window. However, I will have a post in the future all about trimming the other windows in the room so you can see it on a larger window.
This window was unique because it was going to be a part of the grid wall. The boards that we used for the trim were the same thickness as the boards for the grid wall. That meant that the window would kind of blend in with the other boards and make some of the grid boards look thicker than they should be. Which meant the window would throw off the symmetry of the wall as a whole.
We decided that we wanted the window to stand out slightly from the rest of the wall treatment so that they looked like two different things.
To do this, we bought a ¼” thick piece of inexpensive plywood. Ben came up with the idea to put the plywood behind the trim pieces to add some extra dimension and depth. You can see in this picture the gap created by the plywood behind the trim pieces.
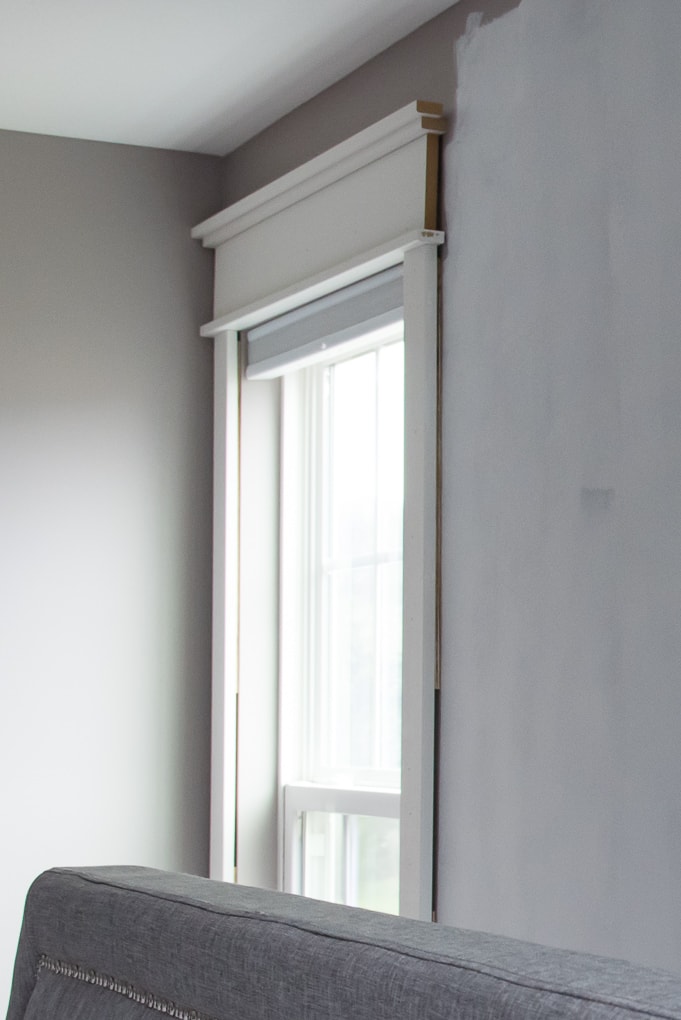
We used a razor saw to rip the plywood into smaller pieces that fit behind each of the boards. Each piece was cut to be slightly smaller than the actual trim piece so that it didn’t show.
Later, when we finished the window trim, we filled the spacing with paintable white caulk.
Building the Grid
Once the window trimming was finished, we started on the grid wall. Our master bedroom wall is roughly 16’ wide by 8’ tall. We started by splitting the wall in half by placing a vertical board at the midpoint.

We measured the distance between the baseboard and the ceiling and cut the first MDF board to that length.
Instead of removing the existing baseboards, we opted to keep them for the grid wall. To help match the new board to the existing baseboard, we cut a 45-degree angle using our miter saw on the back side of the board. This helped to cover the top of the baseboard and give the illusion that everything matched up. It also helped with the finishing process later when we caulked all of the spacing between the boards and the wall.

To attach the board to the wall we held it into place, used a level to make sure it was completely level, and then secured it using wood glue and brad nails.
For this project, we got to use one of my favorite tools, the Ryobi Airstrike. It’s such an easy tool to use, and it’s cordless which is a major plus!

After the first board was on the wall, we attached another one on the far right side of the wall.

Here’s a front view of the bottom of the board on the right side of the wall. We also had to create a miter cut on the side of the board so that it would fit against the baseboards on the side wall of the room.

On the far left side of the wall, we placed a vertical board between the baseboard and the window sill and another vertical board above the window. We then used a thinner MDF board for the remaining vertical spacing to fit around the window trim. This helped the left side of the grid wall appear as if it was continuing through the window trim.

Once the vertical pieces were attached and perfectly level on the wall, we knew that the spacing between them was consistent. That meant we didn’t have to worry about the measurements changing if the room wasn’t square.
Here’s what the wall looked like in sketch form at this point in the process.

We wanted a consistent top surface of the grid wall to work off of, so next, we measure the two gaps along the ceiling and cut boards to fit those spaces. We attached them with wood glue and brad nails.
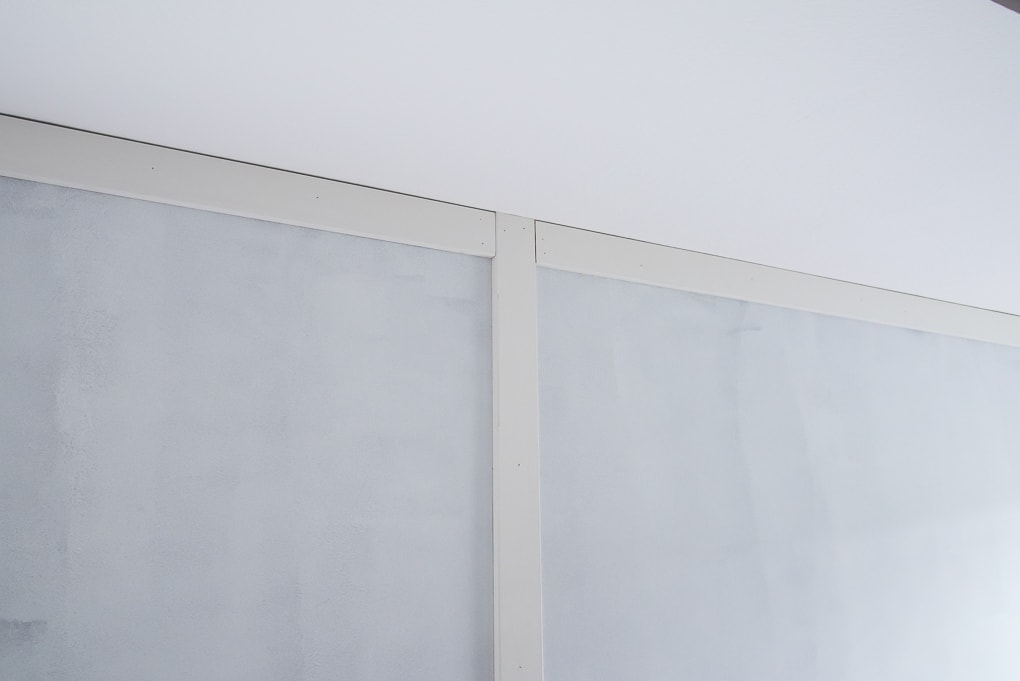
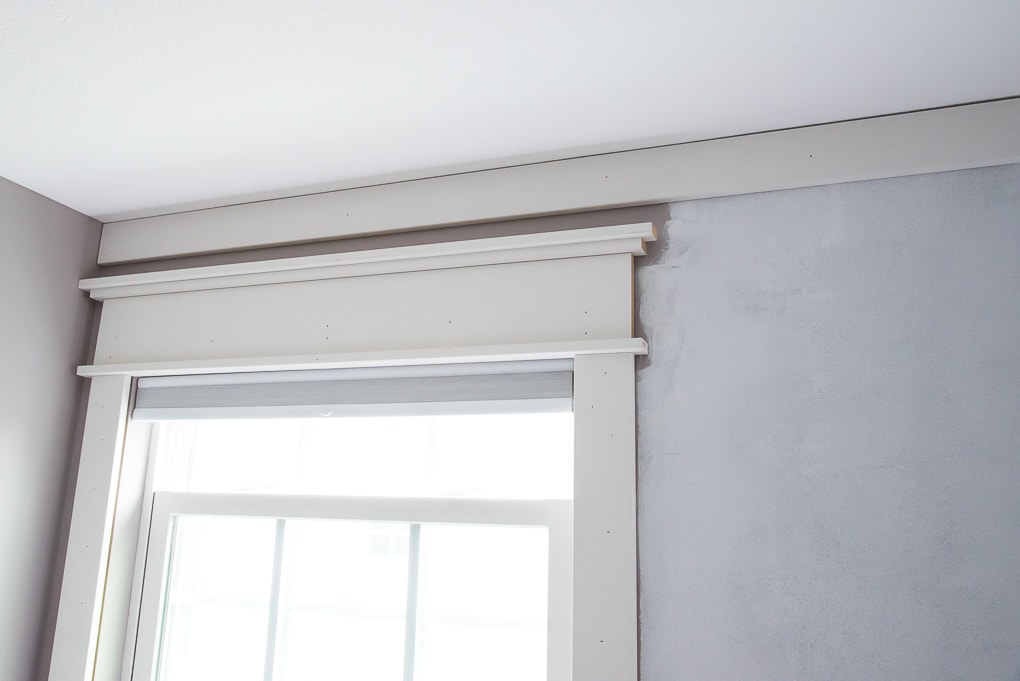
And, here’s what the wall looked like in sketch form after we attached the two horizontal top boards.

This is where we probably should have done things a different way. In hindsight, it would have been better to place all of the vertical boards first. We had planned to continue working down the wall with the horizontal boards, but we found that it was really difficult to hold the horizontal board level and attach it to the wall at the same time.
So instead, we decided to switch gears and place the rest of the vertical boards at this point. Since we had already placed the top boards, we now had to measure the distance between the baseboard and the bottom of the top horizontal board on the wall. Once we had this measurement, we cut the rest of the vertical boards. Each vertical board also had the 45-degree cut on the bottom back side so that it sat against the baseboard.
After the vertical pieces were cut, we used our sketch and determined the spacing needed between each vertical piece.

Before attaching a vertical board to the wall, we double checked our measurements from the sketch to make sure that everything was centered and spaced evenly. Then, after making sure everything was level, we attached all of the vertical boards to the wall using wood glue and brad nails.

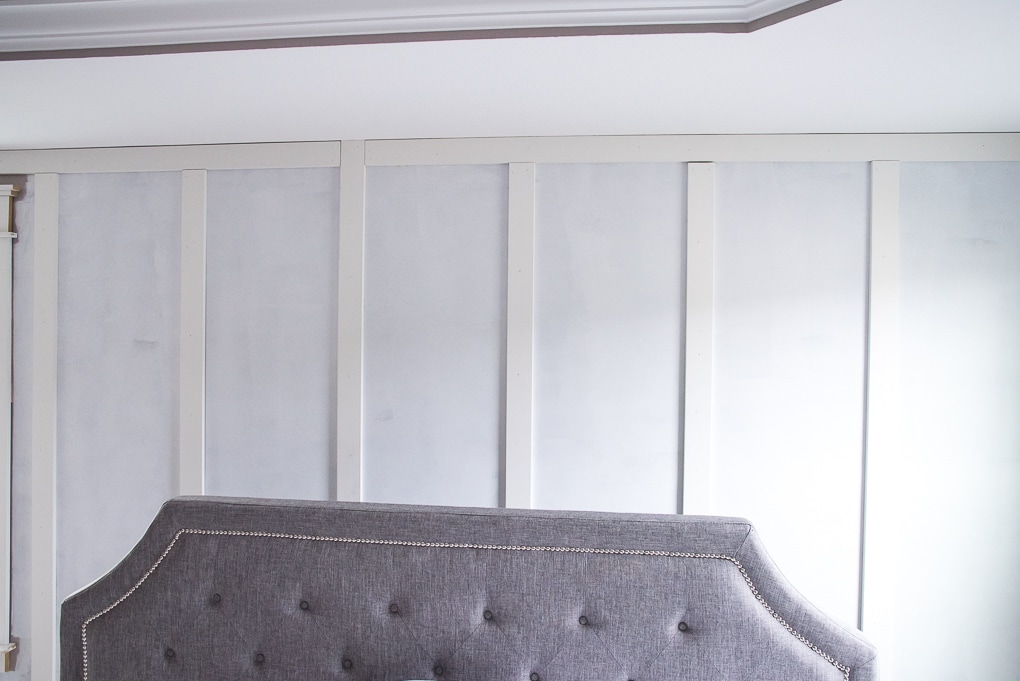
Once the vertical pieces were attached to the wall and spaced out evenly, we knew that we could cut out all of the horizontal pieces to the same length. So, we measured the spacing and cut out all of the smaller horizontal boards.
If you are doing this project in your home, just make sure to double check all of your spacing. You don’t want to be surprised later if some of the spaces are slightly different measurements and your pieces don’t fit. Always double check before cutting out your pieces.
With all of the horizontal pieces cut to length, we cut out two spacer pieces from scrap wood. These spacers were cut to the exact length that we knew was needed as the vertical spacing between the horizontal boards.

Using the spacers, we were able to accurately place each horizontal board on the wall and attach it without having to measure each time. This also helped to make everything consistent across the whole wall.
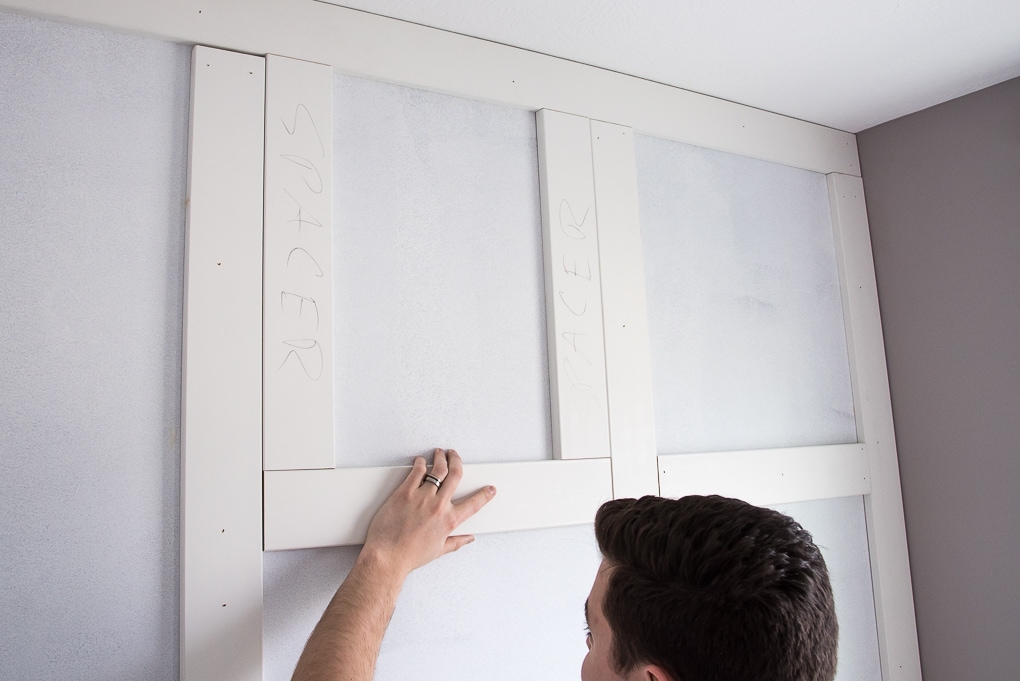
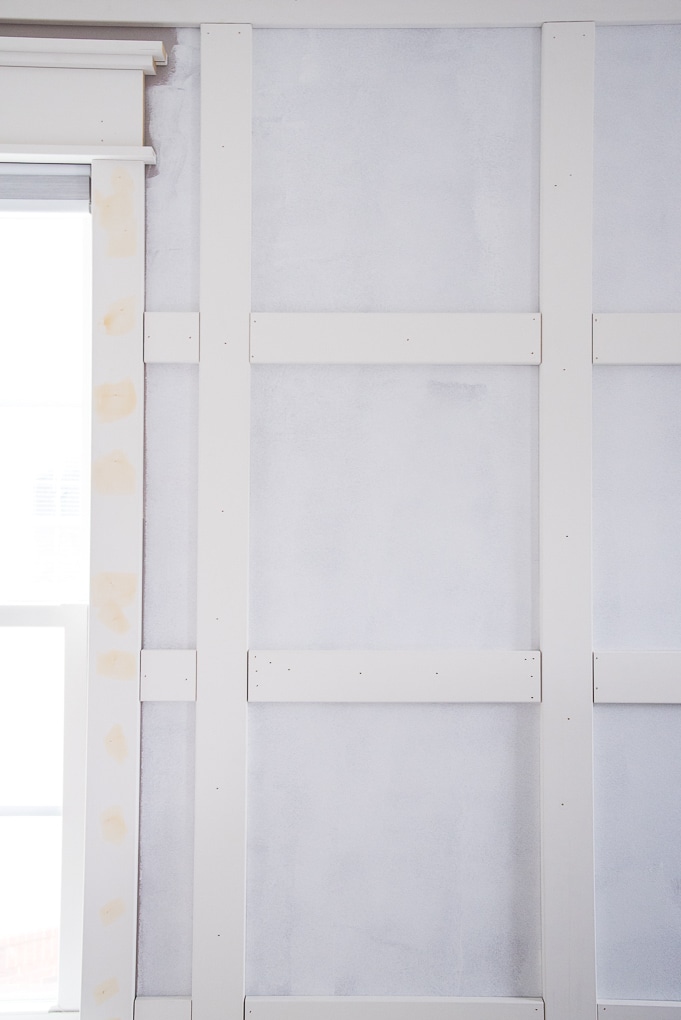
This took some time, but one by one we attached each small horizontal board to the wall using wood glue and brad nails. This glue bottle made things so much easier and a lot less messy!

Around the window, we had to cut custom length horizontal boards to get the square sizing right. This gave the illusion that the grid was going “through” the window.
Finishing Touches
After all of the boards were attached the wall, you could finally see the completed design coming together. It was time to add the finishing touches.
First, we filled all of the nail holes with wood putty.

Some of our MDF boards had “low spots” and “high spots” that made the surface look uneven. So, we used a putty knife to apply some wood putty to the boards and even out the surfaces.
We added putty to the low spots in the wood pieces and used sandpaper to sand down the high spots in the wood. Then, we repeated this process until everything was smooth and consistent.
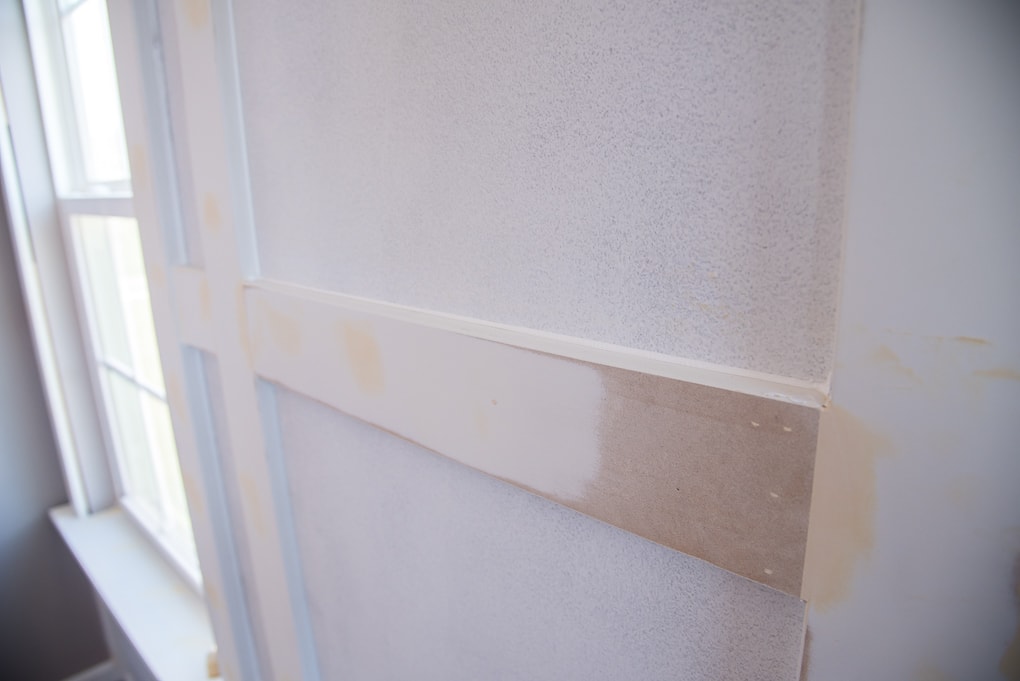
Once the putty was completely dry, we used paintable caulk to fill in all the gaps between the boards and the wall.
For spacing like this, caulk is much easier to work with than putty and provides and clean finish. This caulk gun was also a lifesaver and helped us to apply the caulk quickly and evenly.

We used gloves and this little caulk edging tool to help us smooth out the caulk and get into the corners between two boards. We also made sure to have some paper towels handy to wipe off the excess caulk from the edging tool.

After the caulk was completely dry, we painted the wall with 3 coats of white semi-gloss paint. This gave us an even, consistent and professional looking finish.
Once everything was dry, we had a beautiful and bright grid board and batten feature wall! It was exactly what I had imagined and looked incredible in the room.


I think my favorite part is actually how our window looks as a part of the wall. The window was kind of a struggle to work around, but ended up adding so much to the wall and the design in general.

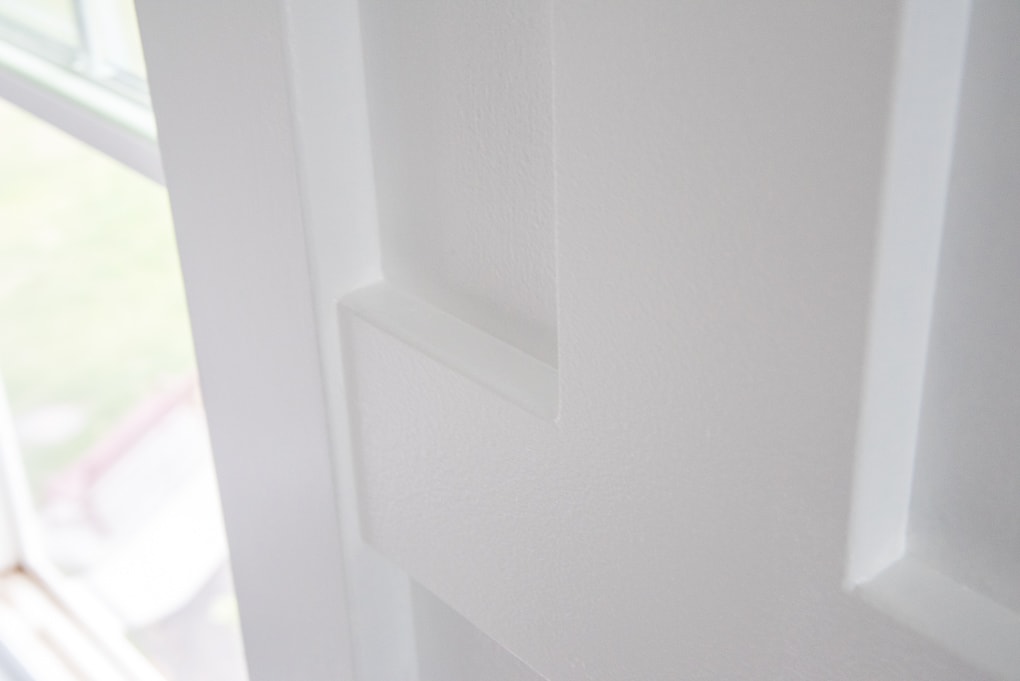
Here are a few close-ups of the window trim. You can really see how it sticks out just a little bit more than the grid wall.

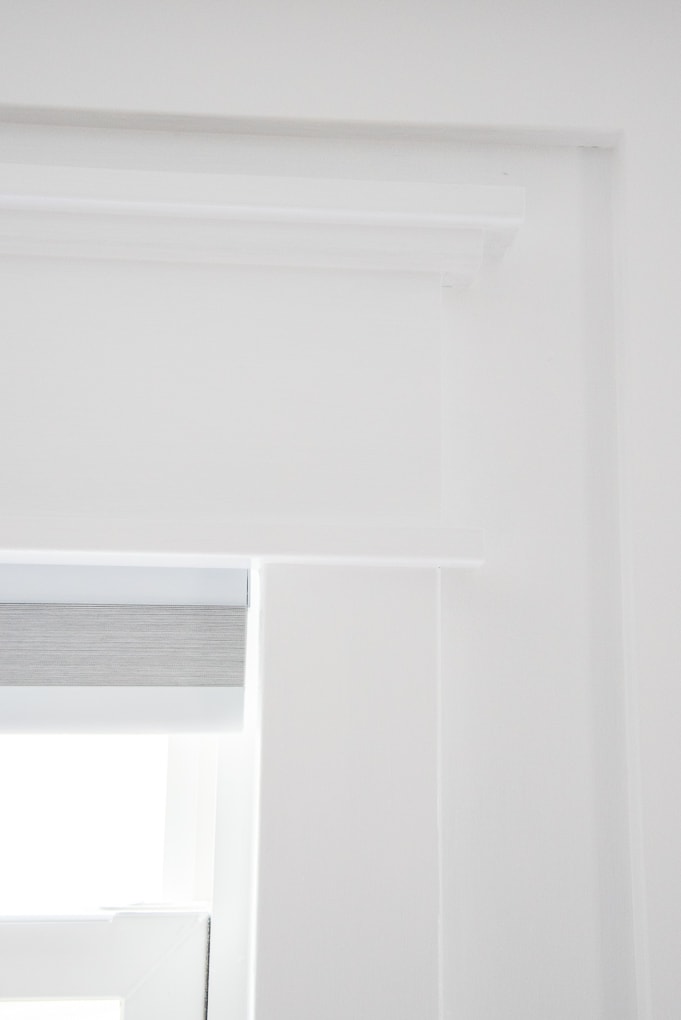
You can also see how seamless the caulk made everything look!
It was kind of hard to get a picture of the whole space because we still had our king size bed in the middle of the room during this DIY project. That made it super difficult to get an unobstructed picture of the wall as a whole. But, you can kind of get an idea from these pictures.
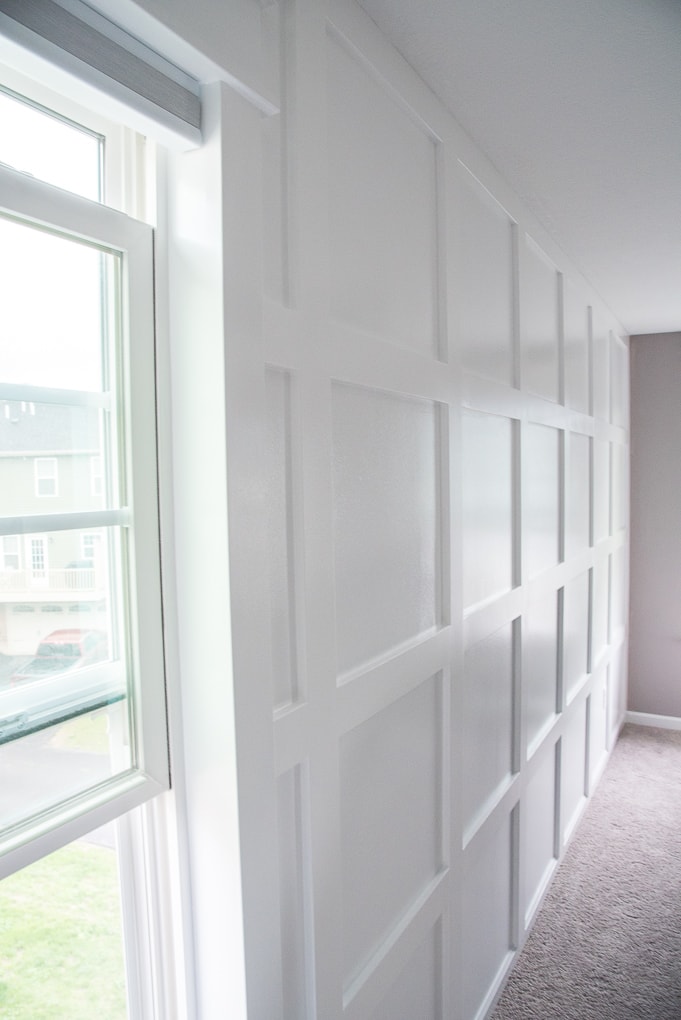

I’m so happy with how our grid board and batten wall turned out. We were able to get the exact look I wanted without having to hire the professionals or pay tons of money.
That’s one of the things that I love the most about DIY. You can create that “custom look” for a fraction of the price.
I can’t wait to show you the completed room with the grid board and batten wall as the backdrop. I’ve already shared a sneak peek on my Instagram, but stay tuned for the full room reveal.
Even Widget is excited!

Have a great week!





This is amazing! It looks so high end. I love how much character it adds to your room!
Thanks so much Jackie! It’s now my favorite room in the house. Sometimes I just stare at the wall (I’m a goof), but really. I am really glad that it turned out so well.
>> Christene
This wall looks great! My wife and I are attempting to build a similar wall now. I understand that you used wood filler to fill all of the nail holes and caulk to clean up the gaps where the boards met the wall, but what did you use to clean up the gaps where the horizontal boards met the vertical boards? From your pictures it looks like wood filler but I just wanted to confirm. Thanks!
Thanks Dustin! It’s one of my favorite projects in our house. So glad you are going to do this in your home too. For the gaps between boards (vertical and horizontal) we did just use wood putty and sand it down so it was flush and looked like there wasn’t a gap anymore.
Hope this helps!
>> Christene
Hi! We’re about to take on this project and loved what you guys did. How did you handle the gap between the miltered edge of the vertical pieces and the baseboard? Do you have a close up photo you can post? Thank you!
Hi Anna! So excited you will be doing a similar project in your home 🙂
It’s kind of hard to see but you can sort of tell in the last photo with our cat Widget in the background. The mitered edge sort of fits right over our baseboard top. Because the baseboards are slightly decorative and have an angled top. Now, they don’t fit perfectly, obviously. So to fix that we just used wood putty and caulk to fill in the gaps and make it look somewhat seamless. It’s also not really noticeable from a distance. A lot of it is behind furniture in this particular room. The angle helps you eye think the two pieces are fitting together.
Hope this helps!
Let me know if you have any other questions
>> Christene
Hi. I love this wall! Thank you for the step by step instructions. Can you tell me how many total hours this project took?
Thank you for the inspiration.
Pam
Hi Pam, Unfortunately, I don’t remember exactly how many hours this took us. We tend to do projects over a few days when we have the time. It probably took a few hours to cut and install all of the boards – like an afternoon. And then another afternoon to caulk everything. Then another afternoon to do all the painting.
>> Christene
Wall looks wonderful! I am planning on doing board & batten walls in our staircase. Trying to figure out how big the squares should be-are yours approximately 2feet square? Thx
Hi Bridget,
Oooo that would look beautiful. I believe ours are approx 2′ square. But I think we calculated the right sizing based on the wall size. Measure the entire wall and then pick a number of squares you want to have going across that wall. Subtract the size of the boards and then divide to see how big the squares will be. Thay way you don’t have half-squares on your wall. You definitely want to do some math.
>> Christene
Hi Christene,
stunning? would it be possible to have the size of the square?
thank you very much!
Hey Stefania! The squares are 20″ x 20″, which was the best size for my particular wall so that each square was equal. I hope this helps.
>> Christene
Thank you so much for the idea! I LOVE your wall! My husband and I are working on this right now. We are finding that we have high and low spots on the MDF also. When you sanded the MDF, did it change the look of the thickness of the MDF? I’m concerned it will be obvious I sanded down spots. Thanks for sharing!
Hey Leslie,
Nope, we just lightly sanded and didn’t notice any thickness difference.
>> Christene
How were you able to map out the measurements and squares? Did you use a program to digitally see your plan? I am doing it with two windows on the opposite sides of the wall and I can’t figure out the best measurements. Any recommendations??
Where did you purchase the 2.5” brad nails? I am only able to find brad nails only going up to 2”. I see finishing nails that are 2.5” (for finish nailer) but am having a hard time finding brad nails in that length. Let me me know!
Sure – here’s a link from Lowes: https://rstyle.me/+YyFHZaKqLzRQVA_A-SDsLw
>> Christene
That nail gun looks awesome, I’m looking into getting one to help with doing a similar project on my master bedroom wall. Is the nail gun that you linked able to take those 2.5″ nails? I couldn’t find that information in the product description.
Hi Chelsea,
I think I had a typo in the post. I’m going to correct that now. It looks like we used 2″ nails with that nail gun which I think is the max size you can use. For our wall specifically, anything larger than 1″ would have worked because that would go through the board and then the wall as well.
Sorry about that mistake. Hope this helps!
>> Christene
Hello! I am curious about the 2.5″ brad nails that you mentioned. Where did you purchase these at? I cannot seem to find brad nails above 2″. I only see finish nails in the 2.5″ length.
Sure – here’s a link from Lowes: https://rstyle.me/+YyFHZaKqLzRQVA_A-SDsLw
>> Christene
Looks amazing. Wondering if your walls were textured? I would like to try, but I am afraid I will need to cover the whole wall first to cover the texture.
Hello, I have the same question.
Did you smooth your walls first?
Hi – I did not smooth the walls first, they were already that way
Did you only use brad nails where the batten crossed the studs in the wall behind the sheetrock (I see you used glue as well)?
My husband and I are wanting to do this to our wall. Were your walls textured?
Hi Melissa,
No our walls were not textured. If your walls are textured, you may want to use actual boards on top of your walls that have a flat finish. That’s the traditional way to do board and batten
>> Christene
Did you have any vertical boards not hit a stud? If so did they hold okay with just the glue?
Yes, they didn’t all hit a stud, but the wood glue did hold them with a brad nail.
Fabulous post!! I did a similar wall in my bedroom…but wished I had seen this first. Lots of good tips!!
I want to know, how were the 2 spacer pieces held to the wall or did you just hold and mark the wall once lined up?
Hi – we just held it up and marked the wall. Sometimes it would also just balance on the other installed boards so that we could place the next piece. Hope that makes sense
>> Christene