Create a simple walking in a winter wonderland shadow box using the Cricut Explore or Cricut Maker. This sign is fun, bright, and will look great for a festive holiday home.
Welcome to Have Yourself A Very Cricut Christmas: 25 Days of Homemade Holiday Crafts!
Each day in December, I’ll be sharing a new Christmas project that you can make using your Cricut. It’s going to be a blog version of an advent calendar! Come back every day to get a new “gift.”
Today’s gift is a Walking in a Winter Wonderland Shadow Box.

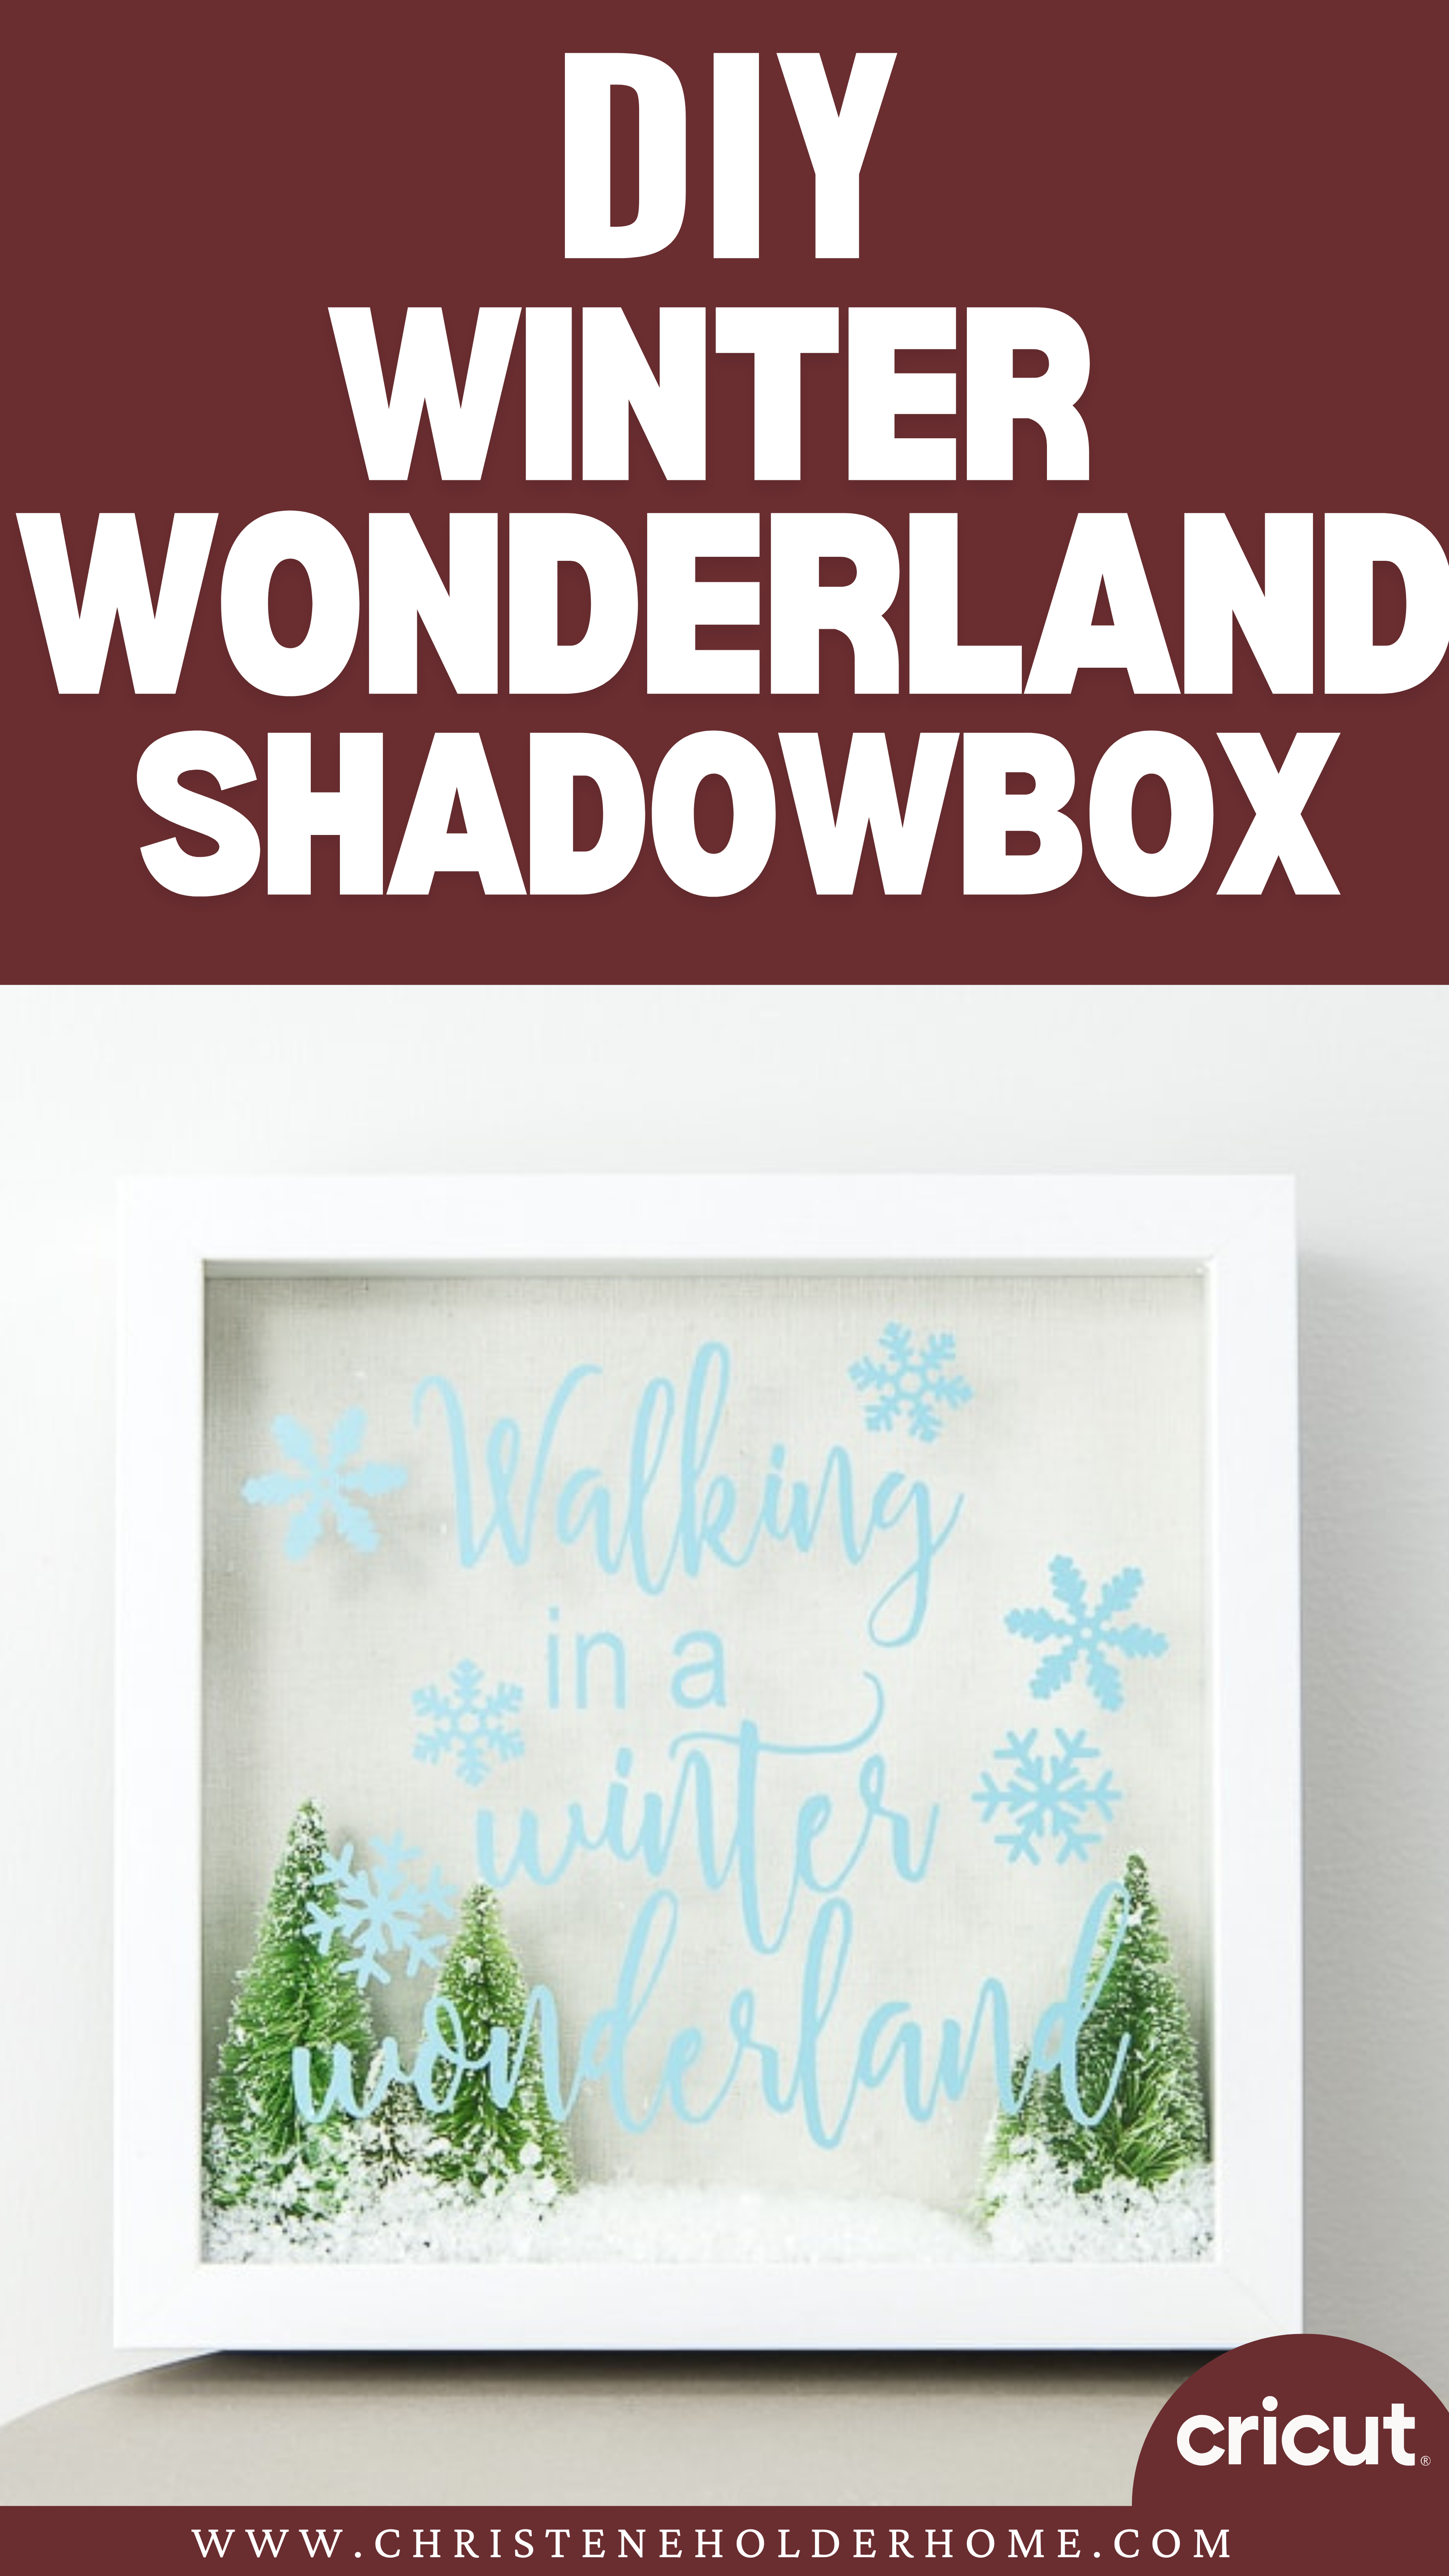
I was browsing the miniatures section in the craft store and found these tiny Christmas trees. It inspired me to use them in some kind of decoration, and the first thing that came to mind was a shadow box.
Shadow boxes make pretty decorations because they have a lot of dimension. They are very pretty on shelves or as a centerpiece of a Christmas display.
You’re going to love this Walking in a Winter Wonderland Shadow Box. Here’s how to make it.
How to Make a Walking in a Winter Wonderland Shadow Box Using The Cricut
This post contains affiliate links for your convenience. For more information, see my disclosures here.
Materials:
- Walking in a Winter Wonderland Shadow Box SVG file
- Light Blue Vinyl
- Shadow Box 9” x 9”
- Mini Christmas Trees
- Fake Snow
Tools:
- Cricut Machine (You can use a Cricut Explore or a Cricut Maker for this project)
- Standard Grip Cutting Mat
- Cricut Fine-Point Blade (comes with all Cricut Machines)
- Cricut Weeder Tool
- Cricut Brayer Tool
- Transfer Tape
- Hot Glue Gun and Hot Glue Sticks
How to Cut Out The Project Using The Cricut
First, you will need to download the Walking in a Winter Wonderland Shadow Box SVG file.
Get the Free Walking in a Winter Wonderland Shadow Box SVG File

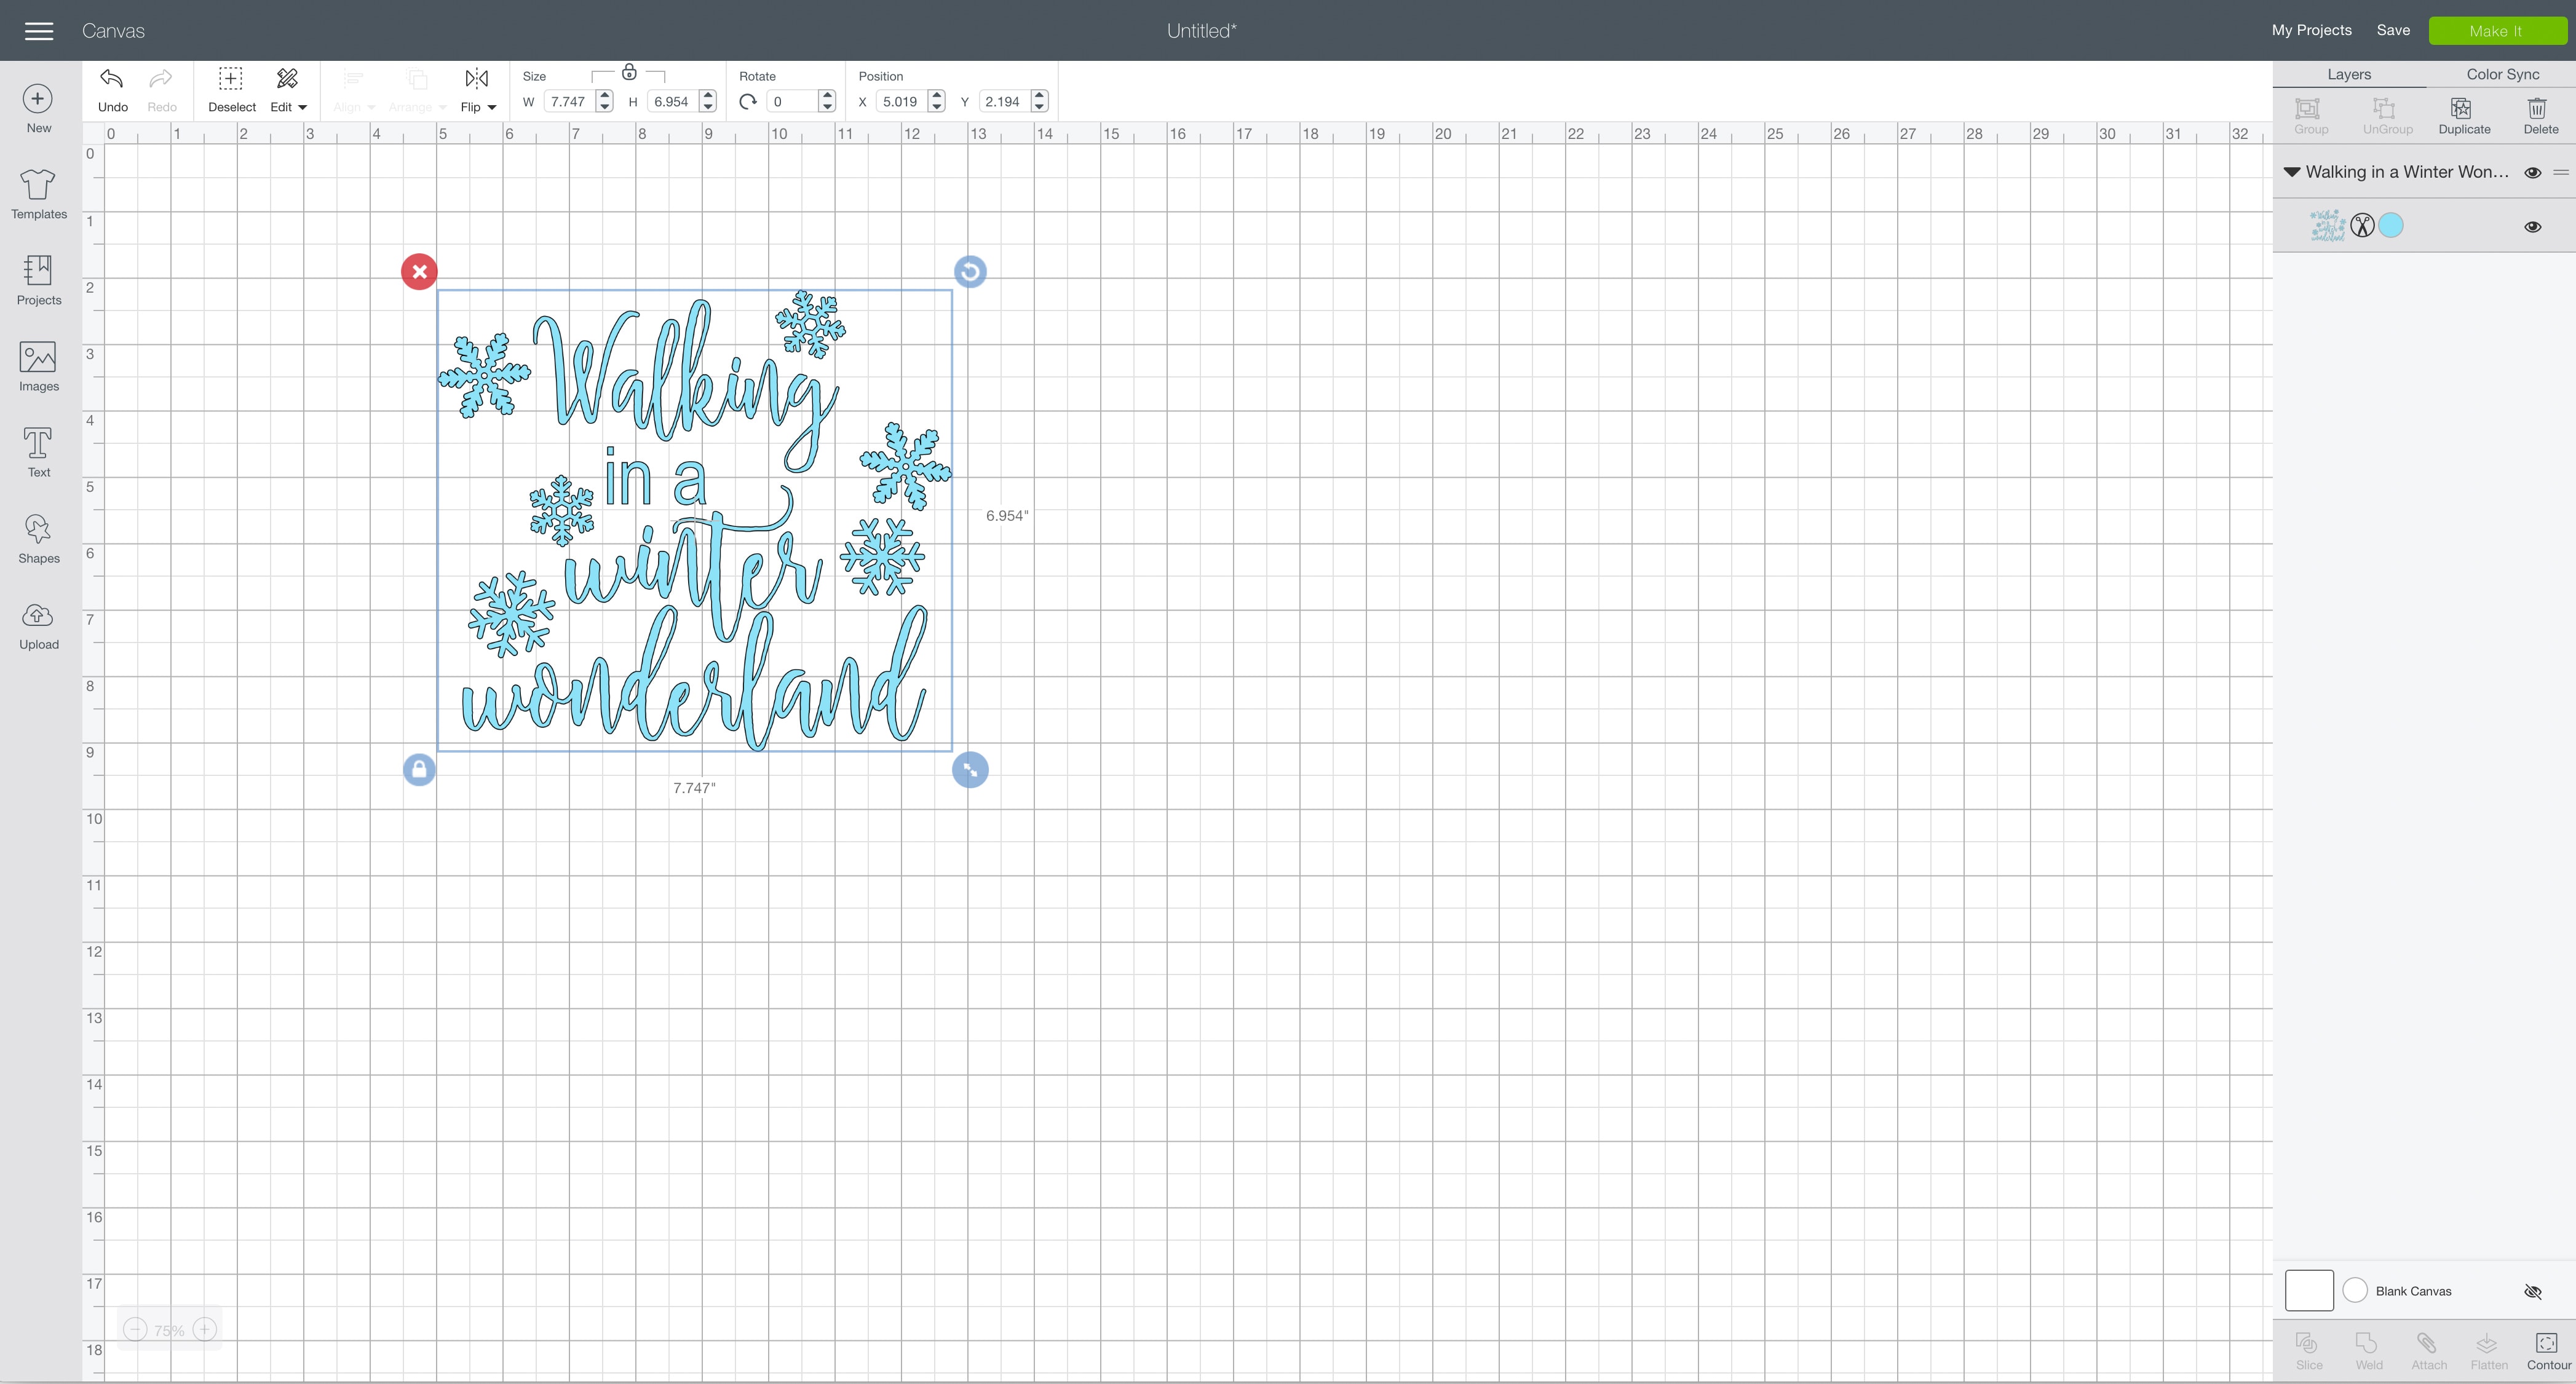
Start by opening Cricut Design Space and creating a new project.
Upload the SVG File
Then, upload the SVG file by selecting the Upload button and then Upload Image. Next, drag and drop or select the SVG file you want to upload.
After the SVG is uploaded, add the image to your design canvas.
If you need a little more help uploading SVG files, you can learn more in this post.
The SVG file will already be sized properly for this project.
Make It
Now it’s time to make your project!

Click on the Make It button in the upper right of the screen.
The first screen you will see is the Mat Preview Screen. This will show you all of the different mats needed for your project. Each mat represents another piece of material.
For this project, there is only one material.
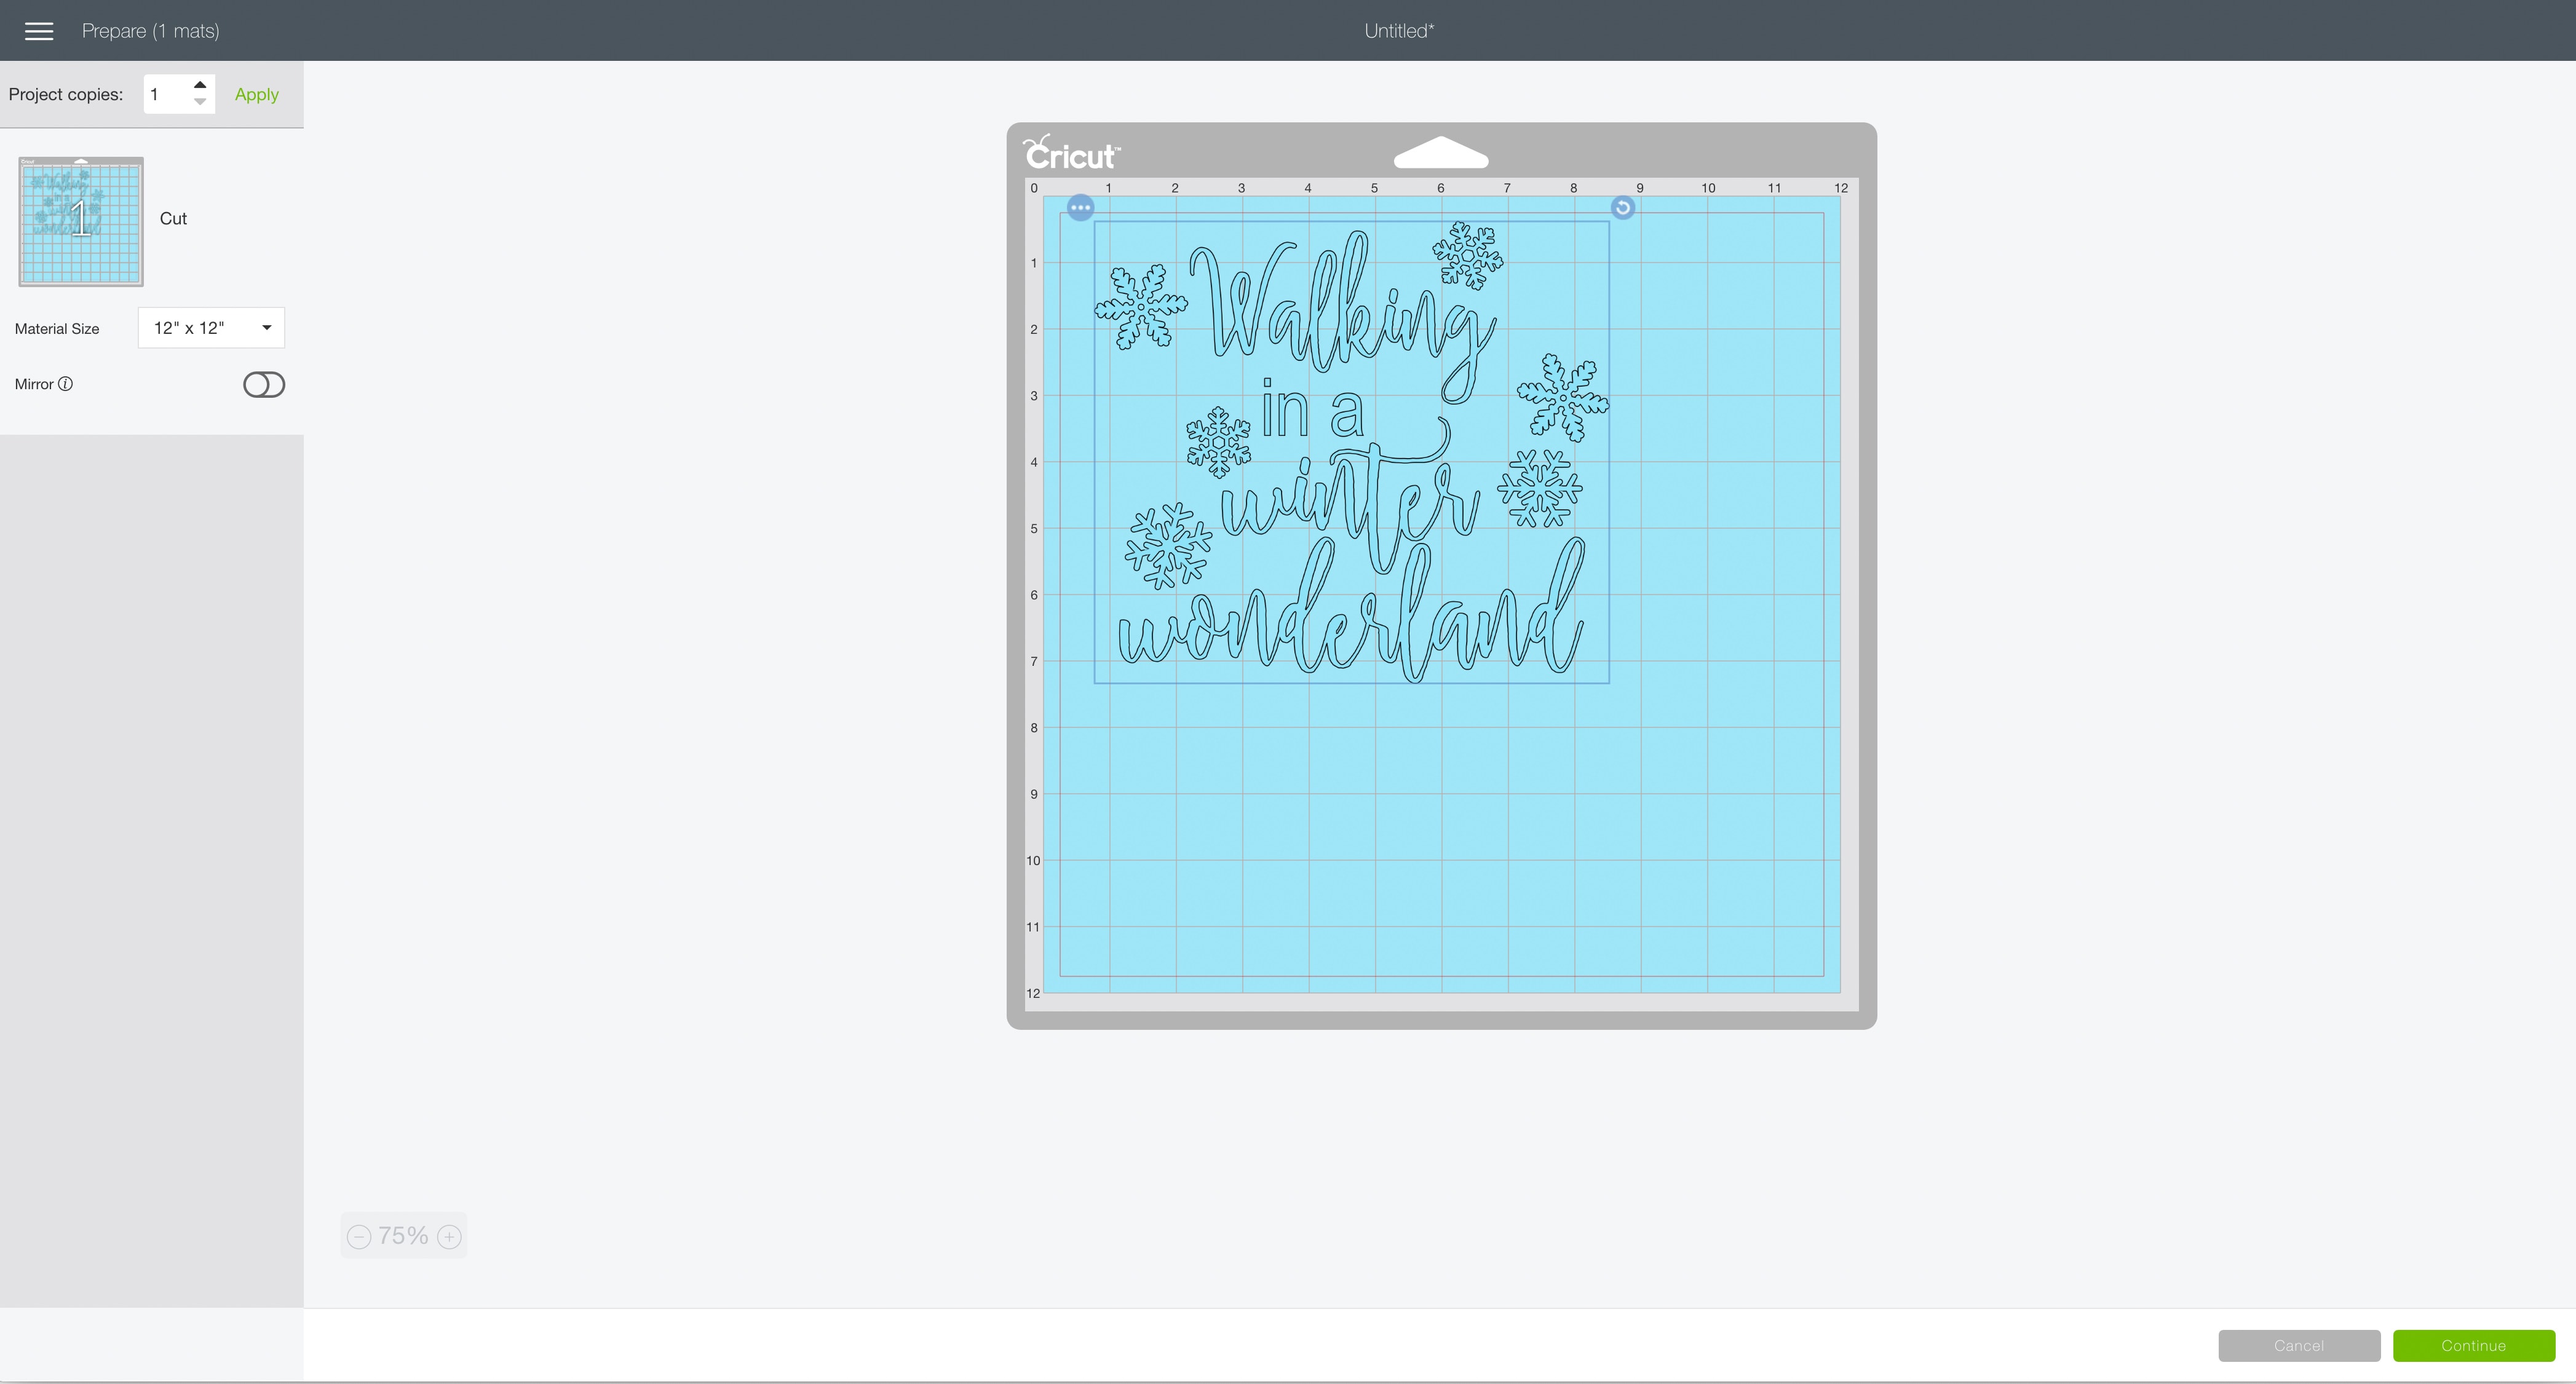
Click on the Continue button in the lower right of the screen.
Connect your Cricut machine. Then, adjust the settings as follows.
Material: Vinyl
Pressure: Default
Tools: Fine-Point Blade
Load the standard grip cutting mat with the light blue vinyl material into the machine. Then, press the flashing Go button to begin the cutting process.
How to Assemble The Project
Once all of your pieces are cut out, it’s time to assemble the project.

Take apart your shadow box. There will be a few different pieces. The frame, the glass, the inner piece, and the back piece.

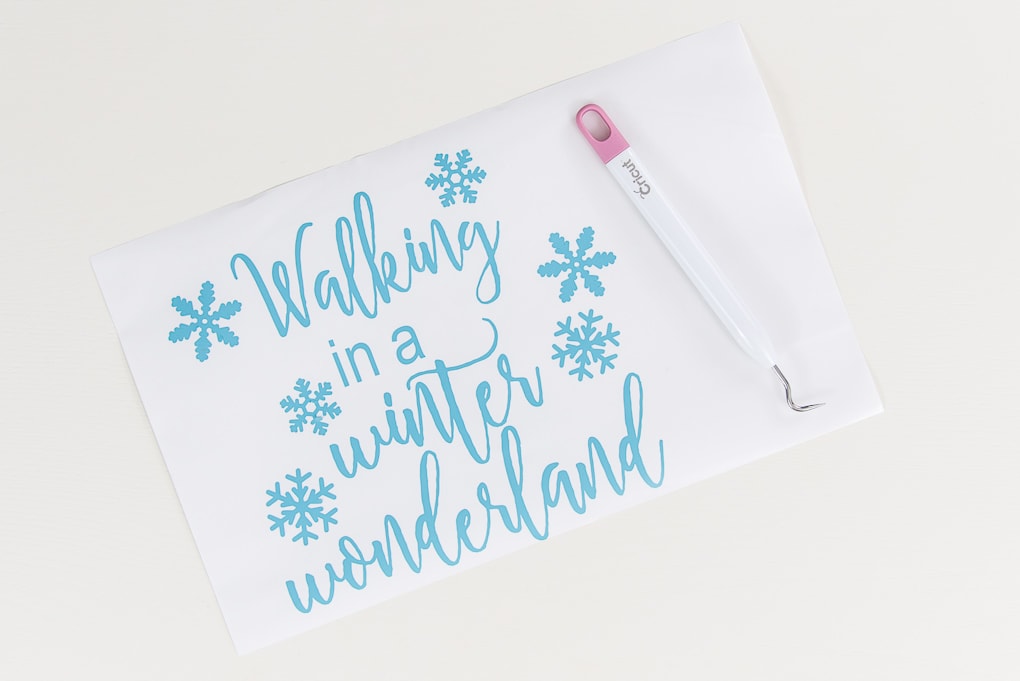
First, you will need to weed the vinyl design to remove the extra material. The goal is to leave only the vinyl for the design image behind.
Use the weeder tool to pick up the vinyl off the backing and easily remove it. After all of the extra vinyl is removed, you should be left with just the design on the vinyl backing.

I find it helpful to cut away the excess vinyl as you go so it doesn’t stick to the design.

Next, take a piece of transfer tape and place it over the entire design. I like to use these big rolls of transfer tape and cut it to the size of my design.
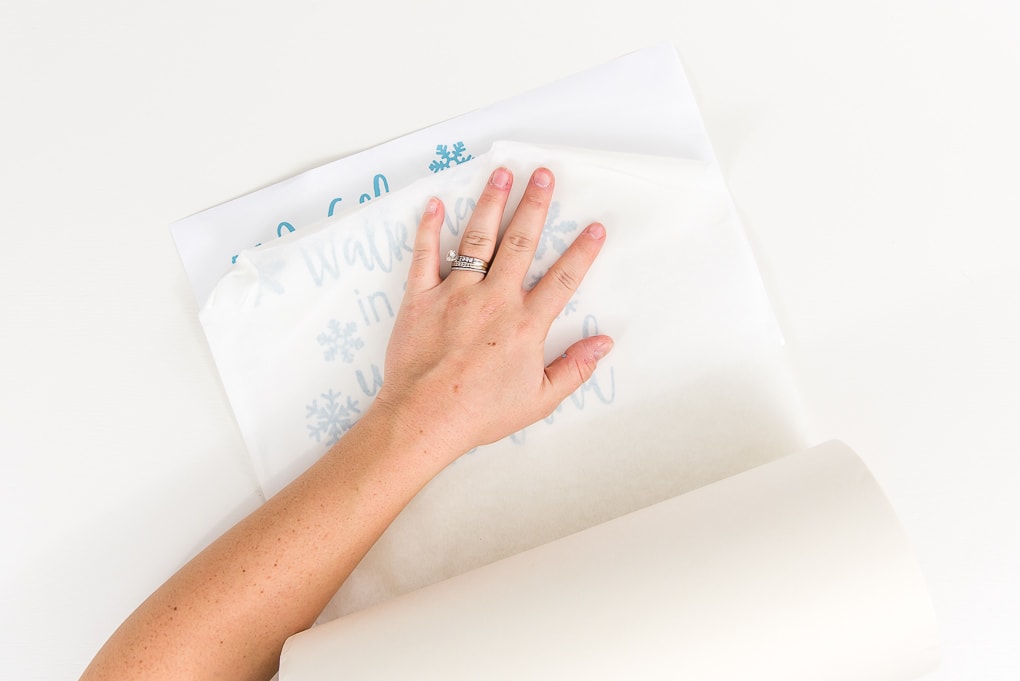
Smooth down the transfer tape with your hand or using the brayer tool.

Then, flip over the design and peel the vinyl backing away from the design. If the transfer tape is stuck properly, the vinyl will be attached to the transfer tape and will peel off of the vinyl backing.
But, if you are having problems with it sticking properly, flip the design over again and try to put more pressure on the transfer tape to get the vinyl to stick.

Next, place the transfer tape with the vinyl design onto the glass front of the shadow box.

Use the brayer tool to transfer the vinyl from the transfer tape onto the glass. Make sure to get all of the vinyl pieces pressed down so it will stick properly.

Then, take one corner of the transfer tape and peel it back and away from your design. If the vinyl is stuck properly, the transfer tape will peel right off leaving the design behind.


Now it’s time to assemble the inside of the shadow box.

Take the inner piece of the shadow box out and use a hot glue gun to attach mini Christmas trees to the bottom of the piece.

Then, take the fake snow and pour a small amount into the shadow box.
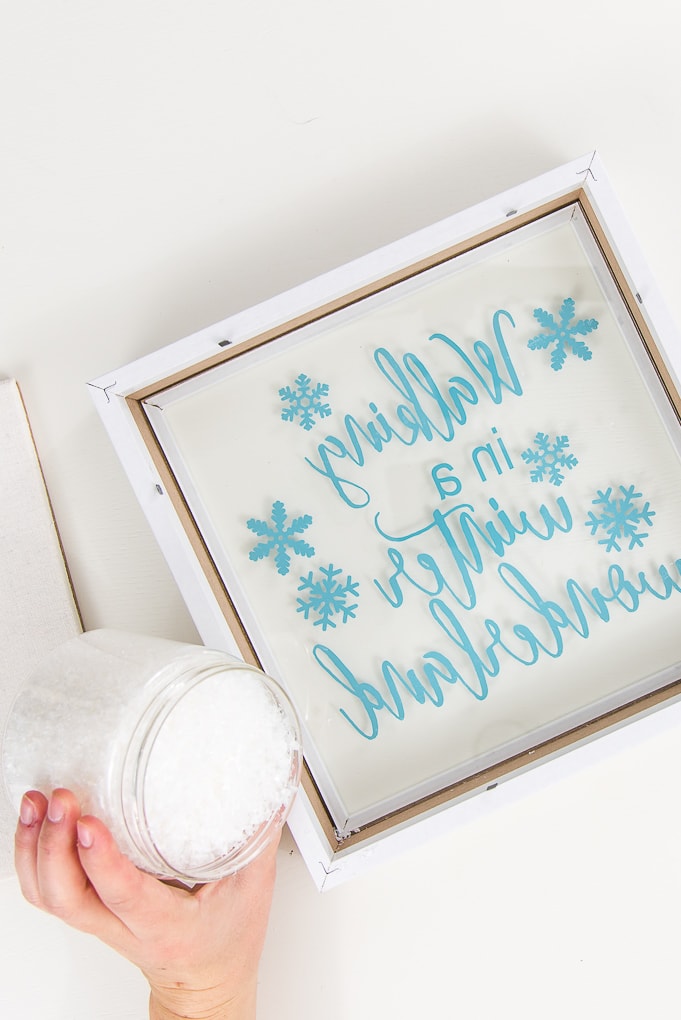

Try to concentrate the snow in the center so you have room for the mini Christmas trees.


Place the inner piece back inside the shadow box. Then, reattach the back piece of the shadow box.

Now your Walking in a Winter Wonderland Shadow Box is ready!

This pretty decoration can be used for the Christmas season, or even afterward during the remainder of winter.


I hope you love this Walking in a Winter Wonderland Shadow Box.
If you decide to make this project, I would love to see!
Or, tag me on Instagram. Use the hashtag #25daysofcricut so that we can all see each other’s projects too!
To see more projects from Have Yourself A Very Cricut Christmas: 25 Days of Homemade Holiday Crafts!, click here!
If you want to follow along and see all of the projects for Have Yourself A Very Cricut Christmas: 25 Days of Homemade Holiday Crafts!, you can do any or all of the following things:
- You can bookmark this blog post and visit it each day to see the newest project.
- You can join me and other Cricut fans over on Facebook in my group – Cricut For Your Home. When you make the newest project, you can snap a picture and share it with the group. Super fun!
- You can fill out this form and I’ll send you an email each day with the newest project.


I LOVE this shadowbox!! The whole time I was thinking “I could totally make this!” Thank you for sharing this one, it’s great!
Such a cute project! Love it!
Thank you, Lauren! It’s cute for winter — even after Christmas too!
>> Christene
Hi, Christene. I made Walking in a Winter Wonderland and it came out great. I want to be able to sell this at a craft fair I’ll be attending in November. Starting early since I have many projects to do. Do I need to buy a commercial license from you. Thanks.
Hi Fran! That sounds like such a great craft fair project. You can purchase a commercial use license for my design files here: https://keys-to-inspiration.myshopify.com/products/blanket-commercial-use-license
Thanks >> Christene