Learn how to build DIY bookshelves for a built-in desk. These bookshelves were created using plywood, but they look like a custom piece of furniture!
Want more home projects? Learn how to DIY a grid board and batten wall, easy craftsman window trim, and modern shiplap.
Welcome to week 5 of the One Room Challenge. If you missed the past few posts, I’m joining in with a group of other bloggers on a room makeover challenge.
I’m working on my modern and bright creative home office, and you can see my design plan here.
Last week I shared how to paint IKEA SEKTION cabinets. The built-in desk really coming together now! I can’t wait for the reveal. This week, I’m sharing all about building the DIY bookshelves in the middle of the built-in desk.

This post contains affiliate links for your convenience. For more information, see my disclosures here. A huge thanks to HANDy for providing product for this post! My favorable opinion of their amazing painting tools is 100% my own.
When I was designing my built-in desk, I knew that I wanted to have both open storage and hidden storage.
The IKEA SEKTION cabinets were perfect for all of the hidden storage that I needed. But, IKEA didn’t have any open storage options that would really fit into my desk design.
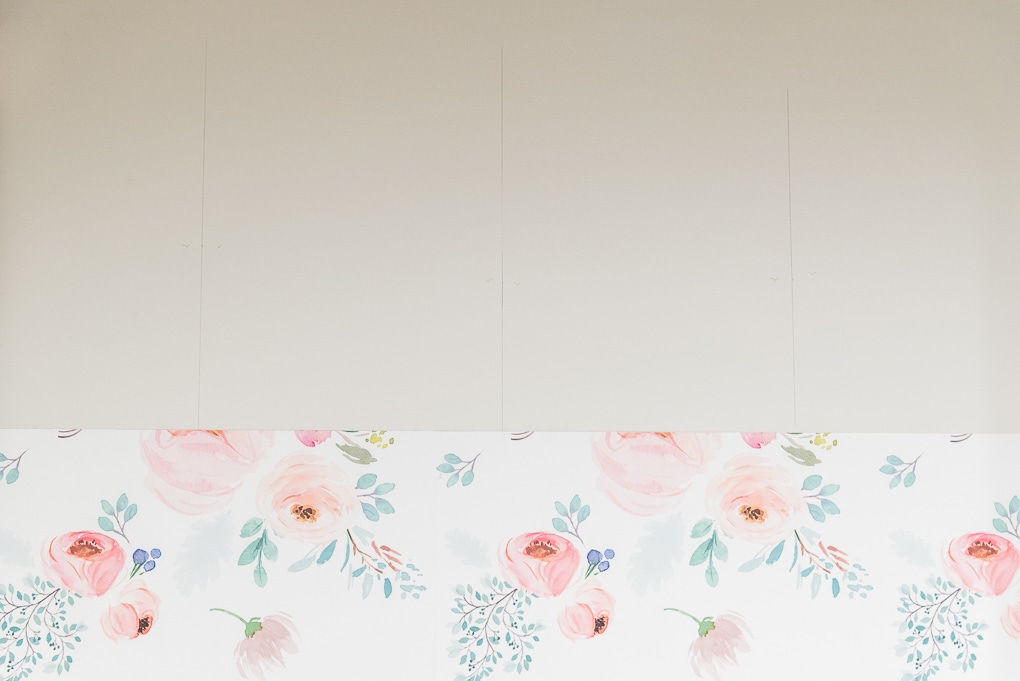
So, when I shared my original desk design plan, you may have noticed that the top center area of the desk was very empty.

I intentionally left that space blank so that I could build my own bookshelves and create a bunch of open shelving.
I wanted open shelves that fit perfectly into the space between the two tall IKEA SEKTION cabinets. That way they would look built-in and like they were originally part of the desk.
I created a quick sketch of what I wanted the bookshelves to look like. Instead of long shelves spanning the length of the desk, I created 6 cubbies of shelves.


Then, I measured the area where I wanted to put the shelves. Once I had a plan laid out, and all of the dimensions determined, it was time to build my DIY bookshelves.
Here’s how I built the bookshelves for my built-in desk.
Materials:
- ¾” Finishing Plywood
- Kreg Screws
- Wood Glue
- Coarse Thread Drywall Screws
- Wood Putty
- Primer — I used Zinsser B.I.N. Primer
- Enamel Paint — I used BEHR Swiss Cream
Tools:
- Miter Saw
- Table Saw
- Ryobi Brad Nailer
- Kreg K4 Jig
- Ryobi Drill
- HANDy Paint Pail
- HANDy Paint Tray
- Foam Roller
- Paintbrush
- Sandpaper
- Measuring tape
- Painters tape
- Level
Cut Plywood to Length
To construct the DIY bookshelves, we decided to use ¾” finishing plywood. We bought the sheets of plywood at Home Depot and had them cut down to 15” wide sections in the store. These sections were the exact depth that the bookshelves would be built to.
TIP: Home Depot will use a large panel saw to cut wood to whatever size you need.

Once we got everything home, we chose three of the pieces to be the “long pieces” of my bookshelf design. We used a miter saw to cut them to the overall length of the bookshelves.
Then, we measured and cut one of the sections into the 2 “side pieces.” These were cut to the overall height of the bookshelves. And finally, we measured and cut the other sections into the 4 “middle pieces.”
Create Pocket Holes
After everything was cut, we needed to create the pocket holes that would hold the entire structure together.
Pocket holes are a great way to join two pieces of wood together. They are much easier to make than they seem and they create a professional looking finished piece. All you need is a Kreg K4 Jig.
If you want to learn more about the Kreg K4 Jig and how to use it, check out this post.

Using the Kreg K4 Jig and a drill, we drilled 3 pocket holes on each end of the “side pieces” and on each end of the “middle pieces.” We also drilled 3 pocket holes on each end of one of the “base pieces.” This particular base piece would be the center shelf of the bookshelves.
Assemble the Frame
To assemble the outside frame of the bookshelves, we used 2 of the “base pieces” and the 2 “side pieces” to make a box. Then, using wood glue and Kreg screws, we attached these all together to make the overall frame.

Next, we added the third “base piece” to the middle of the box to make the center shelf.
To help stabilize the shelf while we were attaching it, we used the “middle pieces” as braces to hold the center shelf up. This helped to keep the center shelf at the right height while we were attaching it using wood glue and Kreg screws.

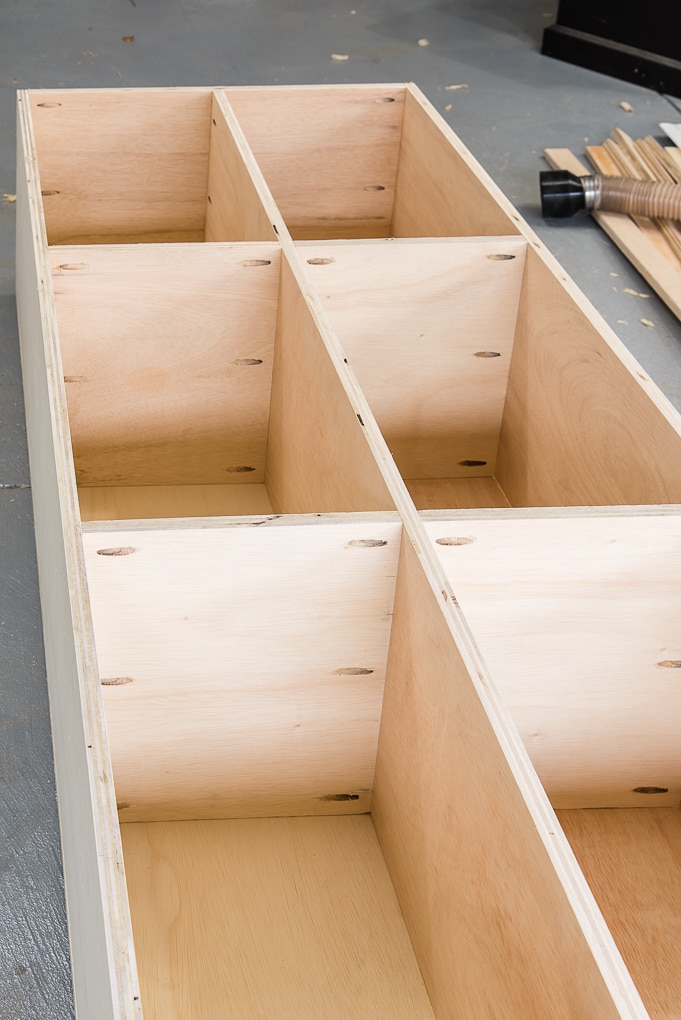
Finally, we added all of the “middle pieces” to the frame at the correct spots according to my original design drawing. Again, we used wood glue and the Kreg screws to join everything to the frame.

Create the Backing
To create the back of the bookshelf, we used two more sections of plywood. We attached the first section to the bottom of the bookshelf frame using screws.
Then, for the top section, we decided to create a french cleat.
A french cleat is a method of securing a cabinet or object to the wall. It’s a simple hanging method that can easily hold a large amount of weight.

To create the french cleat, you need to use a table saw to cut at least a 30-degree angle in a piece of wood. This creates two separate pieces that fit together like puzzle pieces.


One section of the french cleat is the cabinet piece. This piece gets attached to the back of the cabinet. The other section of the french cleat is the wall piece. This piece gets attached to the wall.
We attached the cabinet piece of the french cleat to the top back of the bookshelf frame using screws.
Add Finishing Details
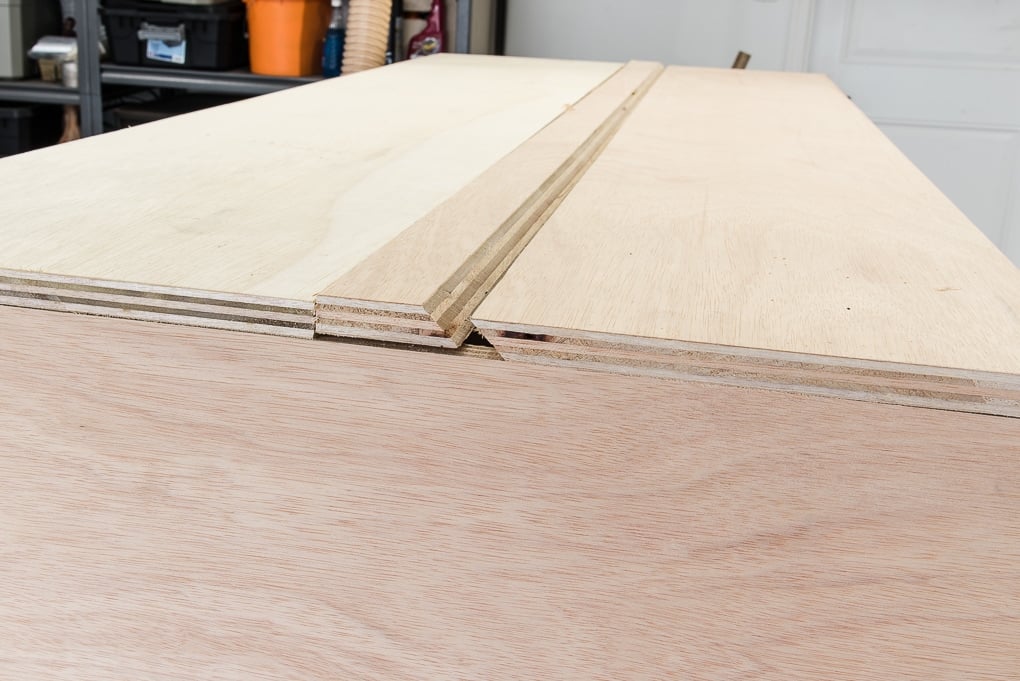
To cover the raw plywood edges in the front of the bookshelves, we decided to add edge banding. This would give the bookshelves that finished, solid look.
We used the table saw to create these thin pieces of wood, but you can also buy iron-on edge banding at Home Depot.
Then, we attached the edge banding using some wood glue and held it in place to dry using painters tape.

Finally, we applied two coats of wood putty to cover all of the pocket holes.

Prime and Paint
After everything was assembled and the wood putty was dry, I sanded the entire unit to prepare for painting.

First, I primed the bookshelves using the Zinsser B.I.N. Primer. It’s the same primer I used for the IKEA SEKTION cabinets and I really liked the coverage. PS: The smell is VERY strong because it’s shellac-based, so be warned.

After priming it was time to paint. I needed the bookshelves to match the IKEA SEKTION cabinets that were the original white color.
IKEA SEKTION cabinet frames are pure white, but the door and drawer fronts are “off-white.” It’s a little hard to tell the difference, but the off-white is just slightly more yellow. The bright white is very stark.
To make sure my bookshelves matched the upper cabinet doors, I needed to find a color match for the IKEA SEKTION cabinet doors that I bought.
I did some searching and stumbled upon one of my favorite bloggers Abby from Just a Girl and Her Blog. She redid her entire kitchen in her first home using IKEA SEKTION cabinets and found the perfect color match for the cabinet doors.
The best color match for IKEA SEKTION off-white cabinet doors is BEHR Swiss Cream from the Home Decorators Collection paint line.
Thanks Abby! This saved me so much time trying to color match on my own.
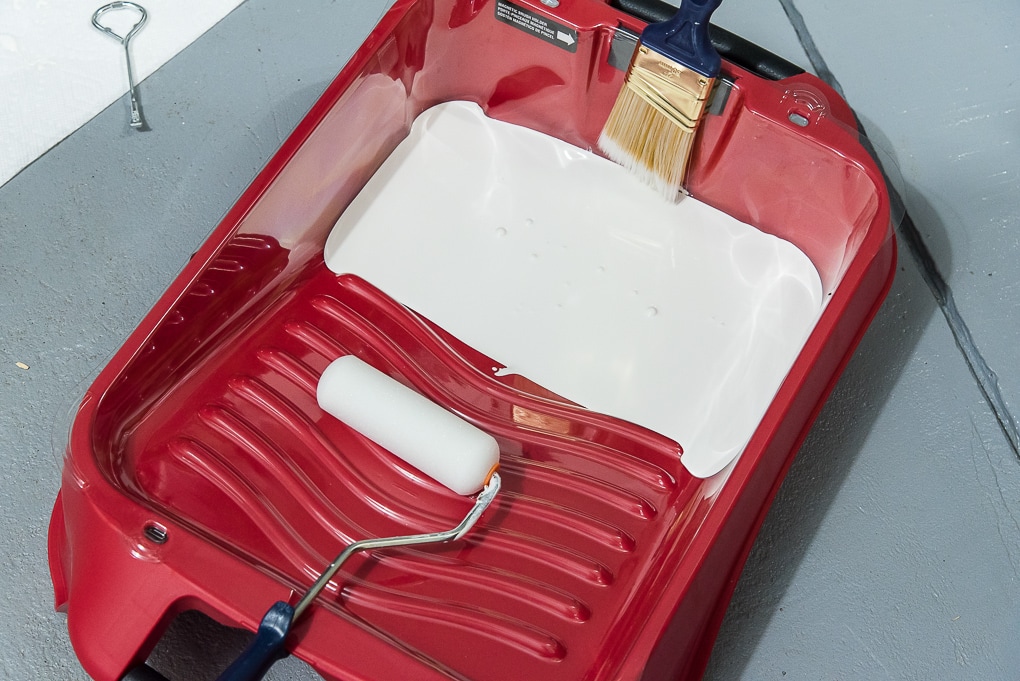
For this painting project, I ended up using both the HANDy Paint Pail and the HANDy Paint Tray. These tools were perfect for this job, and made painting the bookshelves so easy!
The HANDy Paint Pail is my go-to painting tool, especially when I’m edging.

It’s easy to carry around as you are painting. And it has a little magnet in the side to hold your paintbrush up and out of the paint. I used the HANDy Paint Pail while I was painting all of the edges and joints of the bookshelves.
The HANDy Paint Tray is new to me, but I’ve been dying to try it out.

It has a deep well for the paint and it’s much sturdier than your typical paint tray. There are even handles on each end so you can easily move it around when you are painting.

The HANDy Paint Tray also has the super useful magnet in the side to hold your paintbrush. And, you can hook your roller on the side so it also stays out of the paint.

I decided to use the HANDy Paint Tray for rolling the paint onto the bookshelves. It held both my paintbrush and my foam roller so I had quick access to both.
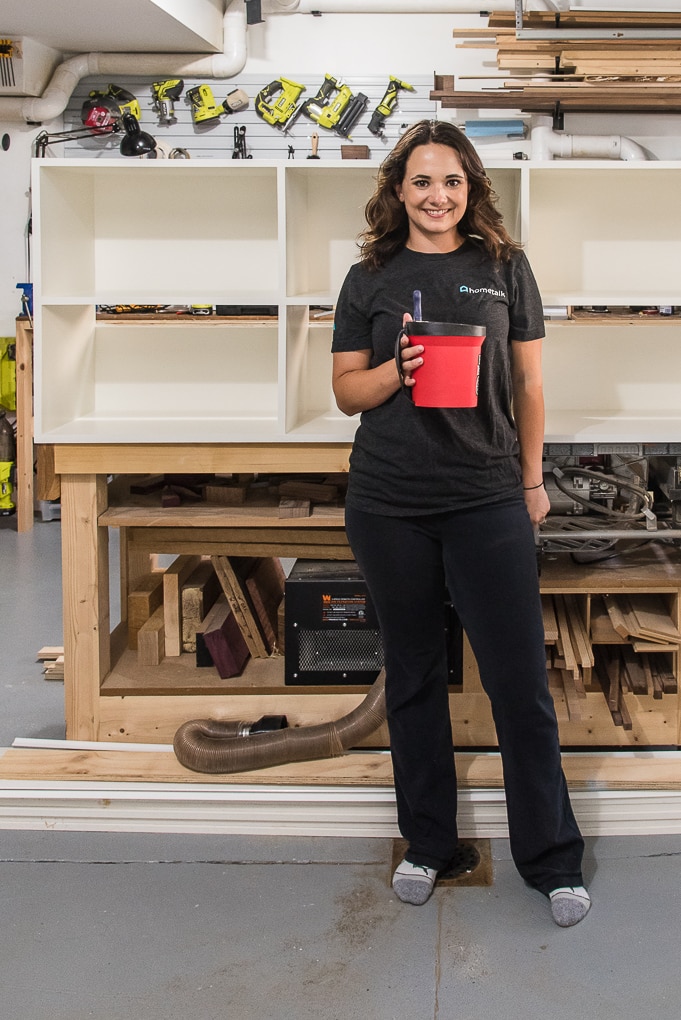
I painted the bookshelves with two coats of BEHR Swiss Cream and then let everything dry. Finally, I painted the french cleat wall piece that was going to be attached to the wall for hanging.

PS: In the photo above the bookshelves are flipped over. So that top painted surface is actually the part that will be facing the desk surface once it’s installed.
Install the DIY Bookshelves
To install the bookshelves, we first marked where the studs were in the wall.
Then, we measured the distance from the top of the bookshelf to the top of the french cleat cutout. This gave us the distance from the top edge of the IKEA SEKTION cabinets down to where the wall piece of the french cleat would need to be positioned on the wall.
Once we knew where the french cleat wall piece needed to be positioned, and made sure it was level, we used coarse thread drywall screws to anchor the french cleat directly into the studs.

Before we put the shelves in place, I taped up a few sheets of kraft paper to protect my newly installed wallpaper.

Then, we called a friend to help Ben lift the bookshelf into place. The entire bookshelf unit was way too heavy for me to lift and maneuver with Ben.
To attach it to the wall, they just had to lift the shelves over the french cleat wall piece. Then, they slowly lowered the french cleat cabinet piece that was attached to the back of the bookshelves down into the french cleat wall piece. They fit together exactly like a puzzle!

The whole process was much quicker than I expected. Especially since the bookshelf was so large. The french cleat definitely made attaching it to the wall and easy process.

After the shelves were in place, Ben grabbed onto the shelves and tried to hang his body weight from them to make sure there were not going anywhere. Very secure!
The only part that has to be cleaned up is the french cleat cutout and the screw holes in the back of the shelves. I’m going to wood putty over those and then paint over everything.
Are you starting to see the desk come together now? I’m actually impressed with how “custom” our DIY version of a built-in desk looks!

Yes, I’ve already started filling up the storage shelves because my office and craft supplies were all over the room! I’m dying to get everything into the built-in desk. Next project – organizing!
Stay tuned for more updates on the built-in desk. Next week is the big reveal!.

If you’d like to see how the other bloggers are doing with their One Room Challenge spaces, you can do so in this link up.
You can follow along as we transform (a section of ) our basement into my modern and bright creative home office via the links below:
Planning a Modern and Bright Creative Home Office {One Room Challenge Week 1}
How to Build a Desk using IKEA SEKTION Cabinets {One Room Challenge Week 2}
The Best Removable Wallpaper Patterns
How to Install Removable Wallpaper {One Room Challenge Week 3}
How to Paint IKEA SEKTION Cabinets {One Room Challenge Week 4}
DIY Bookshelves for a Built-In Desk {One Room Challenge Week 5} (You’re Here)
Modern and Bright Creative Home Office Reveal {One Room Challenge Week 6}


Eeek this is looking amazing Christene! I always admire how handy you guys are! Great job building the shelves, and that paint tray looks so neat. I’ll keep that in mind in case I ever get motivated to paint! 🙂
Thanks so much Caitlin! 🙂 It was a fun, but also tedious, project. I’m really happy with how it turned out! And yes!! I really do love those HANDy products. They are so helpful!
>> Christene
Beautiful office! Do you have a post on the trim you used to complete the “built in” look?
The french cleat would have created a gap between the wall and the unit, so did you apply trim along the bottom of the shelves to hide the gap?