Can you paint IKEA cabinets?
IKEA cabinets and furniture are a budget-friendly way to get a custom look in your home. However IKEA cabinets don’t come in any color. They have a set selection for you to pick from.
What if you want to change the color of your IKEA cabinets or furniture. Can you paint over an IKEA laminate surface?
In this tutorial, I’m sharing exactly how to paint IKEA SEKTION cabinets using a paint sprayer.
Welcome to week 4 of the One Room Challenge. If you missed the past few posts, I’m joining in with a group of other bloggers on a room makeover challenge.
I’m working on my modern and bright creative home office, and you can see my design plan here.
Last week I shared how to install removable wallpaper. The built-in desk is starting to look so good! I can’t wait to show you more.
This week, I’m sharing all about the cabinet painting process.
This post contains affiliate links for your convenience. For more information, see my disclosures here. A huge thanks to HANDy for providing product for this post! My favorable opinion of their amazing painting tools is 100% my own.
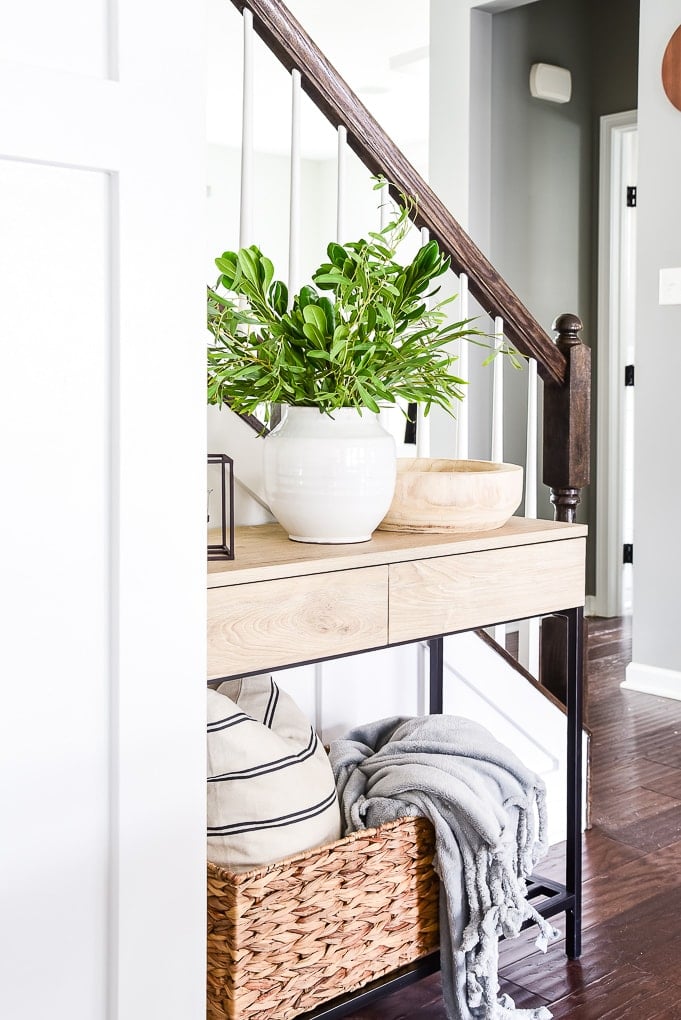
Desk from IKEA Cabinets
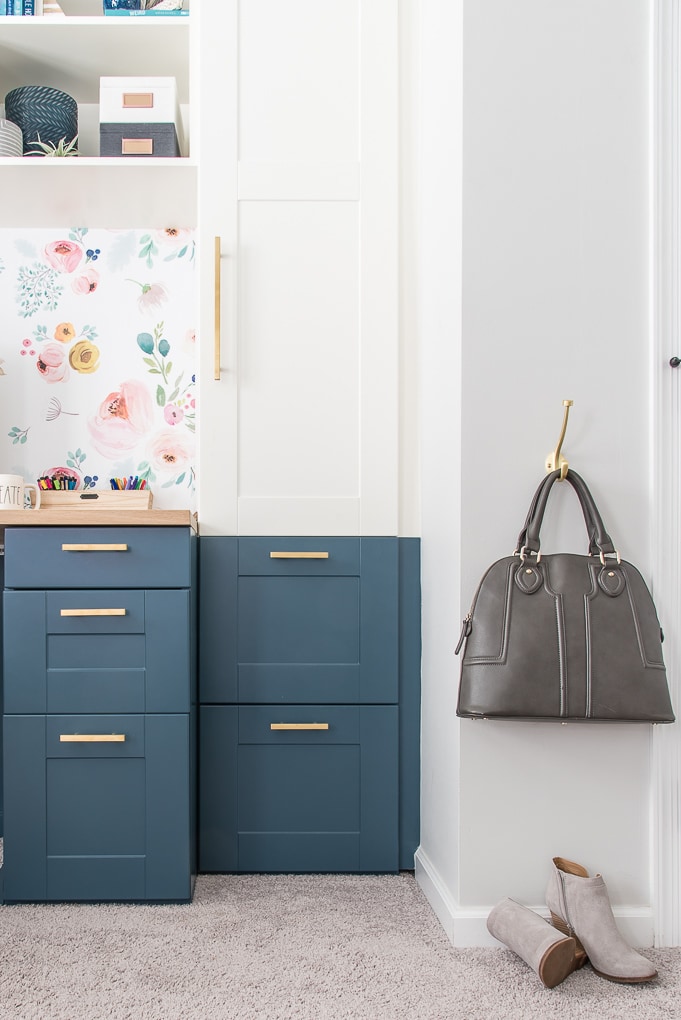
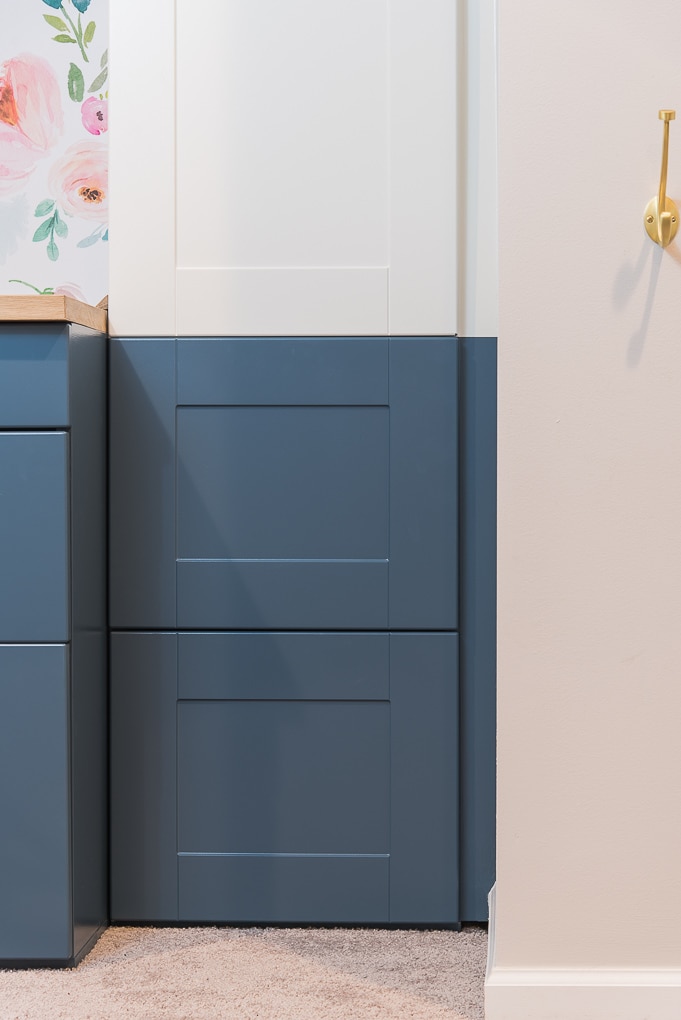
One of my favorite parts of my original design plan was the navy lower cabinets on the built-in desk. I love the look of the white upper cabinets and dark lower cabinets. It creates a great contrast and it’s a fun way to add some color.
When I was designing my built-in desk, I decided to use IKEA SEKTION cabinets.
What are IKEA SEKTION Cabinets?
IKEA SEKTION cabinets are kitchen cabinets.
They are made to be flexible and allow you to organize your kitchen however you want. Because they are so functionally designed, they are perfect for my office built-in desk.
The cabinets come in a variety of different designs to get whatever look you want for your kitchen.
IKEA has a good selection of cabinet fronts, but they didn’t have exactly what I was looking for. The frames of the cabinets were white and the other “color” option they had was gray.
So I decided to buy all white cabinets and drawer fronts. My plan was to leave the upper cabinets white and paint the lower cabinets navy blue.

Can you Paint IKEA SEKTION Cabinets?
The answer is yes! But you need the right kind of paint and to follow the steps in this tutorial to get the best finish for your IKEA cabinets.
IKEA SEKTION cabinet fronts are already finished and painted. They are made of laminate wood, instead of solid wood, which means they have a glossy texture.
If you tried to just paint the glossy laminate cabinets, the paint will chip off. Instead, you’ll need to prepare the surface to be painted so that you can get the smoothest finish.
This is the best way to reface IKEA cabinets.
Materials & Tools for Painting IKEA Cabinets
Materials
- Zinsser BIN Primer
- Semi-gloss Enamel Paint — I used BEHR Marquee in the color Rush Hour. This type of paint is great for a piece of furniture.
Tools
- Very Fine Sandpaper
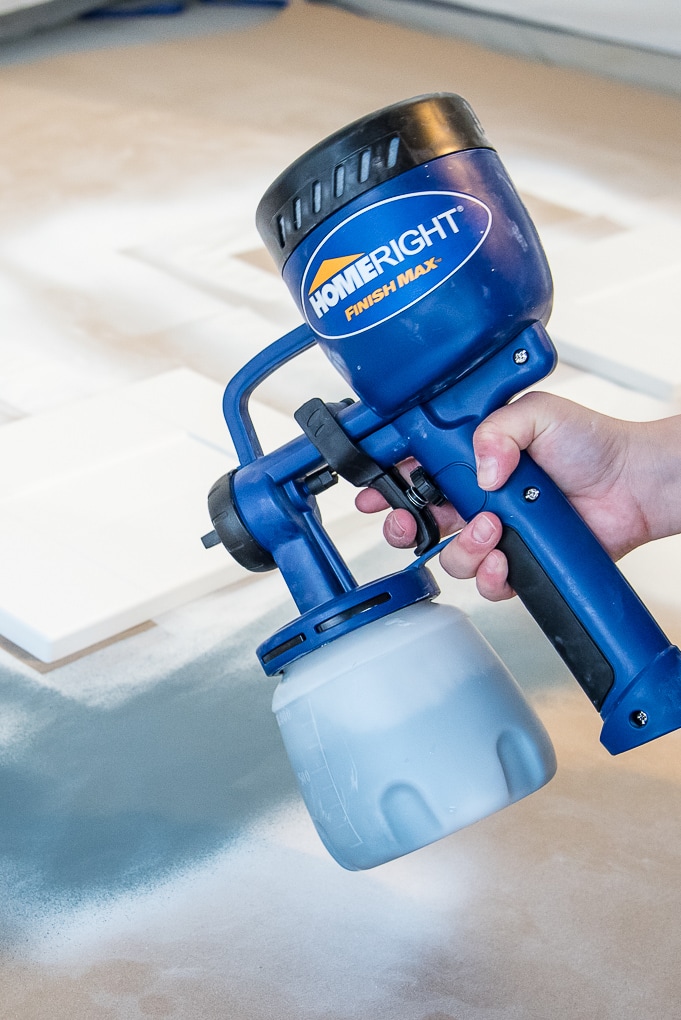
- HomeRight Paint Sprayer
- Paintbrush
- Foam Paint Roller
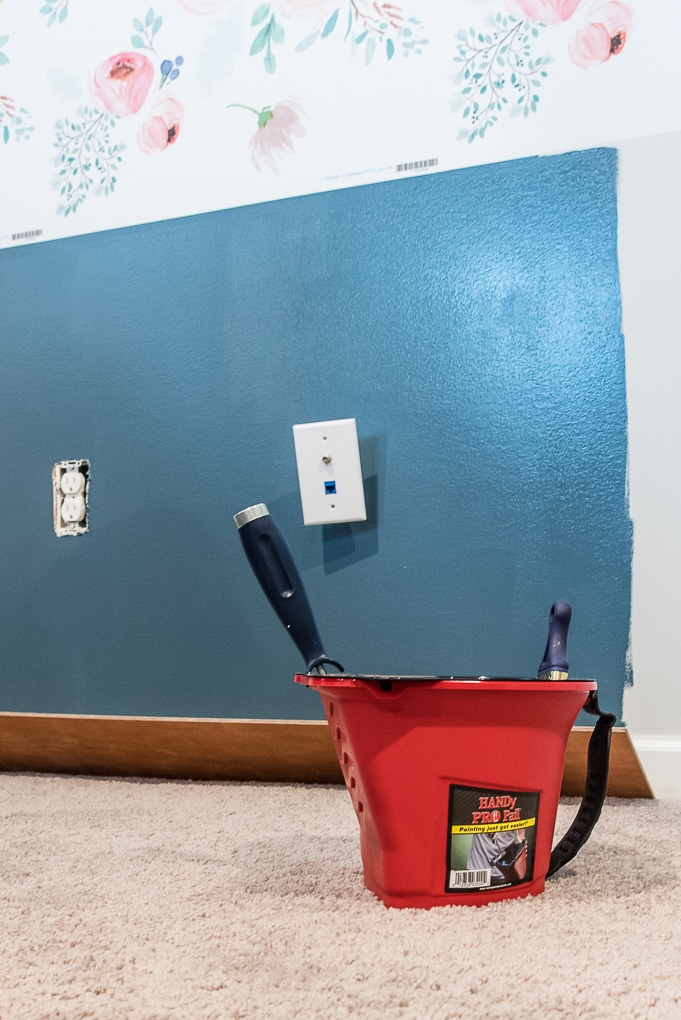
- HANDy Pro Pail
- HomeRight Spray Shelter
- Kraft Paper or Drop Cloths
- Frog Tape
- Microfiber Cloths
- Liquid Grease Removal Cleaner (optional)
Best Primer for IKEA Furniture
I did some research and looked up the best ways to paint IKEA cabinets. I found so many recommendations for a shellac based primer that promised to help paint stick to IKEA cabinets.
The primer that I decided to used is called Zinsser B.I.N. Primer. It’s a shellac based primer and is essential if you want to paint IKEA cabinets.
You can’t use a water-based primer or oil-based primer to paint over laminate. It won’t work.

This shellac based primer says that it will stick to all surfaces. I was sold!
There are a few cons to using this primer.
First, it’s a little expensive compared to other primers.
Second, it has a very strong smell when you are applying it. It goes away after the primer is dry, but you will definitely need to be in a well-ventilated area when you are using this primer.
Which Paint to use on IKEA Furniture
To get the best finish for your painted IKEA cabinets or furniture, you will want to use a high-quality paint.
I chose to use the BEHR Marquee line of paint. This paint promises to cover in one coat. I think it was the best paint for this project.
While I’ve found this is true for painting the walls, for furniture I decided to do two coats of paint.
The BEHR Marquee paint is perfect for this type of painting project. I decided to use the paint color Rush Hour to get the beautiful navy blue from my design plan.
I also chose a semi-gloss finish so that the cabinets would have a sheen. I also think that a satin finish would look beautiful and give you that factory finish look. Choose the paint finish that you prefer.

BEHR Rush Hour
- MQ5-25
- Blue Color Family
- Interior/Exterior One-Coat Hide
How to Paint IKEA Kitchen Cabinets

How to Paint IKEA Kitchen Cabinets
Learn how to paint IKEA SEKTION cabinets using a paint sprayer. Here's the secret to painting over the laminate surface of IKEA furniture.
Materials
- Zinsser B.I.N. Primer
- Semi-gloss Enamel Paint -- I used BEHR Marquee in the color Rush Hour
Tools
- Very Fine Sandpaper
- HomeRight Paint Sprayer
- Paintbrush
- Foam Paint Roller
- HANDy Pro Pail
- HANDy Pro Pail Liners
- HomeRight Spray Shelter
- Kraft Paper or Drop Cloths
- Frog Tape
- Microfiber Cloths
- Liquid Grease Removal Cleaner (optional)
Instructions
- Prepare IKEA Cabinets for Painting: Remove the doors and drawer fronts from the cabinets. If the cabinets are existing cabinets, use a grease removal cleaner to get off any grease and oil.
- Sand IKEA Cabinets: Use a very fine grit sandpaper to rough up the surfaces of the cabinets you are painting. Sand all surfaces that you want to paint so that the cabinets are prepared for the paint to adhere. After sanding, use a microfiber cloth to remove all of the sanding dust.
- Prime IKEA Cabinets: Use a foam roller and a paintbrush to apply a shellac based primer to all surfaces of the cabinets. The primer that you need to use is the Zinsser B.I.N. Primer, which is a shellac based primer.
- Paint IKEA Cabinets Doors: Use a paint sprayer to apply 2 even coats of high quality paint to all cabinet surfaces. Let the cabinets dry between coats.
- Paint IKEA Base Cabinets: Use a foam roller and a paintbrush to apply 2 even coats of high quality paint to all of the visible surfaces on the base cabinets.
- Let Painted IKEA Cabinets Cure: Let the cabinets dry and cure for at least 24 hours before handling them.
- Assemble the Painted IKEA Cabinets: Assemble all of the painted cabinets. Add any hardware to the drawer fronts and doors.
Notes
The time will vary depending on how many IKEA cabinets you have to paint.
The first step was to paint all the drawer fronts for the base cabinets. I also needed to paint the base cabinet frames themselves.
I’ve never painted laminate furniture before, so this was a learning experience for me. There were definitely things that I wish I did differently.
Nothing went wrong, but I did a lot more work than was necessary for some of the steps.
Even though I did things that hard way, it all worked out. And now I know exactly what to do the next time. Hopefully, you can learn from me so you don’t create extra work for yourself.
Step 1: Prepare IKEA Cabinets for Painting
First you will need to prepare the IKEA cabinets for painting. The right prep will make all the difference in your project.
I painted my cabinets before I assembled them. But if you are painting existing cabinets, you will want to remove all of the doors from the base cabinets.
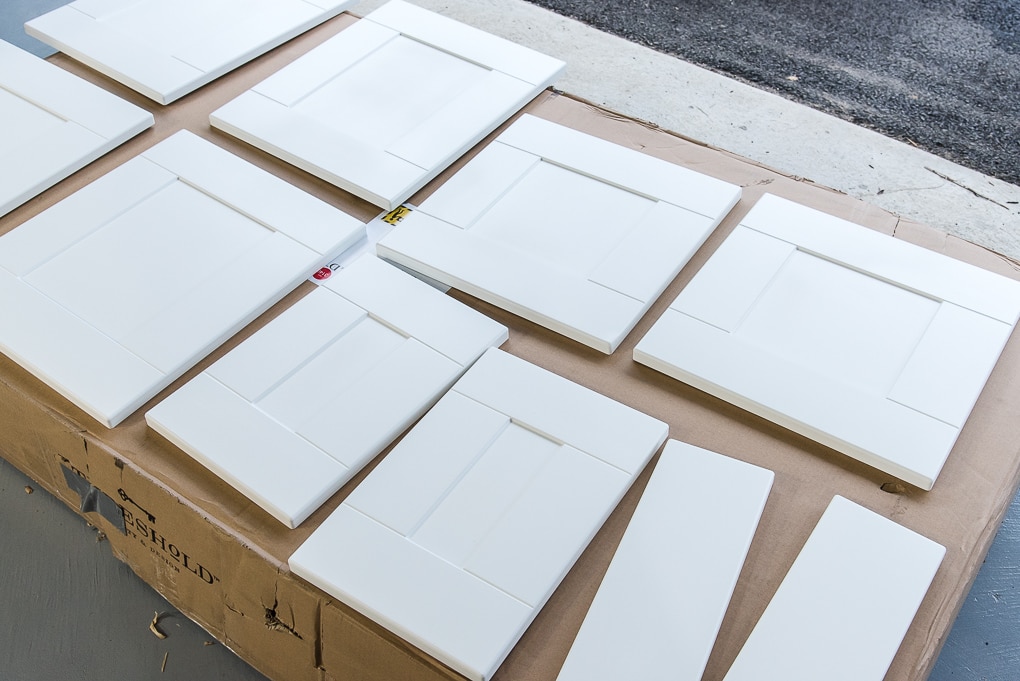
Since my cabinets were brand new, I didn’t do any sort or grease removal. However, if you are painting existing cabinets, I would recommend going the extra step and using a grease remover to prep the cabinets.
A good liquid grease removal cleaner will help you get off any grease or oil from the cabinets. These extra steps will give you the best chance at a flawless, smooth finish for your IKEA piece.
Step 2: Sand IKEA Cabinets
To prep all of the cabinets for painting, I sanded all of the surfaces with a fine grit sandpaper and a sanding block. This helped to rough up the surface of the cabinets so that the paint would adhere better.
This is where I made my first small mistake. At first, I used a fine grit sandpaper, but not fine enough. It created some scratches on the rough surface of the drawer fronts.
Now that the dark paint is on the cabinets, you can’t see those scratches.
But, if I was going to do this again, I would have used a VERY fine grit sandpaper and only lightly sanded. I would recommend a 220 grit sandpaper or higher.
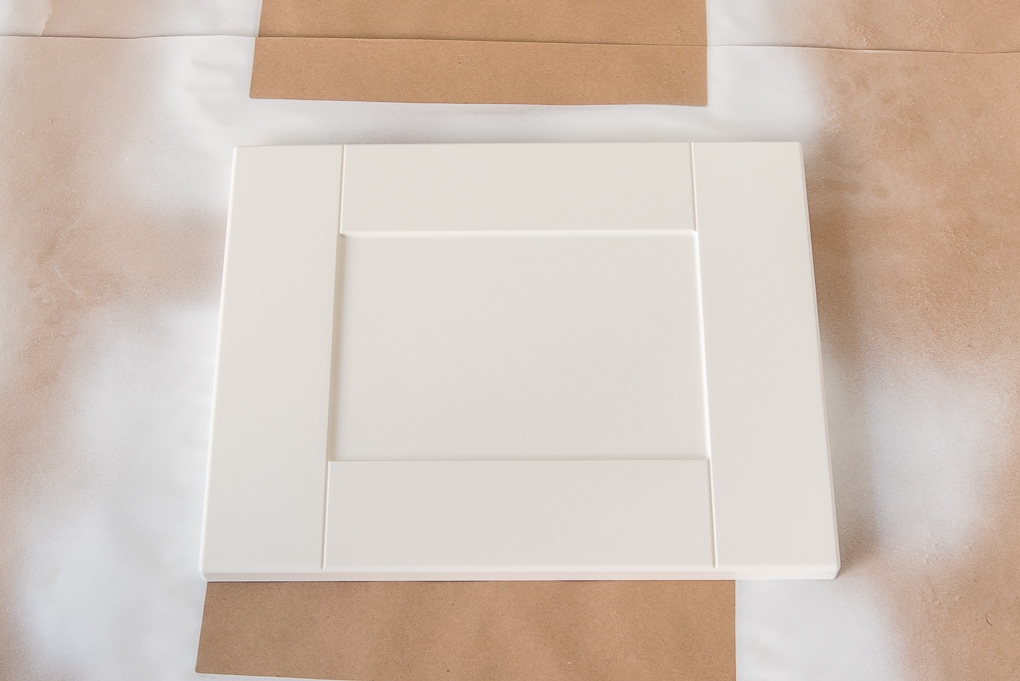
Once everything was sanded, I used microfiber cloths to remove any dust from the surfaces.
First, wet the microfiber cloth to pick up any loose dust. Then go back over all of the surfaces with a dry microfiber cloth to finish the cleaning process.
Step 3: Prime IKEA Cabinets
Next, you will need to prime all of the surfaces. I decided to prime and paint my cabinets in the garage.
The primer that you need to use is the Zinsser B.I.N. Primer, which is a shellac based primer.
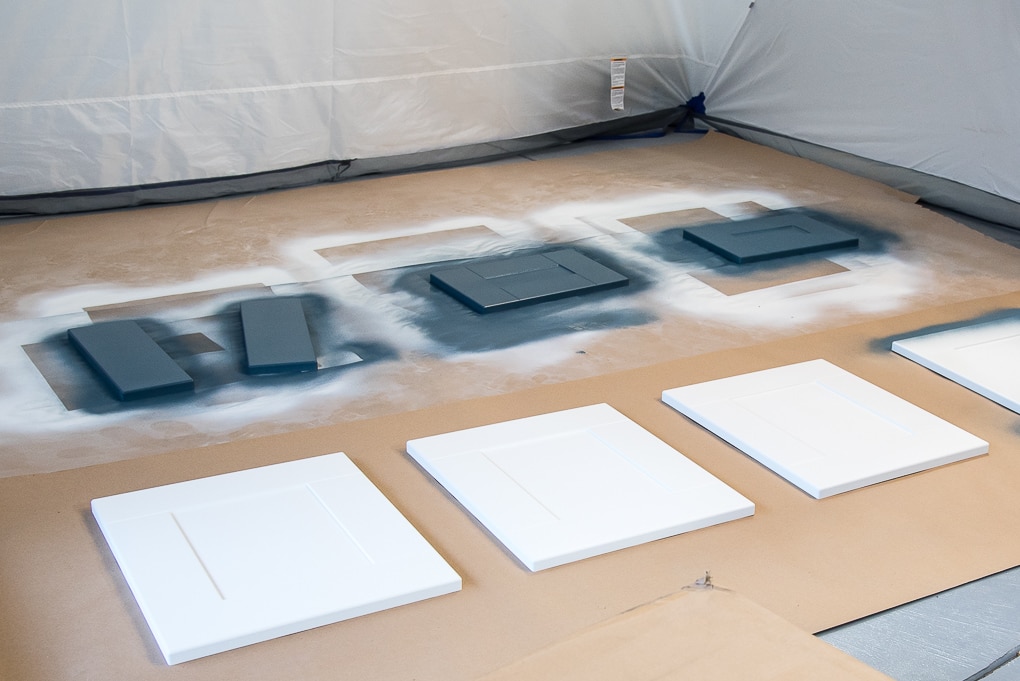
Setup Painting Area Using a Paint Shelter
I set up a painting area using this large spray shelter from HomeRight. It goes together just like a camping tent and provides good protection so you don’t get paint all over the place.
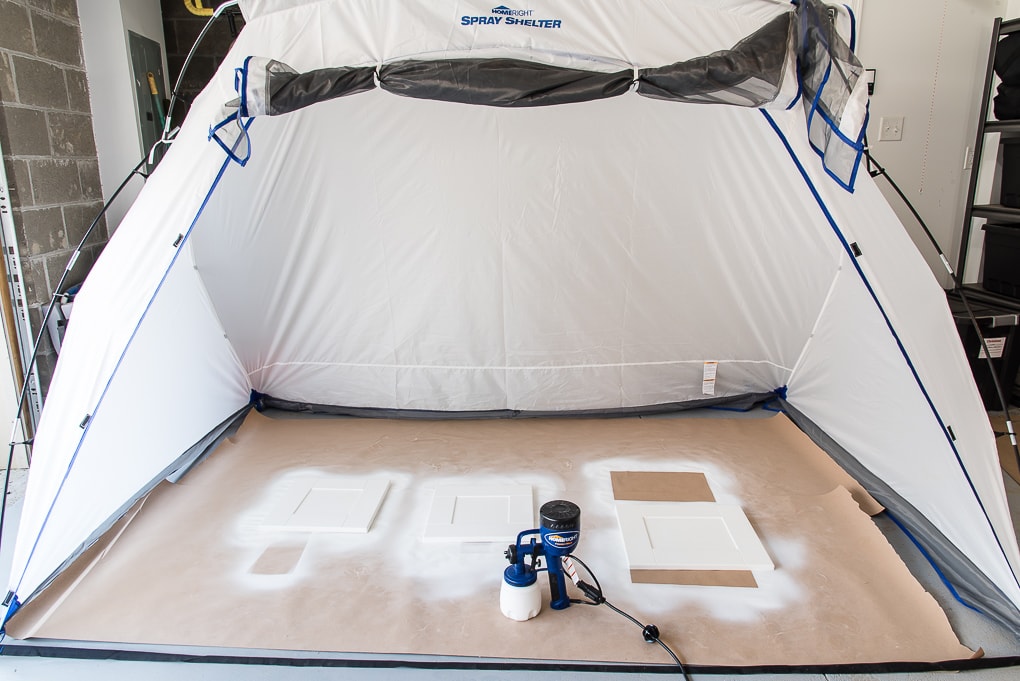
The spray shelter doesn’t have a base, so I decided to use kraft paper.
I’ve had one of these rolls of kraft paper for years now. It’s perfect for just about any project, and it never seems to run out. In our home, we call it the “never-ending kraft paper.” You could also use a drop cloth instead.
Once the paint shelter was setup, it was time to actually start priming the cabinet doors and bases.
To prime the IKEA cabinets, use a foam roller and a paintbrush. Apply the primer evenly to all surfaces that you want to paint.
This is where I made my second mistake of this project.
I knew that I wanted to use a paint sprayer for the navy blue paint. But I also thought it would be really handy to use the paint sprayer for the primer too.
So, I put the primer into the paint sprayer and primed all of the cabinets.
It worked really well and provided that nice even finish.
But…YOU SHOULD NOT DO THIS!
Never use Shellac-Based Primer in a Paint Sprayer
I was so eager to get started that I didn’t read all of the instructions on the paint sprayer. I didn’t realize you can ONLY use water or oil-based paints and primers in this tool.
I also didn’t think about the cleanup.
Because the primer is shellac-based, you can’t clean it with water. Which is a HUGE hassle when you need to clean a paint sprayer.
I put the paint compartment and the other pieces of the sprayer into the sink to clean and the leftover primer started to solidify. It got almost crumbly and stiff and would not come off of the surfaces.
And then I started to panic because I thought I had just ruined my new paint sprayer!
Ben came to the rescue and told me to try using rubbing alcohol to clean it off. So, I sat there for a very long time using rubbing alcohol and the tiny cleaning tools that come with the paint sprayer to try and unclog all of the primer from the little paint sprayer components.
Let me repeat, do not do this! It was such a hassle. And I could have ruined my paint sprayer.
It would have been much quicker to prime with a foam roller and paintbrush. That’s the method that I recommend if you are painting IKEA Cabinets.
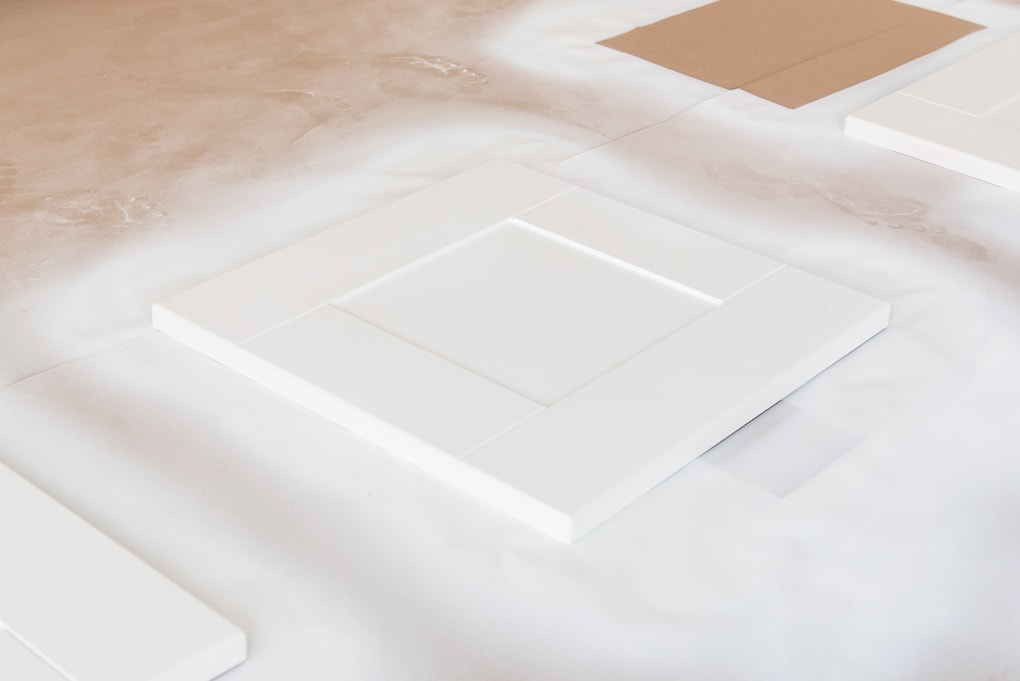
Step 4: Paint IKEA Cabinet Doors
The next step is to start painting.
Once the primer was dry, I started by painting the drawer fronts. If you also have cabinet doors, you would paint those in this step as well.
If you have very dark cabinets and are painting them lighter, it might be helpful to apply a second coat of primer before you paint.
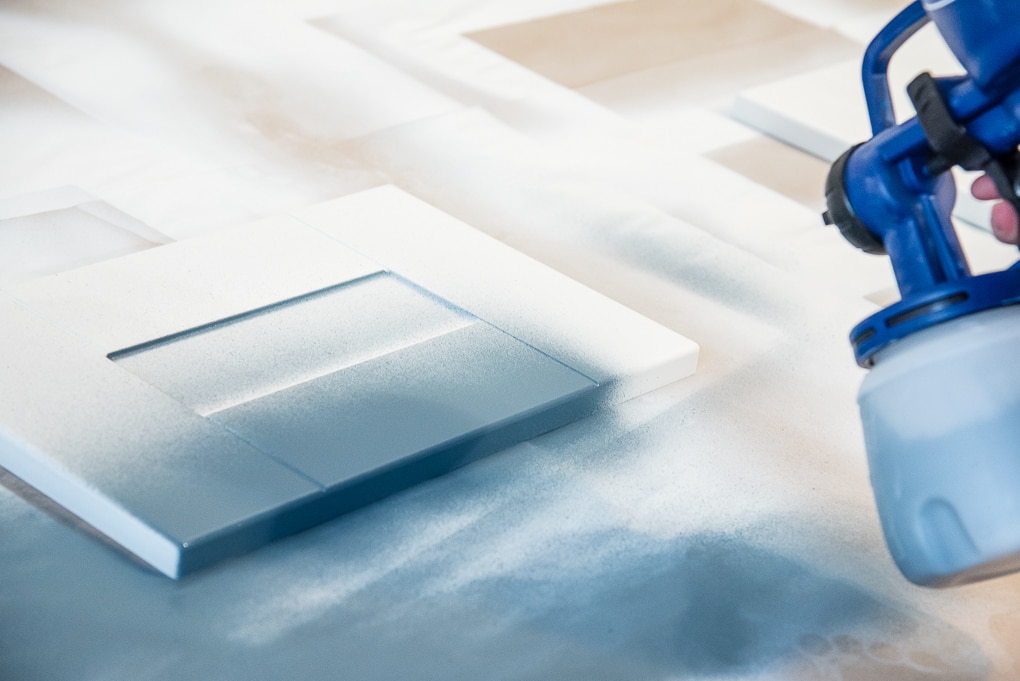
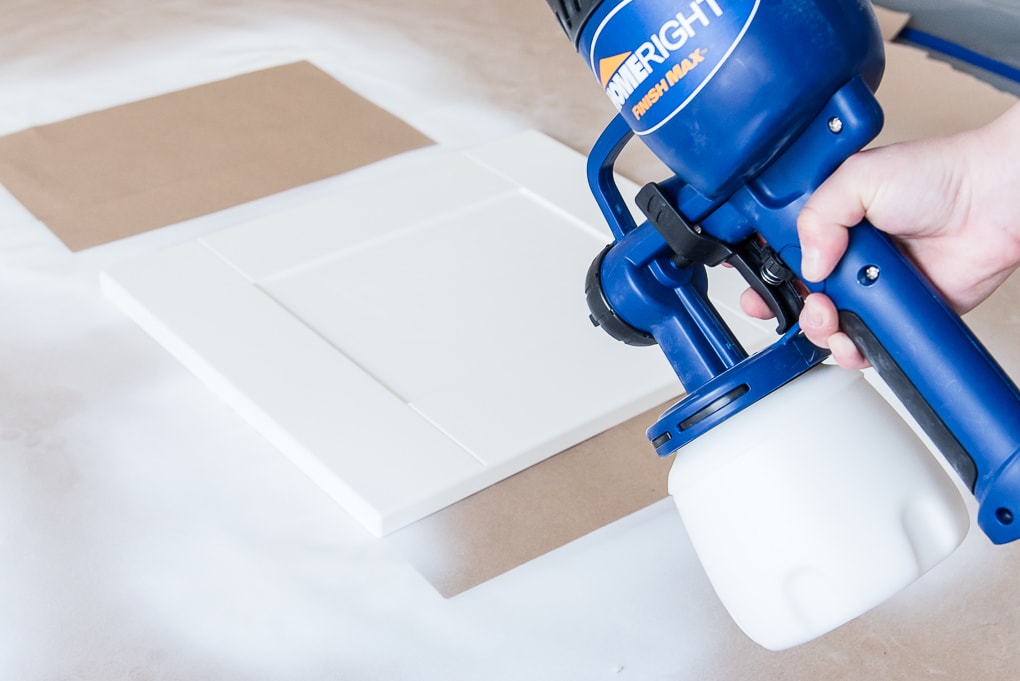
To paint the IKEA cabinets, I knew that I wanted to use a paint sprayer.
Best Tips for using a Paint Sprayer
Paint sprayers create a nice, even finish. That way I could avoid any brush strokes from paintbrushes and roller marks and give my pieces of IKEA furniture a smooth surface.
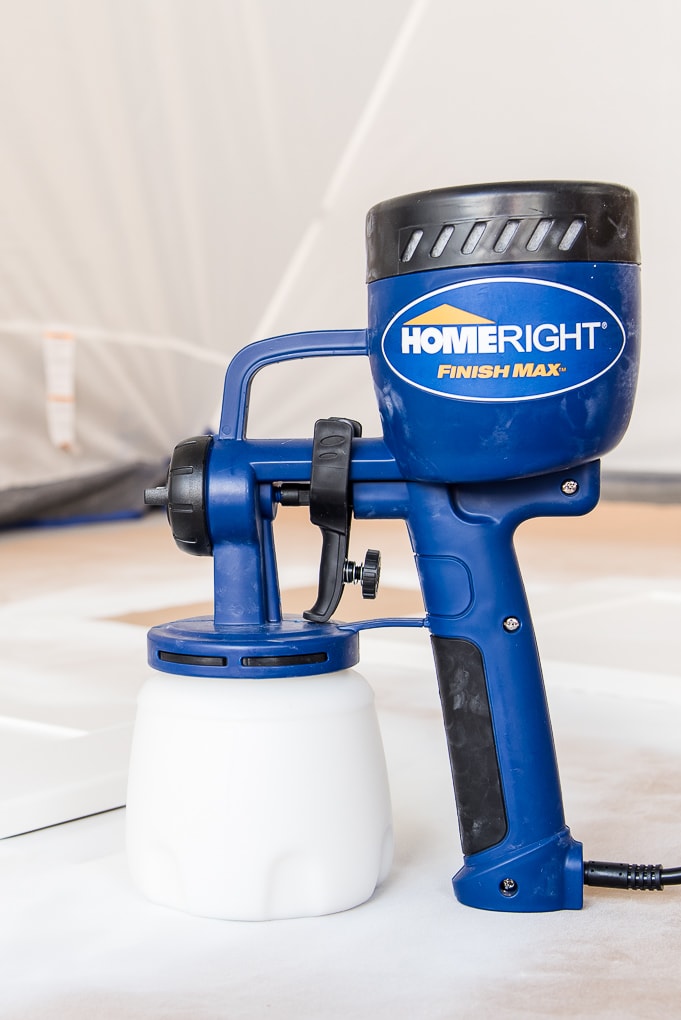
This paint sprayer from HomeRight is a really affordable option. It comes with easy to follow instructions on how to prepare your paint so you have the right consistency for spraying.
I had to water down my navy enamel paint considerably to get it to be the right consistency. It seemed like I was adding a lot of water, but it all worked out once I started spraying.
To get the best results with a paint sprayer, you need to keep it moving at a constant speed. You want to lightly cover the surface and avoid paint build-up.
Don’t worry if it looks slightly patchy in a few areas. The first coat of paint won’t completely cover everything.
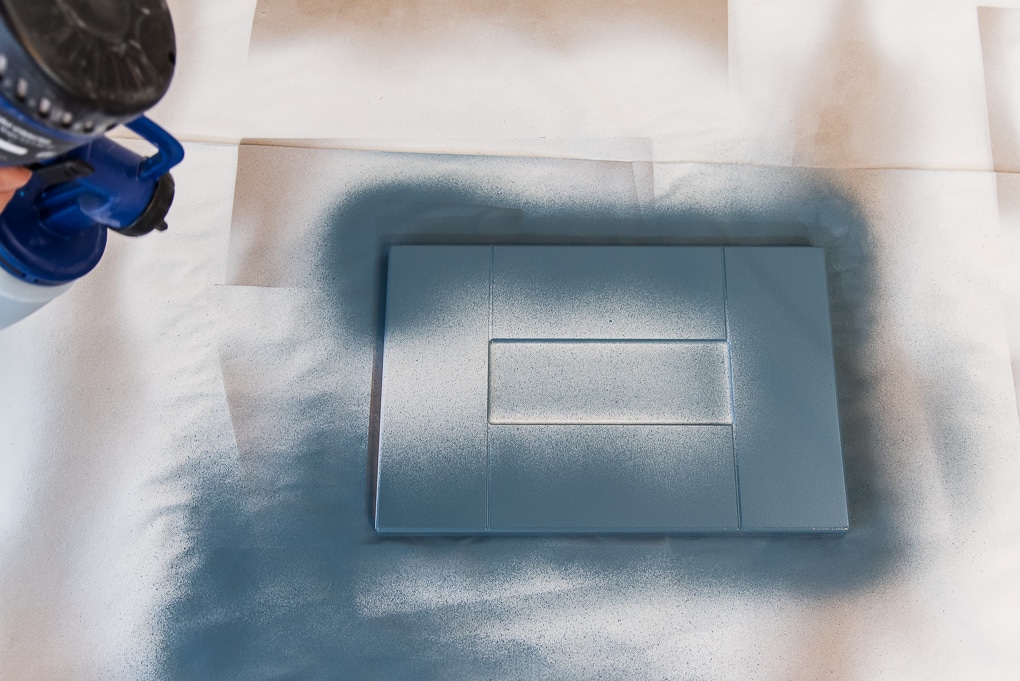
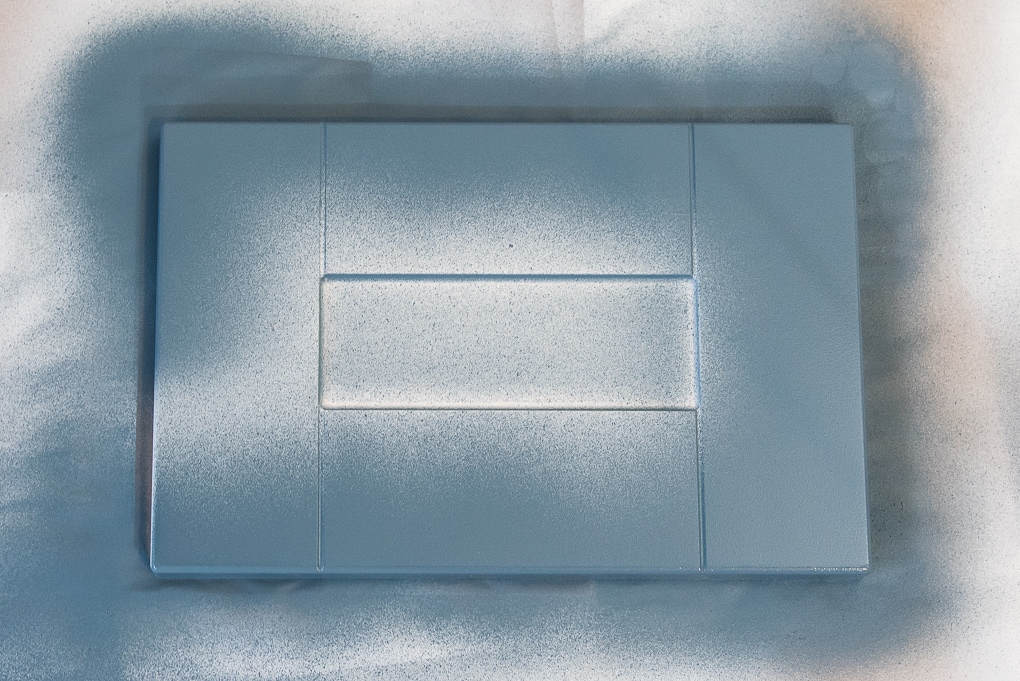
I did two coats of the BEHR Marquee paint to get a full and even coverage on all of the cabinet drawer fronts. That second coat of paint really make a difference and acts as a top coat.
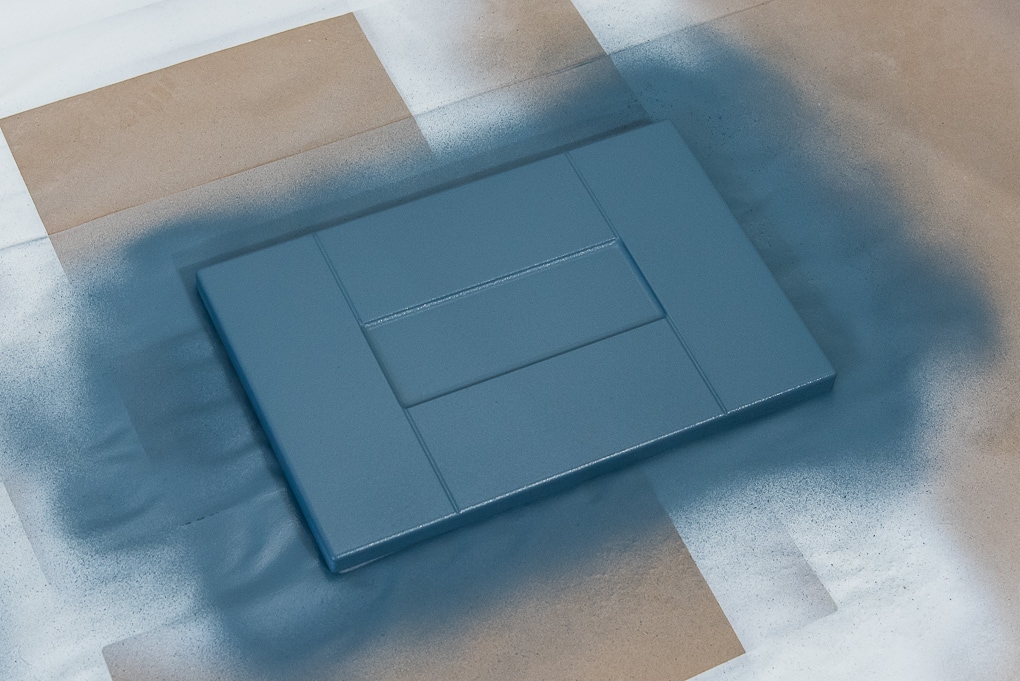
Then, I just kept painting!
Using the paint sprayer was so satisfying! It was actually fun to watch the navy paint cover the white surfaces. And it went very fast. Much faster than painting everything with a brush and roller. Having a paint sprayer will make a huge difference in your project and is a great option for this type of project.
The paint sprayer was very easy to use. I would definitely recommend it if you are going to be painting cabinets of any kind. Or if you are painting lots of surfaces, like shutters or trim. You can hand paint, but this will be much faster and save you plenty of time.
Step 5: Paint IKEA Base Cabinets
Next, I painted the base cabinets.
To paint the IKEA base cabinets, use a foam roller and a paintbrush. Apply the paint evenly to all surfaces in thin layers.
I already moved the middle desk cabinets into our garage to prime and paint them since they weren’t attached to anything yet.
I also flipped them upside down so I could paint over the base that I created using MDF.
You can see it attached to the bottom of the cabinet (the thin strip at the top). Once they were painted, they look like they were part of the cabinet originally.
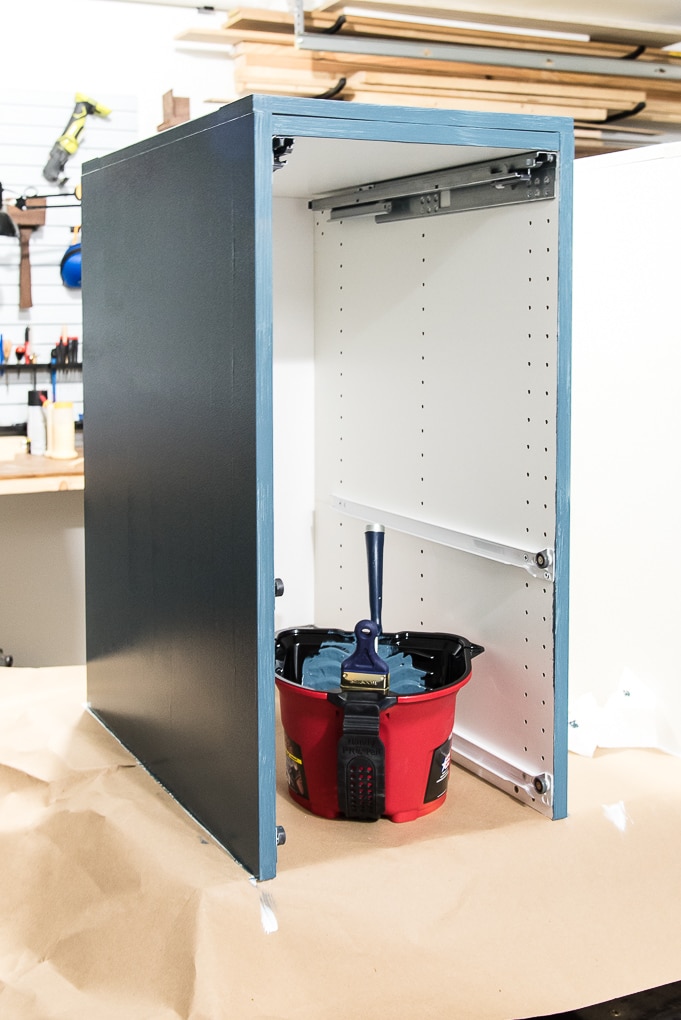
Using a HANDy Pail for Painting Furniture
I used this HANDy Pro Pail and it was so helpful! It’s my new favorite “pail” from HANDy.
I needed to use both a paintbrush and a foam roller to paint these cabinets. And the HANDy Pro Pail has a spot for both of those tools while still being portable.
I love the magnet that holds the paint brush! It’s the little things…right?!
This tool was much easier to use than my previous method of trying to balance a paint tray and not get paint drips everywhere!
Do yourself a favor and buy one of these HANDy Pro Pails! And don’t forget to grab the liners for super quick cleanup!
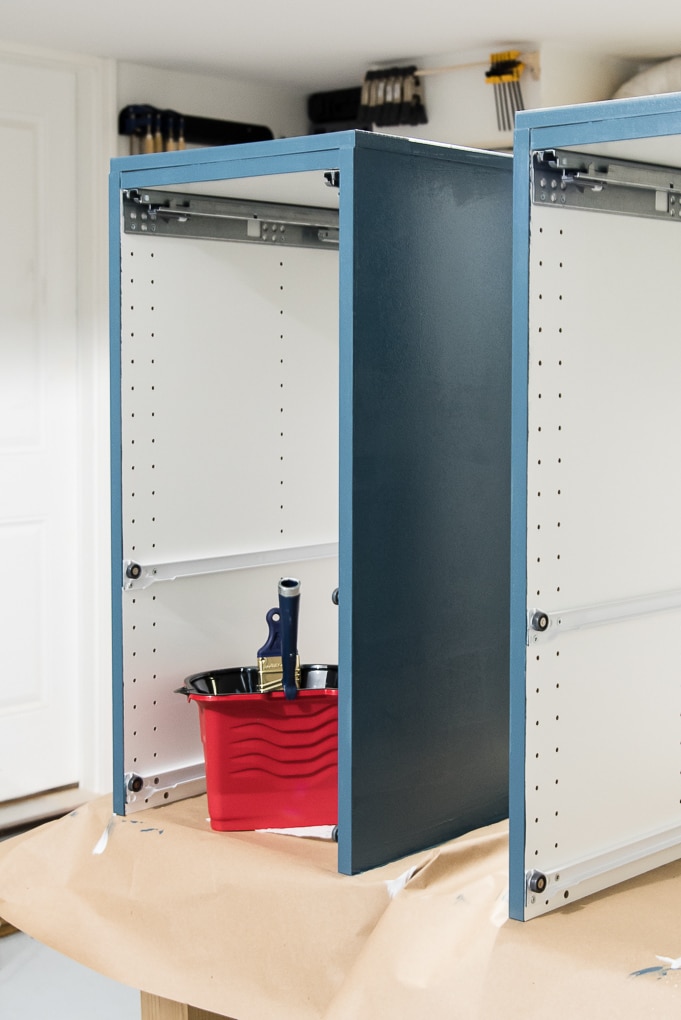
The tall outside desk cabinets were already installed. I needed to paint the lower sections of these cabinets as well.
I used a foam roller and a paintbrush to apply the paint to the outside facing surfaces of the cabinets that were already installed.
Since the sides of these cabinets would not be visible once the middle cabinets were installed, I didn’t bother painting them.
We have carpeting in the basement and I did not want to get navy paint all over the gray carpet.
We used a few thin scrap pieces of wood and wedged them underneath the large cabinets. We made sure to really push them in to make sure the wood was covering the carpet.
This trick worked perfectly! I was a little nervous when I was painting and tried to apply thin, light coats and not just glob on the paint. I didn’t want to use too much paint.
But once everything was dry and we removed the wood, there was not a drop of paint on the carpet!
To make the IKEA cabinets look built-in, I also painted the wall and the trim in the section that would be underneath the desk where my chair will go.
Step 6: Let Painted IKEA Cabinets Cure
After you have painted all of the cabinet doors, drawers, and bases, you will need to let everything dry and cure. This is important step and will give you the most durable finish.
I recommend waiting at least 24 hours after you paint before handling the cabinets or any painted surface. But if you want to make sure everything is really solid, you could even wait a full week before you use cabinets in a high traffic area.
Letting the paint cure completely is critical if you want the finish the last long term.
Step 7: Assemble the Painted IKEA Cabinets
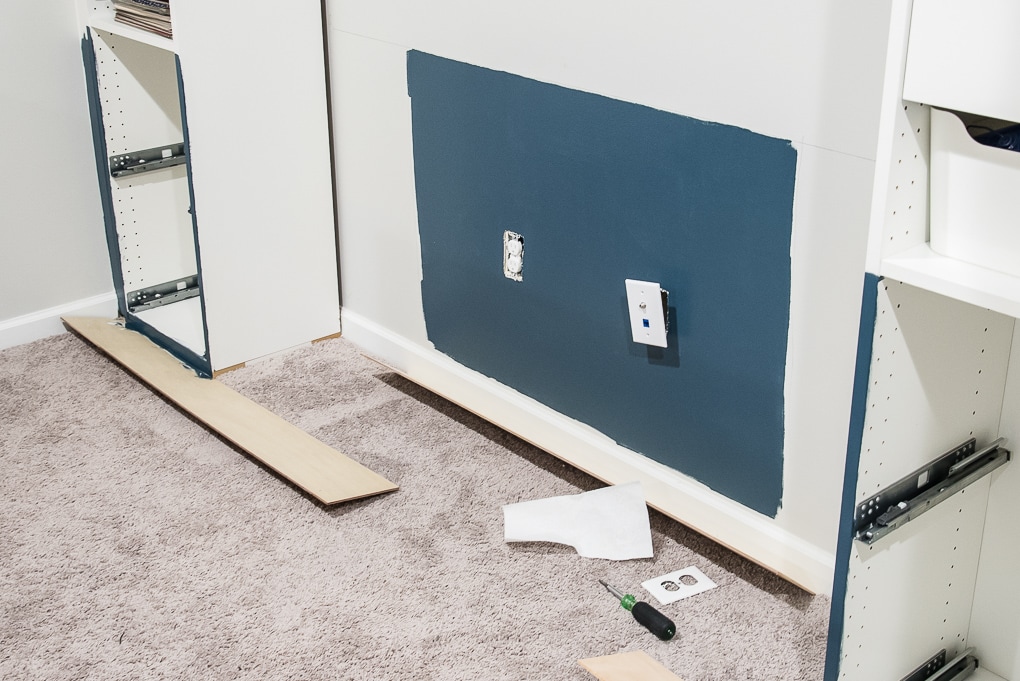
The next day, I got to work assembling the cabinets. I attached the drawer fronts to the drawers. Then, I brought the middle base cabinets back inside and put them in place.
Here’s how everything looked once the cabinets were assembled again.

Built In Desk Using IKEA Cabinets
The IKEA SEKTION cabinets were perfect for creating a built-in desk for my office space.
Because IKEA cabinets are so customizable, I was able to get the exact storage solution I needed for my desk.
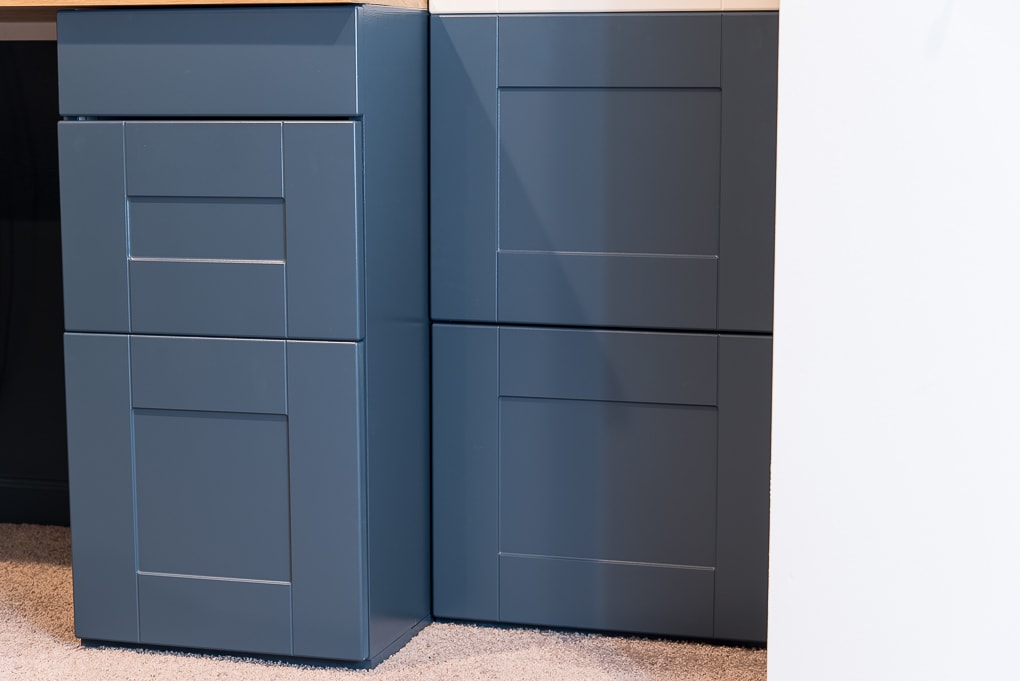
The built-in desk is coming together so well! The navy blue base cabinets are exactly what I imagined when I was designing the space.
Add Hardware to IKEA SEKTION Cabinets
After you assemble your cabinets, you can also add the hardware and door handles.
To install hardware, I recommend using a hardware installation template tool. This will help you determine exactly where to place to holes in your painted cabinet doors and drawers.
I decided to use smaller gold pulls on all of my desk drawers. I used similar larger gold pulls on both of the large cabinet doors.

Final Thoughts for Painting IKEA Furniture
If you want to paint IKEA cabinets or furniture, the process is easier than you may think. Laminate cabinets can be painted any color you want as long as you do the proper preparation work.
Sanding the IKEA cabinets using the right primer is the secret to getting the professional painted finish you are looking for.
We’re getting even closer to the big reveal of my home office, and I’m so excited!
Stay tuned for more updates on the built-in desk. Next up is the DIY bookshelves.
Have you ever used IKEA cabinets to build a custom furniture piece in your home? Let me know in the comments below.
Related IKEA Furniture Posts
To Follow Along As We Transform The Basement Into a Home Office for the One Room Challenge, See These Posts:

- Planning a Modern and Bright Creative Home Office {One Room Challenge Week 1}
- How to Build a Desk using IKEA SEKTION Cabinets {One Room Challenge Week 2}
- The Best Removable Wallpaper Patterns
- How to Install Removable Wallpaper {One Room Challenge Week 3}
- 6 Must-Have Painting Tools
- How to Paint IKEA SEKTION Cabinets {One Room Challenge Week 4} (You’re Here)
- The Best Craft Room Tables
- DIY Bookshelves for a Built-In Desk {One Room Challenge Week 5}
- Modern and Bright Creative Home Office Reveal {One Room Challenge Week 6}
If you’d like to see how the other bloggers are doing with their One Room Challenge spaces, you can do so in this link up.


I love the two tone and the blue. NICE1
I’m interested in knowing how the cabinets are holding up? I would like to paint my kitchen cabinets but wonder if the durability would last..
Hi Maureen!
The cabinets have been holding up really well so far. I’m not very hard on them because they are for a desk. But I do use the drawers etc almost every day. I haven’t had any problems so far with paint chipping or anything. I actually just dragged my nails over one of the cabinet fronts and no chipping! So I’ve been really happy with them so far.
>> Christene
What paint can I use on wooden cabinets?
Hi Christene,
How did you determine the proper consistency for the paint?
Hi Inge, The paint sprayer that I purchased had instructions for the paint consistency.
>> Christene
Did you paint the interior or the cabinets? I’d like to paint my IKEA kitchen cabinets and drawer fronts. Thanks!
Hey Katie – no I did not paint the interiors. I left those white.
>> Christene
What was the paint color and brand used for the navy cabinets? Thanks
Hi Chris – it’s Rush Hour by Behr Marquee
>> Christene
If I don’t have a paint sprayer, could I use a roller and brush to do everything? Or would it be very evident (brush strokes, etc)?
I would use a small roller as much as you can to minimize the brush strokes. I think it would still look good – just try to use a roller because that’s what will help hide the paint strokes.
>> Christene
Hi there! Thanks for this tutorial! I am about to paint the same cabinets from IKEA. I’m curious, did you also sand the base cabinets before painting?
Hi! Yes I did sand the base cabinets as well. I think I just forgot to put that in my tutorial.
>> Christene
Hi! What is the reason not to use the paint sprayer for the base cabinets as well? Why stick to just the drawer fronts? Thanks!
Hi Molly,
Honestly I’m not sure HAHA I don’t know if I just didn’t want to deal with taping off the parts I didn’t want to paint and the hardware. I didn’t paint the inside of the base cabinets. I think in hindsight it probably would have been better to spray them.
>> Christene
Hello! I was wondering how these have held up over the last 2 years? We are thinking of doing something similar in our kitchen remodel but are not sure how it will hold up with heavy use.
I am wanting to add Sketion cabinets to a floating desk area however the depth of the nook is 23.5″ I’m wondering if the cabinets have an 1″ in the back that I could cut off with my table saw before assembling? I could just build from scratch but would love to save the time there!
Hi there! Loving reading about your projects and getting so much inspiration! How did you connect the cabinets together and did you attach them to the wall, or are they all kind of freestanding? Thanks!
Hi! So they are kind of freestanding, but I did attach them to the wall. There’s a spot in the back and hardware that comes with the cabinets to help you attach them to the wall. I did not attach them to one another – between the big tall cabinets and the lower desk ones.
>> Christene
Hi Christene – your finishes cabinets look as they were painted at the industrial facilities. Did you sand after you primed them before you applied a first coat of paint? did you had an issue with tiny, tiny grains that formed after primer was applied? As I just sanded doors with 400 fine sand paper, the surfaces were so nice and smooth but after one coat of primer on all doors I have a small, tiny grains… thinking about sanding them down prior paint application…. please advice. Also how do you how to dilute your paint with water, how did you calculate a proper consistency?
Hi Lana,
Yes I would sand again after the primer and do a second coat of primer. Sometimes that can happen with the wood where you will get those tiny bumps.
To dilute the paint, I use the instructions for the specific paint sprayer that I used. They had instructions and a testing funnel. So whichever sprayer you use should have information in a booklet or online for how to dilute paint.
Hope this helps.
Christene
I’m living for your tutorial here…. I’m interested in how the finish would look had you not sprayed the primer and used the brush or roller for this step like you suggested. Obviously, it’s a must if I’m using this primer, but do you think it will still come out smooth after sprayer of the top of the brushed primer??
floetrol is a great additive for eliminating brush strokes, better than water.
shellac based primers use alcohol as the solvent, not water or oil solvents. alcohol has a strong smell and should be used in a well-ventilated area, but it is not as toxic to inhale as oil paint fumes. get a large can of 90% isopropyl alcohol for clean up.
Please post a direct link to the Primer you mention image you posted in blog is different from amazon link
Hi can you please provide link the primer one in your blog pictures doesn’t appear on Amazon links you provided
Hi – sorry it’s been a few years since the project and the specific listing kept going out of stock. Here’s the link: https://amzn.to/473l001
>> Christene
How long did you wait for the primer to cure before painting?
I think I waited 24 hours at least.