How to Create a DIY Shiplap Wall Treatment for Cheap
Are you looking for a budget-friendly way to update your home? One way to add a ton of visual interest and character to your home is by creating a shiplap wall.
Shiplap walls have become very popular in recent years, thanks to design shows like Fixer Upper and the Joanna Gaines effect.
If you want to get the look of classic clean lines and character on your walls, shiplap is the way to go. Creating a DIY shiplap accent wall cheap is a great way to add a beautiful design element to your home without spending a lot of money.
When we decided to makeover our powder room, one of the first projects to complete was the shiplap.
Now, I know that the first thing everyone thinks of when they hear shiplap is farmhouse style. And if you know me, you know that I’m definitely not a farmhouse style girl.
So, how exactly am I going to make shiplap work in my home?
Well, I think shiplap can look polished and put together as a modern wall treatment if you do it the right way. It’s a great way to add texture, interest, and so much character to the walls.
Overall, wall treatments are a great way to make a home look more custom.
Related: Easy DIY Wall Moulding in the Dining Room
Creating a DIY shiplap wall cheap is easier than you might think. With the right tools and a little prep work, you can transform a plain wall into a beautiful feature in your own home.
This budget-friendly DIY project is perfect for beginners. Let’s get started with all of the DIY details.
This post contains affiliate links for your convenience. For more information, see my disclosures here.
Before you get started on your shiplap wall, you’ll need to gather a few supplies. Here’s what you’ll need:
Materials
- Plywood ½” thick (furniture grade) – ripped into 5” wide strips
- 1×2 Pine Boards
- Wood Glue
- Wood Putty
- Caulk
- Primer
- Paint (We Used White Semi-Gloss Trim Paint)
Tools
- Tape Measure or Measuring Tape
- Table Saw
- Miter Saw
- Nail Gun (Brad Nailer) and Brad Nails
- Level
- Tile Spacers 3/16”
- 80 Grit Sandpaper
- 120 Grit Sandpaper
- Foam Paint Roller
- Small Paint Brush
- Large Handy Paint Tray or Paint Tray
- Jig Saw (optional)
- Coping Saw (optional)
The Easiest Way to Create a Faux Shiplap Wall
Step 1: Create a Plan
Before starting your DIY shiplap wall project, make sure you create a plan for your space. This first step will help you get a vision of the completed project, and know how much material you will need to buy.
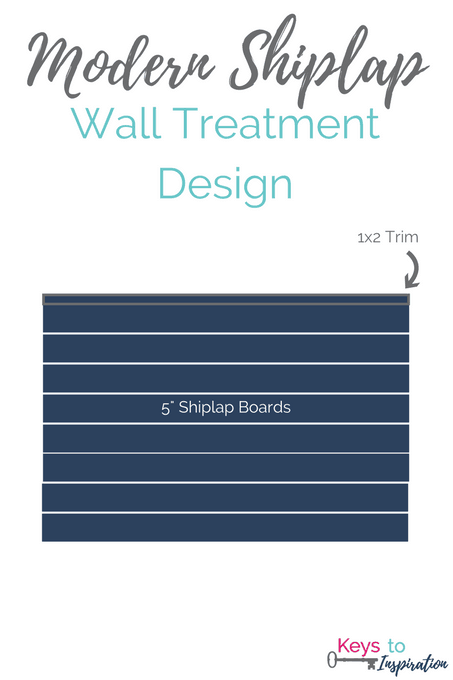
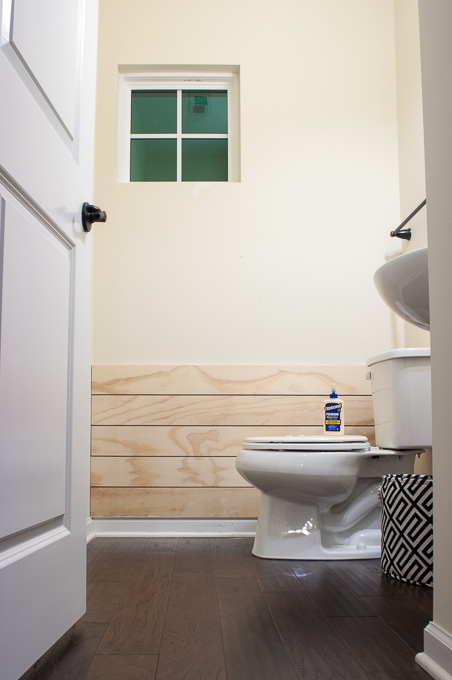
For our powder room project, we wanted to create a modern shiplap look.

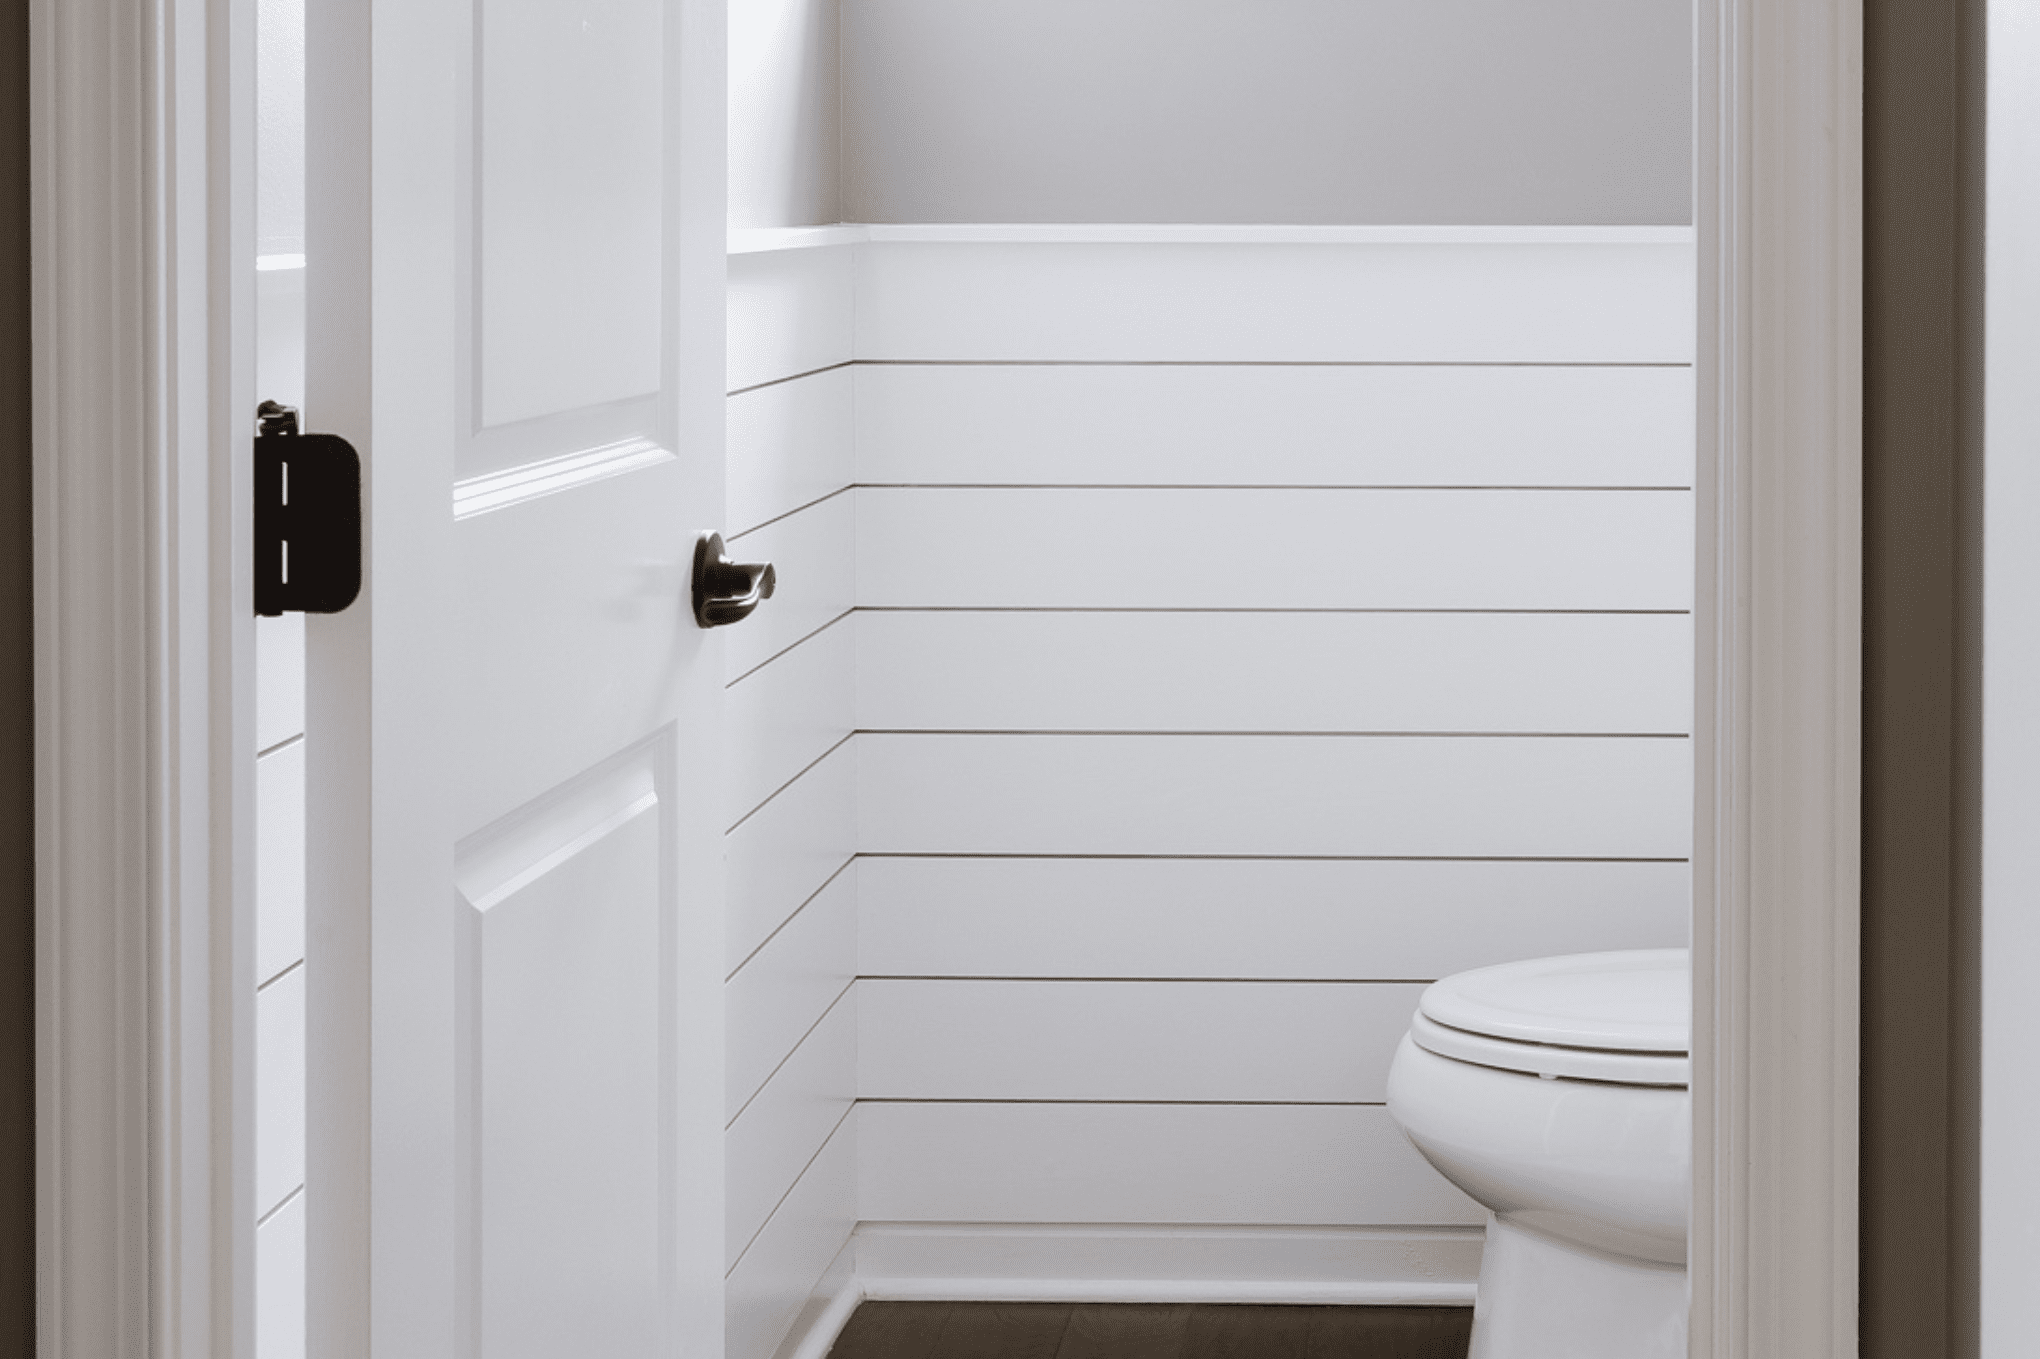
The design we came up with was to cover the lower part of the walls with shiplap instead of the whole wall. The shiplap would come up to 4 feet high and then end, leaving the rest of the walls plain for painting.
We decided that using 5 inch wide boards would be the best option for our space. This width would give us the wide shiplap plank look that we were going for.
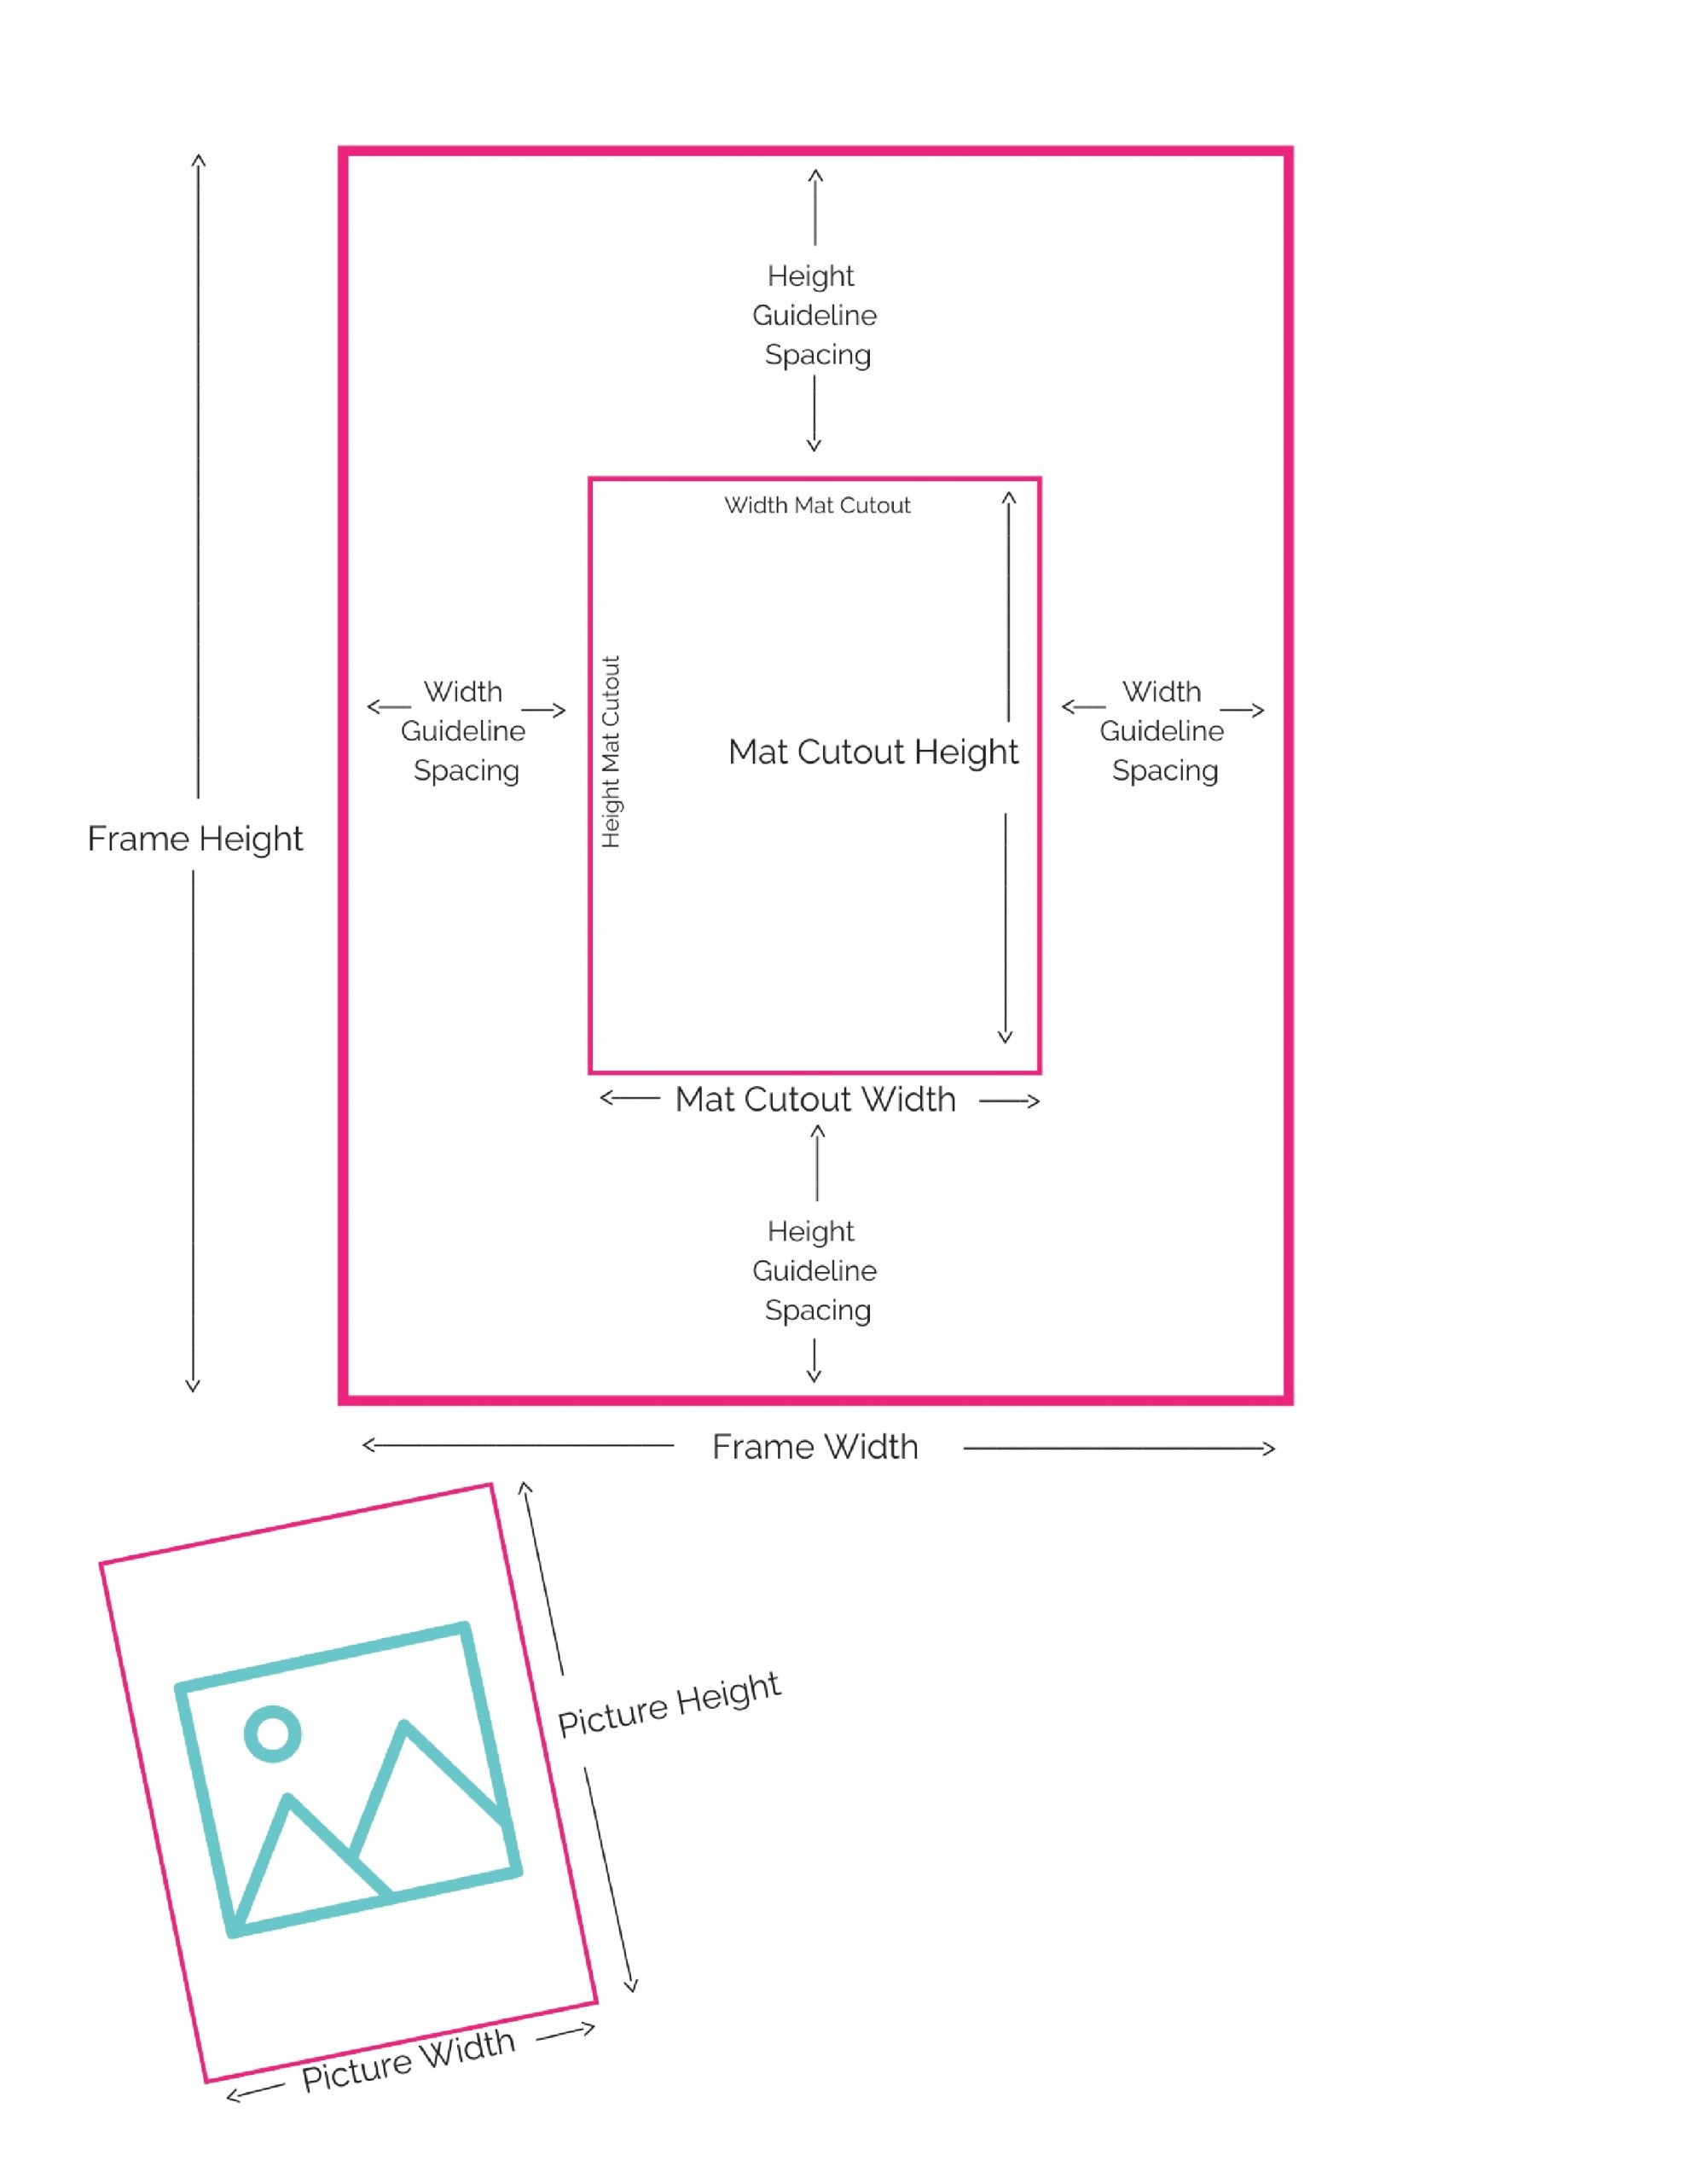
Step 2: Measure and Prepare
Before you begin, measure the walls that you want to add shiplap to in order to get an overall length and width of the space.
By getting accurate measurements, you can determine how many shiplap boards you will need for your project.
Using the wall measurements and the size of the shiplap planks you will be using, you can then calculate how many boards you will need overall.
Calculating How Much Plywood is Needed for the Faux Shiplap Boards
Here’s how we figured out how much material we would need for our shiplap wall project.
First, we measured the lengths of all of the walls and added them together to get a total wall length in feet.
Since the shiplap was only going to be on the bottom 4 feet of the walls, we multiplied the total wall length by the height that we wanted for our shiplap, which was 4 feet. This gave us the total shiplap area.
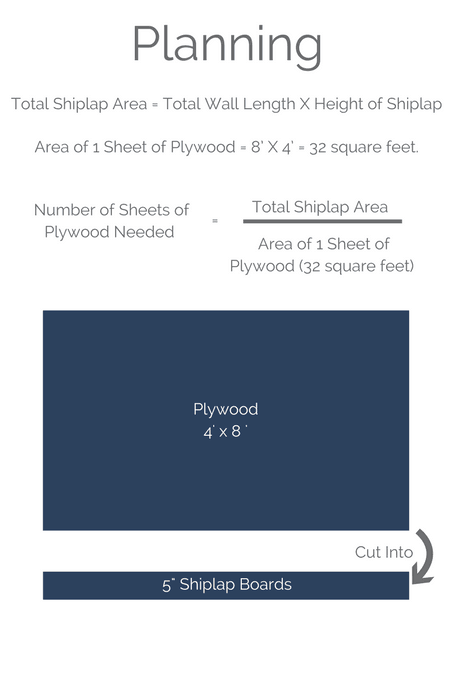
Here’s a formula for reference:
Total Shiplap Area (square feet) =
Total Wall Length (feet) X Height of Shiplap (feet)
True shiplap boards are pretty expensive to buy in the home improvement stores. So, instead of buying real shiplap, we decided to use plywood instead.
What Plywood to Use for a Shiplap Wall Project
An easy way to create shiplap planks is by using plywood and cutting it into smaller pieces.
For this type of project, we recommend you buy furniture grade plywood.
This is because furniture grade plywood has a smooth finish, which is much easier to paint. Using basic plywood will give you rough, uneven surfaces and a bad finished look for your shiplap wall.
To figure out how much plywood to buy, we first calculated the area of a piece of plywood.
Here’s the equation we used for a standard sheet of plywood:
Area of 1 Sheet of Plywood (square feet) =
8’ X 4’ = 32 square feet
Next, we took our Total Shiplap Area (that we calculated before) and divided it by the Area of 1 Sheet of Plywood (32 square feet).
We rounded that number up to the nearest whole number to get the number of plywood sheets that we would need for the project.
Here’s another equation for you to reference:
Number of Sheets of Plywood Needed =
Total Shiplap Area (square feet) ÷ Area of 1 Sheet of Plywood (32 square feet)
Whew! Are you still with me after all that math?
Once we did that math, we had our final number of sheets of plywood for the project. We went to the hardware store and purchased all of the materials.
Preparing the Shiplap Boards
Once we got home from buying the materials, it was time to turn the plywood into our shiplap boards. We used a table saw to rip (or cut) the wood into 5 inch plywood strips.
This gave us our faux plywood shiplap boards to use for the powder room makeover project.
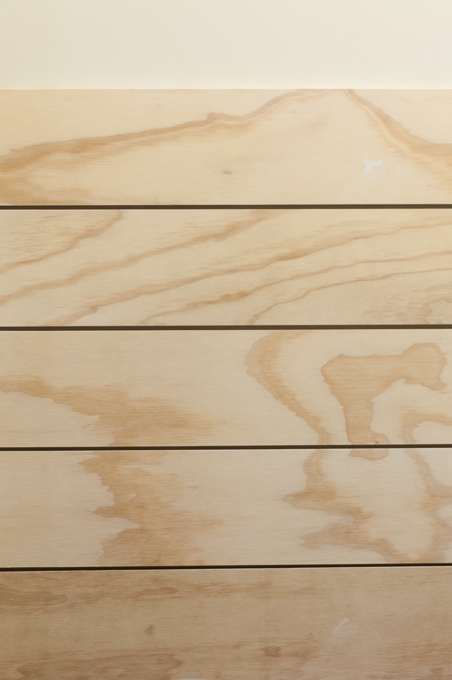
Cut your plywood sheets into 5 inch strips using a table saw or circular saw. This will give you the look of shiplap without having to use real shiplap boards.
Preparing the Walls
Next, you’ll want to prepare the wall for the shiplap planks. This involves removing any existing wall treatments, filling in any nail holes or rough edges, and sanding the wall smooth.
If your walls are already blank, you can skip this step.
But if you are replacing any existing wall treatments, you’ll want to spend the time making sure the walls are ready for attaching the shiplap planks.
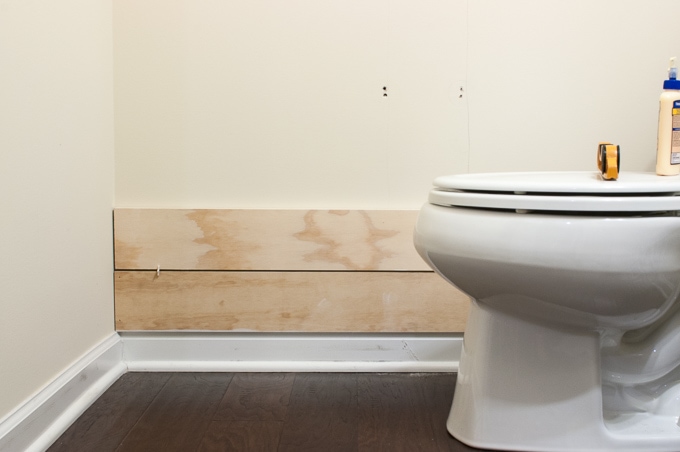
Step 3: Install the First Board
Start at the bottom of the wall and work your way up to attach the shiplap boards to the wall.
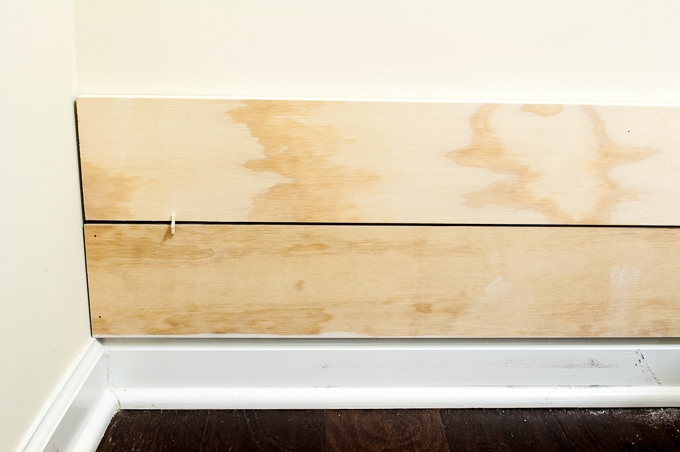
The first row of shiplap boards in our space l was directly above the baseboard trim. We wanted to make sure it was straight and level because this first board is the basis for the rest of the boards going up the wall. And we didn’t want it to be crooked.
Cut the first plank board to the length needed depending on your wall measurements.
Apply wood glue to the back of the first board and attach it to the wall at the bottom of the wall. Use a level to ensure that the board is level and aligned.
Then, use a brad nailer and brad nails to attach the board to the wall.
Step 4: Continue Adding Boards
Next, place tile spacers on top of both ends of the first board to create a gap between the planks.
Cut the next plank board to the length needed depending on your wall measurements.
Then, apply wood glue to the back of the next row board and attach it to the wall directly above the tile spacers.
Use a brad nailer and brad nails to attach the second board to the wall.
Continue this process until you reach the top of the shiplap wall.
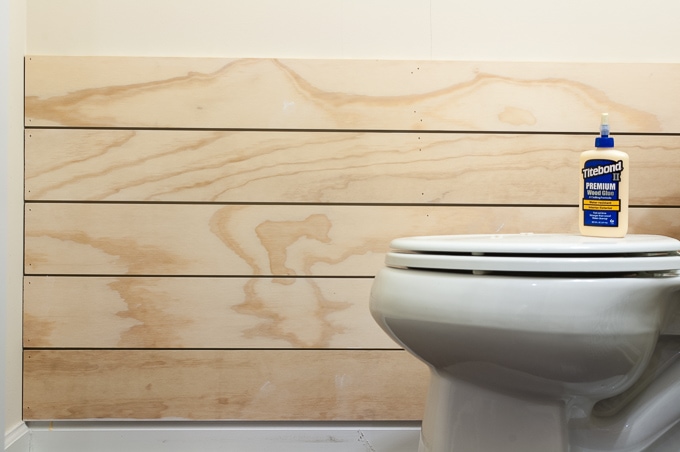
Once we reached 4 feet up the back wall in our powder room, we stopped and moved to the next wall in the room.
We only installed one planked wall at a time, measuring and attaching the shiplap until the lower 4 feet of the powder room was covered in shiplap.
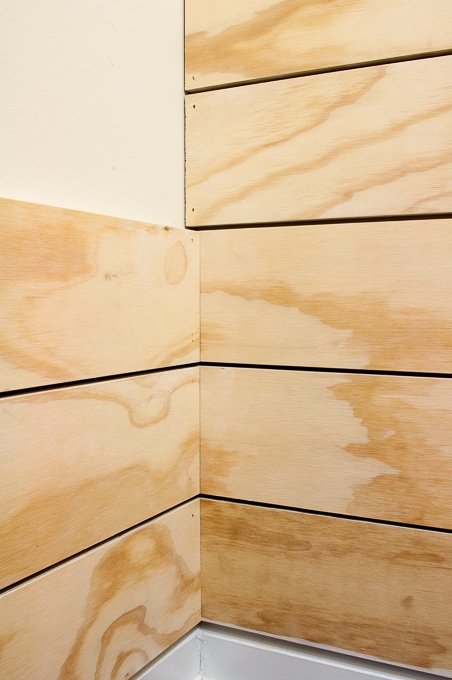
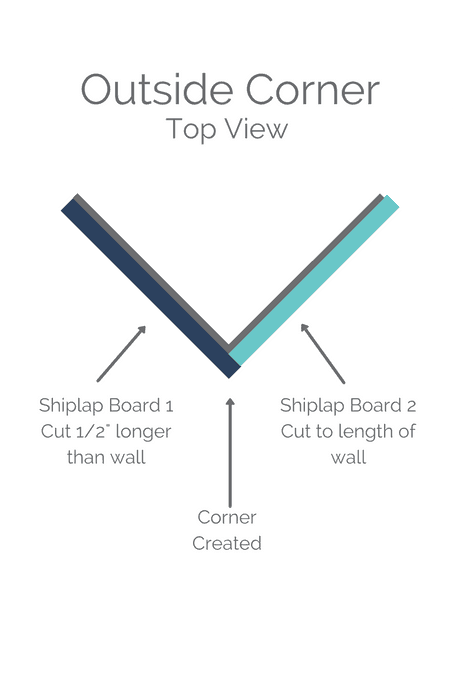
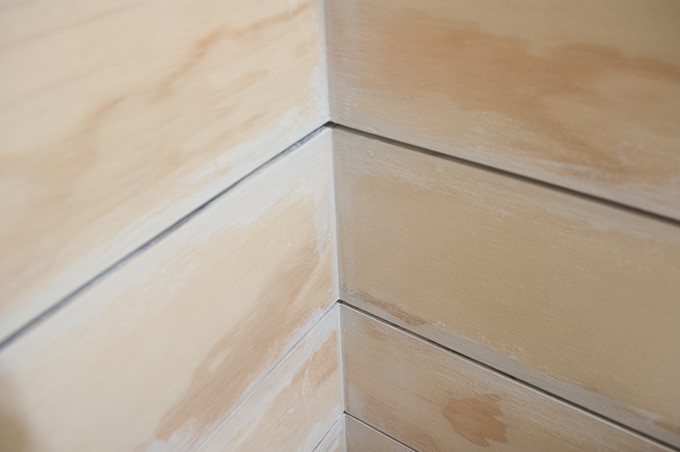
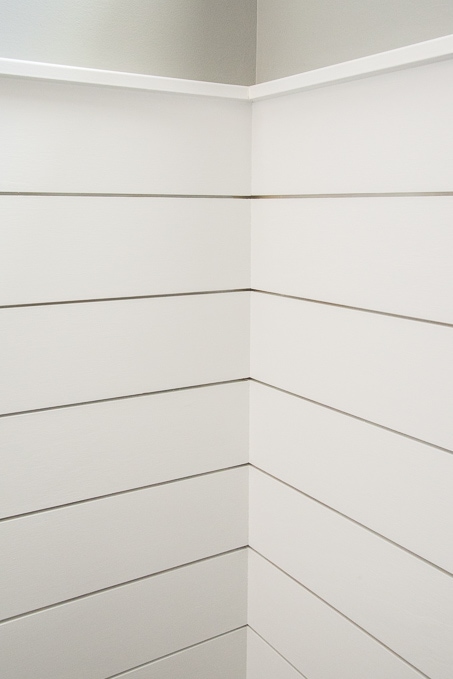
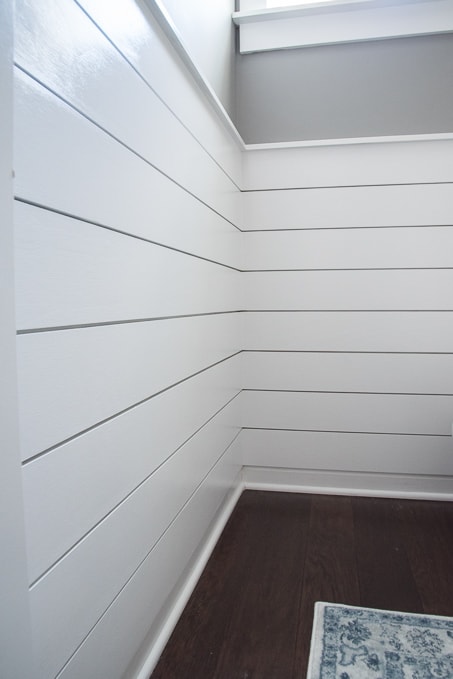
How to Install Shiplap on a Corner
If you are installing shiplap around a whole room and have to cover the corners, here the best way to do it.
There was a section of the powder room had an outside corner.
To cover the corner, we cut the shiplap boards for the left wall ½ inch shorter than the measured wall length.
That way, it would overlap the shiplap boards installed on the back wall creating a clean corner.
Step 5: Cut Boards Around Obstacles
You may need to make additional cuts to fit around obstacles in your space. Things like electrical outlets, light switches, and plumbing can get in the way when you are installing the shiplap.
When you get to an obstacle on the wall, measure and mark where they are on the plank and use a jigsaw to cut out a hole. Then, attach the plank around the area with the brad nailer.
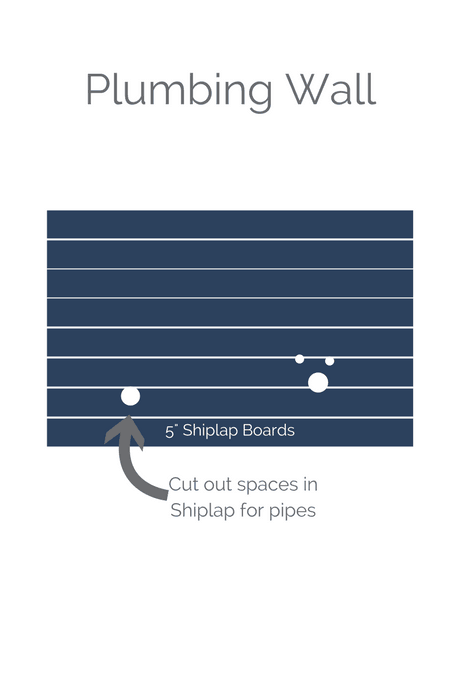
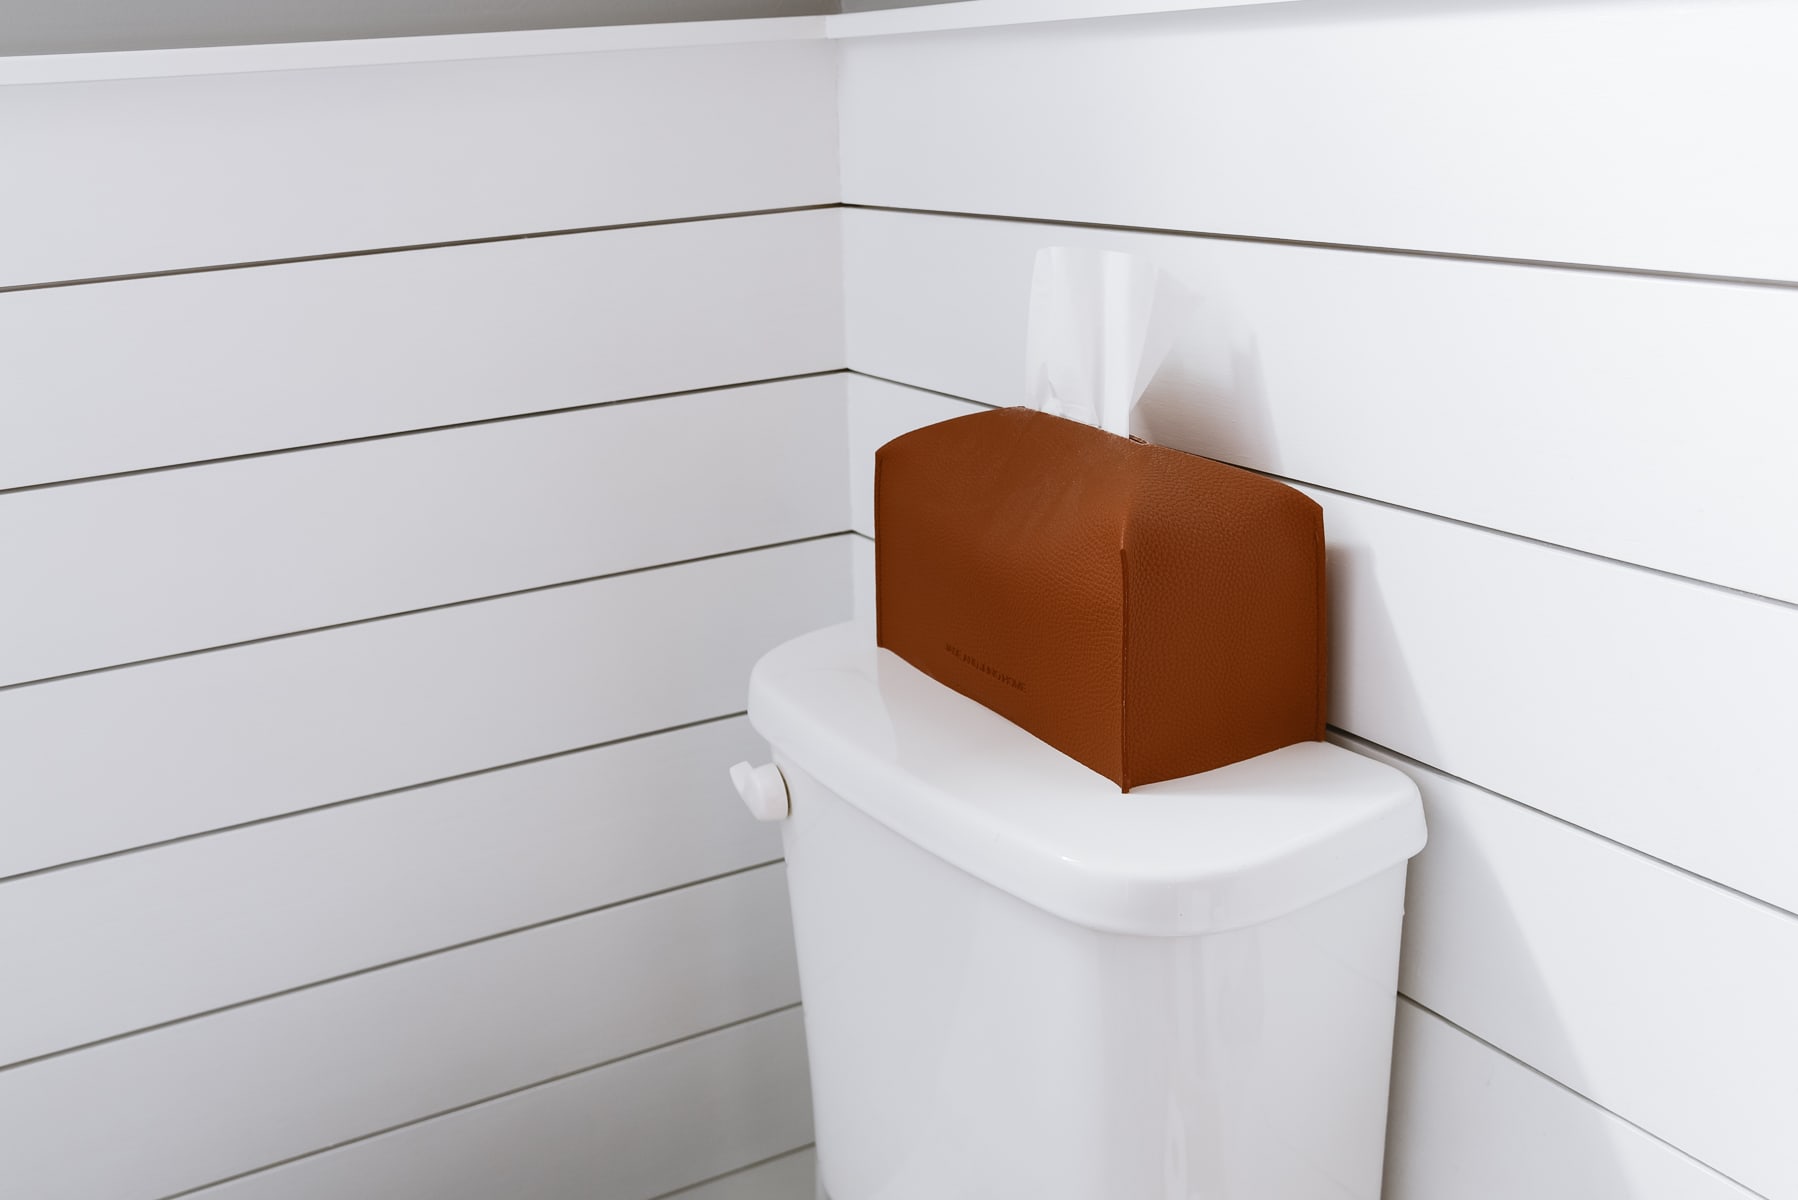
How to Install Shiplap Around Plumbing
One wall that was a little bit more difficult to install in our shiplap project was the right wall with all of the bathroom plumbing.
For any shiplap boards that intersected with the plumbing, we used a coping saw to cut curved sections out of the plank.
We weren’t extremely precise with this because we knew that any mistakes could be filled in with wood putty later.
Then, we placed each board on the wall and aligned the holes as needed. We attached the planks to the wall in the same way as before, first applying wood glue and then using a brad nailer to secure the plank to the wall.
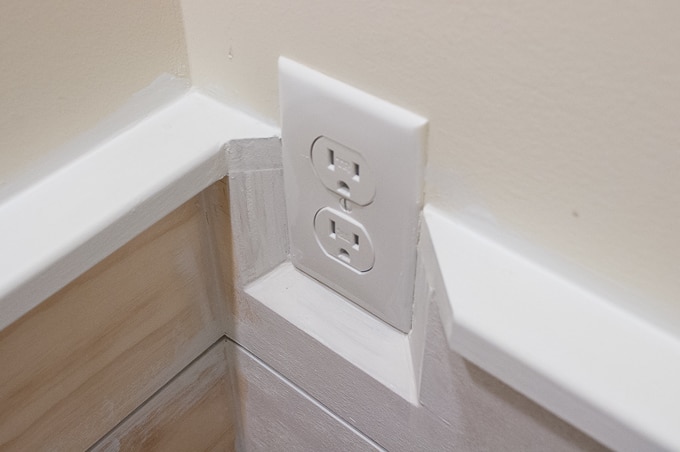
How to Install Shiplap Around Outlets
Another difficult area that we ran into was an outlet on the wall near the sink.
This outlet happened to be right in the middle of the 4 foot height mark on the wall. That meant there would be shiplap on half of the outlet and painted wall on the other half.
To make this look less visually jarring, we came up with an different idea than just cutting out a basic hole for the outlet.

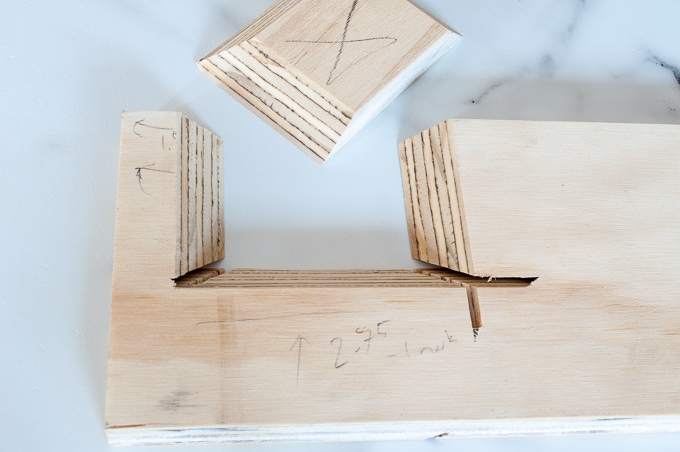
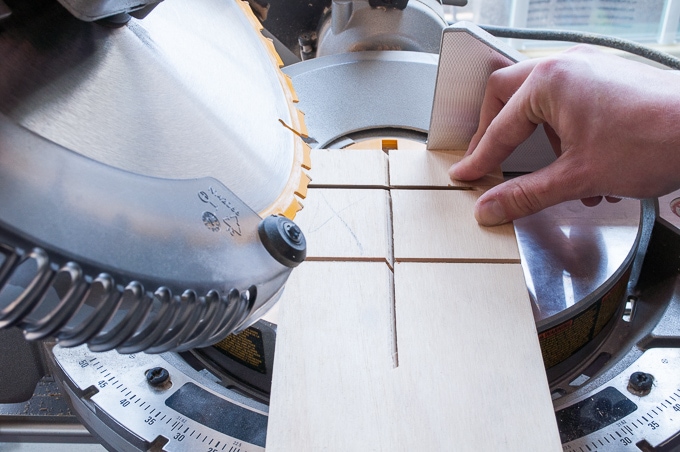
For the shiplap board that was going to overlap that outlet, we used the miter saw to carefully cut 3 chamfers. Chamfers are basically just sloping edged cuts.
First, we measured and marked where the outlet would be. Then, we flipped the board over and used the miter saw to make 45-degree cuts in the back of the board.
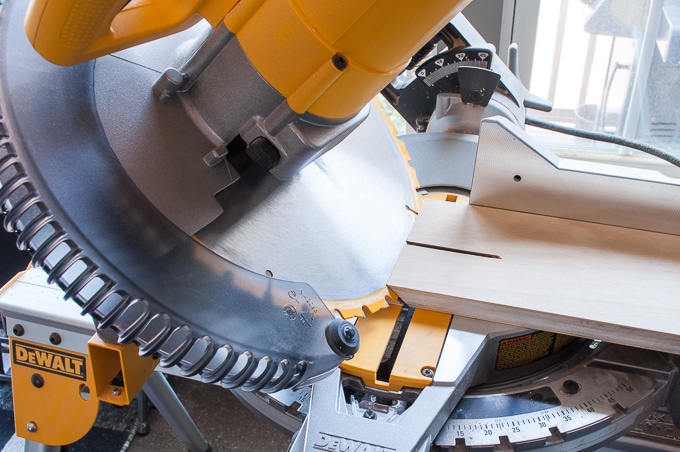
You can see in the picture below that we marked the piece that would be removed to make room for the outlet with an “X.”
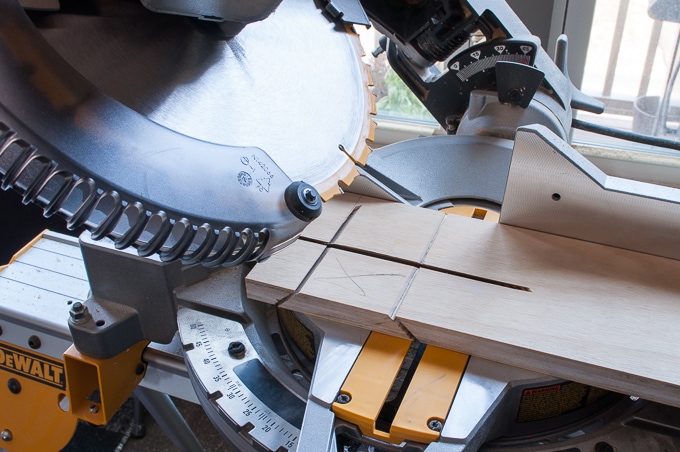
Once the 3 cuts were made, we flipped the board back over to reveal the angled cuts.
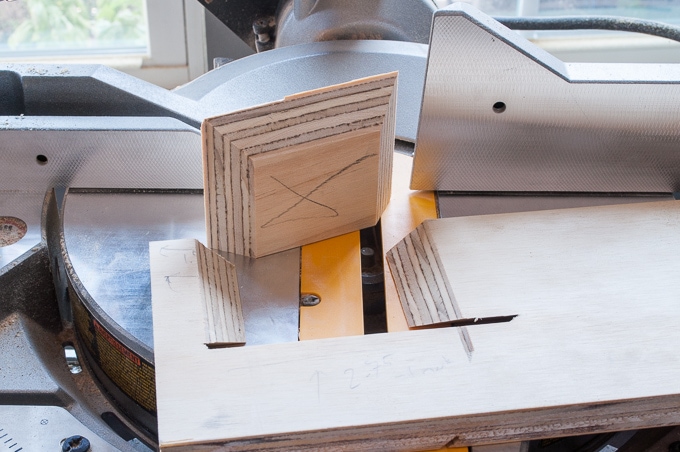
The cutout in the back of the board is the same size as the outlet. Then, the edges of the board gradually slope out.
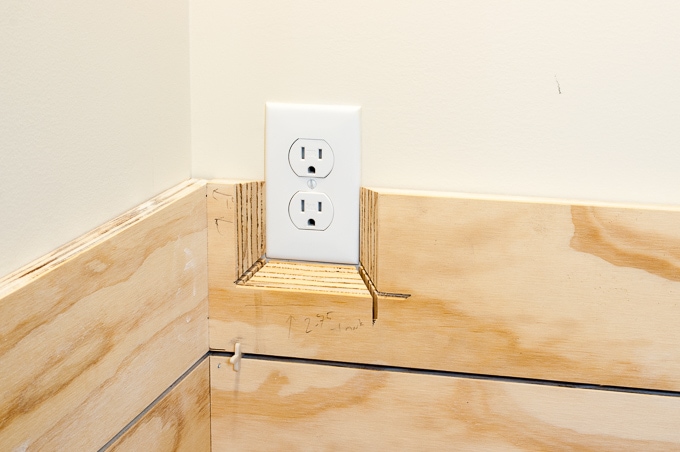
The miter saw made some extra cut marks that we didn’t want, but we just filled them in with wood putty once the board was on the wall.
Step 6: Install the Top Trim Board
After you have installed all of the shiplap boards on your wall, it’s time to add a trim piece. This trim piece helps to create a finished edge for your shiplap if you are only creating a half wall of shiplap like we did.
If you are extending the shiplap up the entire wall, you do not need to add this trim piece. Just install the final board at the top to complete the wall.
To finish off the top edge of the shiplap, we installed 1×2 MDF boards as trim or small crown molding.
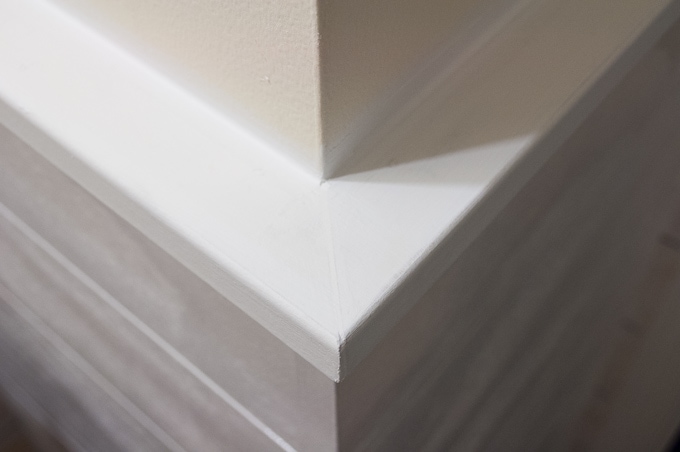
We cut each trim board to size using a miter saw and then used the brad nailer to attach the trim to the top shiplap board.
This created a small ledge on top of the wall. Overall, this helped to visually complete the shiplap wall and make everything look finished.
Step 7: Fill Nail Holes
Once all the planks are attached, fill in any nail holes or gaps with wood filler using a putty knife. Fill any unwanted seams between boards and the trim with caulk.
Then once everything has dried, sand the filled areas.
After everything was installed, we used wood putty to fill in all of the nail holes. We also filled in any mistake cuts that were made around the plumbing and the extra cuts around the outlet.
Then, we used caulk to fill in the vertical seams between boards and the gap between the top trim pieces and the wall. This made everything look seamless and built in.
Once everything was dry, we sanded the entire shiplap wall treatment twice. First with 80 grit sandpaper and then with 120 grit sandpaper.
Step 8: Paint the Shiplap Wall
To finish the shiplap wall, you will need to apply primer and paint in the whatever color you want.
Apply a primer and allow it to dry. Then, apply 2-3 coats of paint in the color of your choice. Be sure to allow it to dry completely between coats.
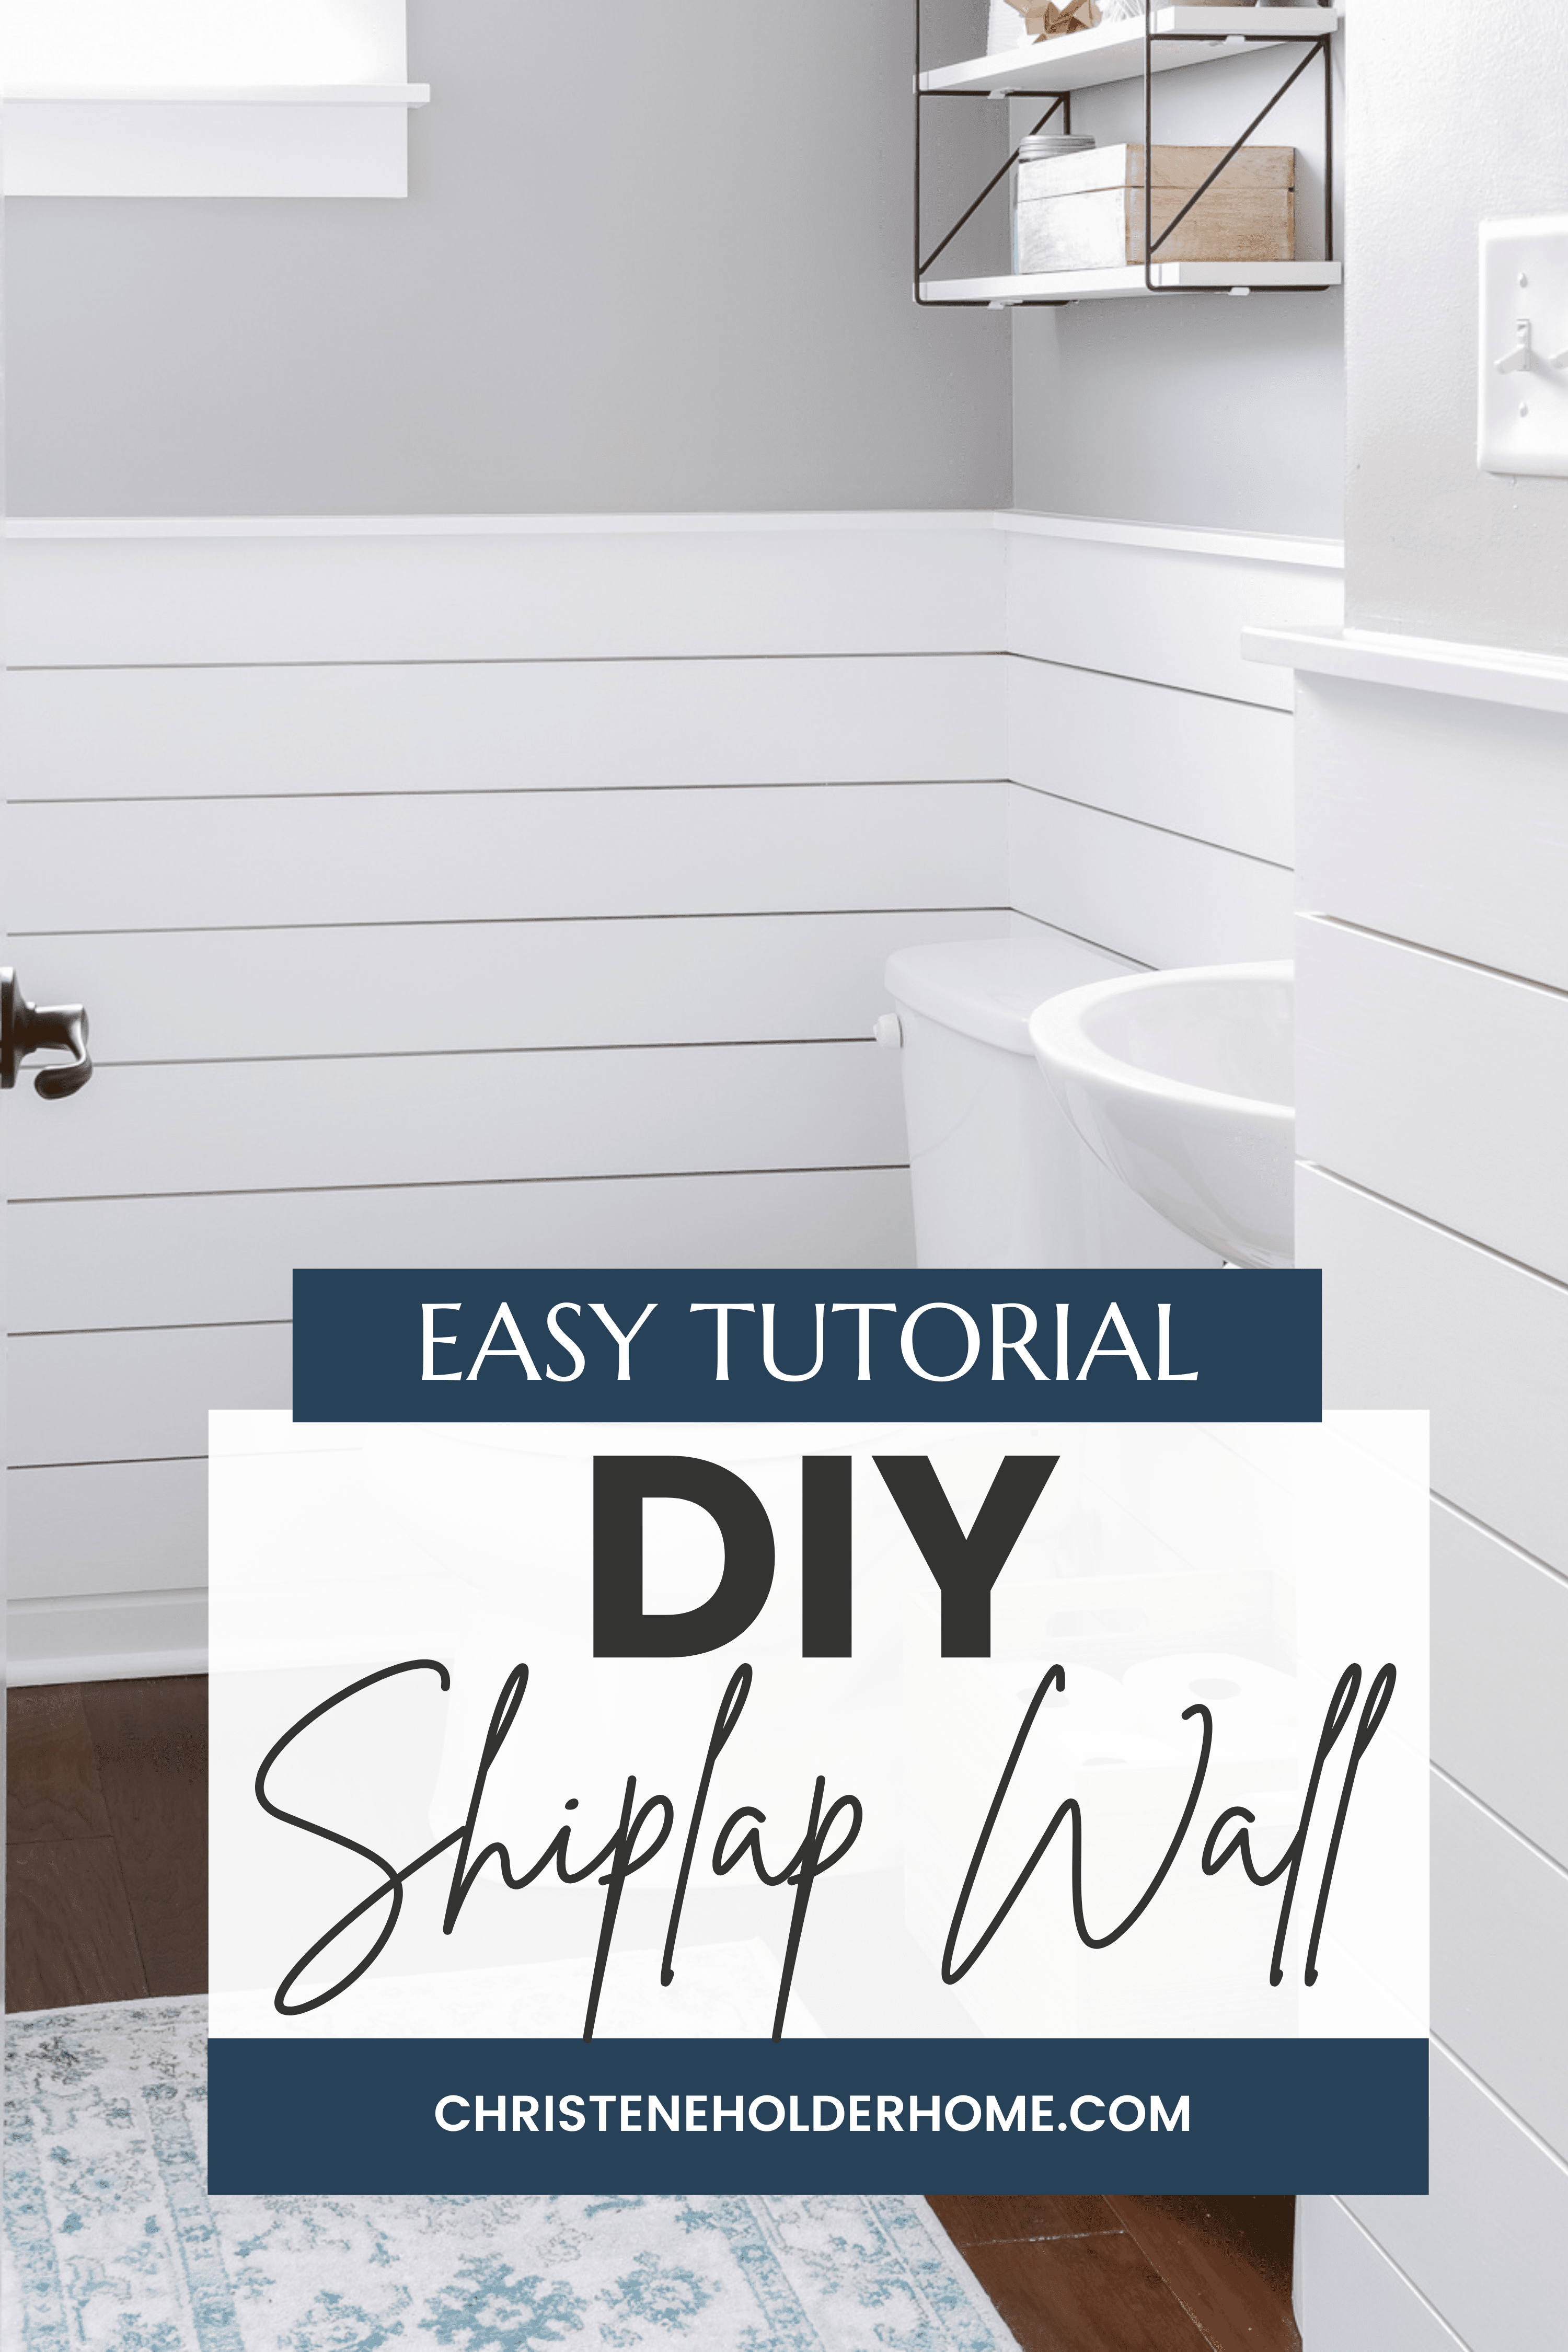
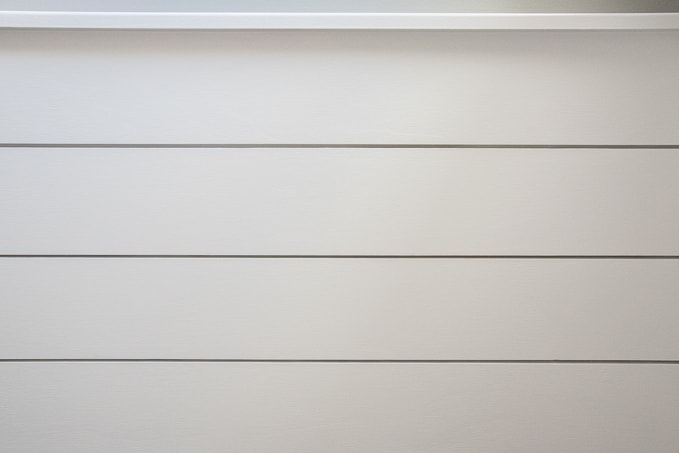
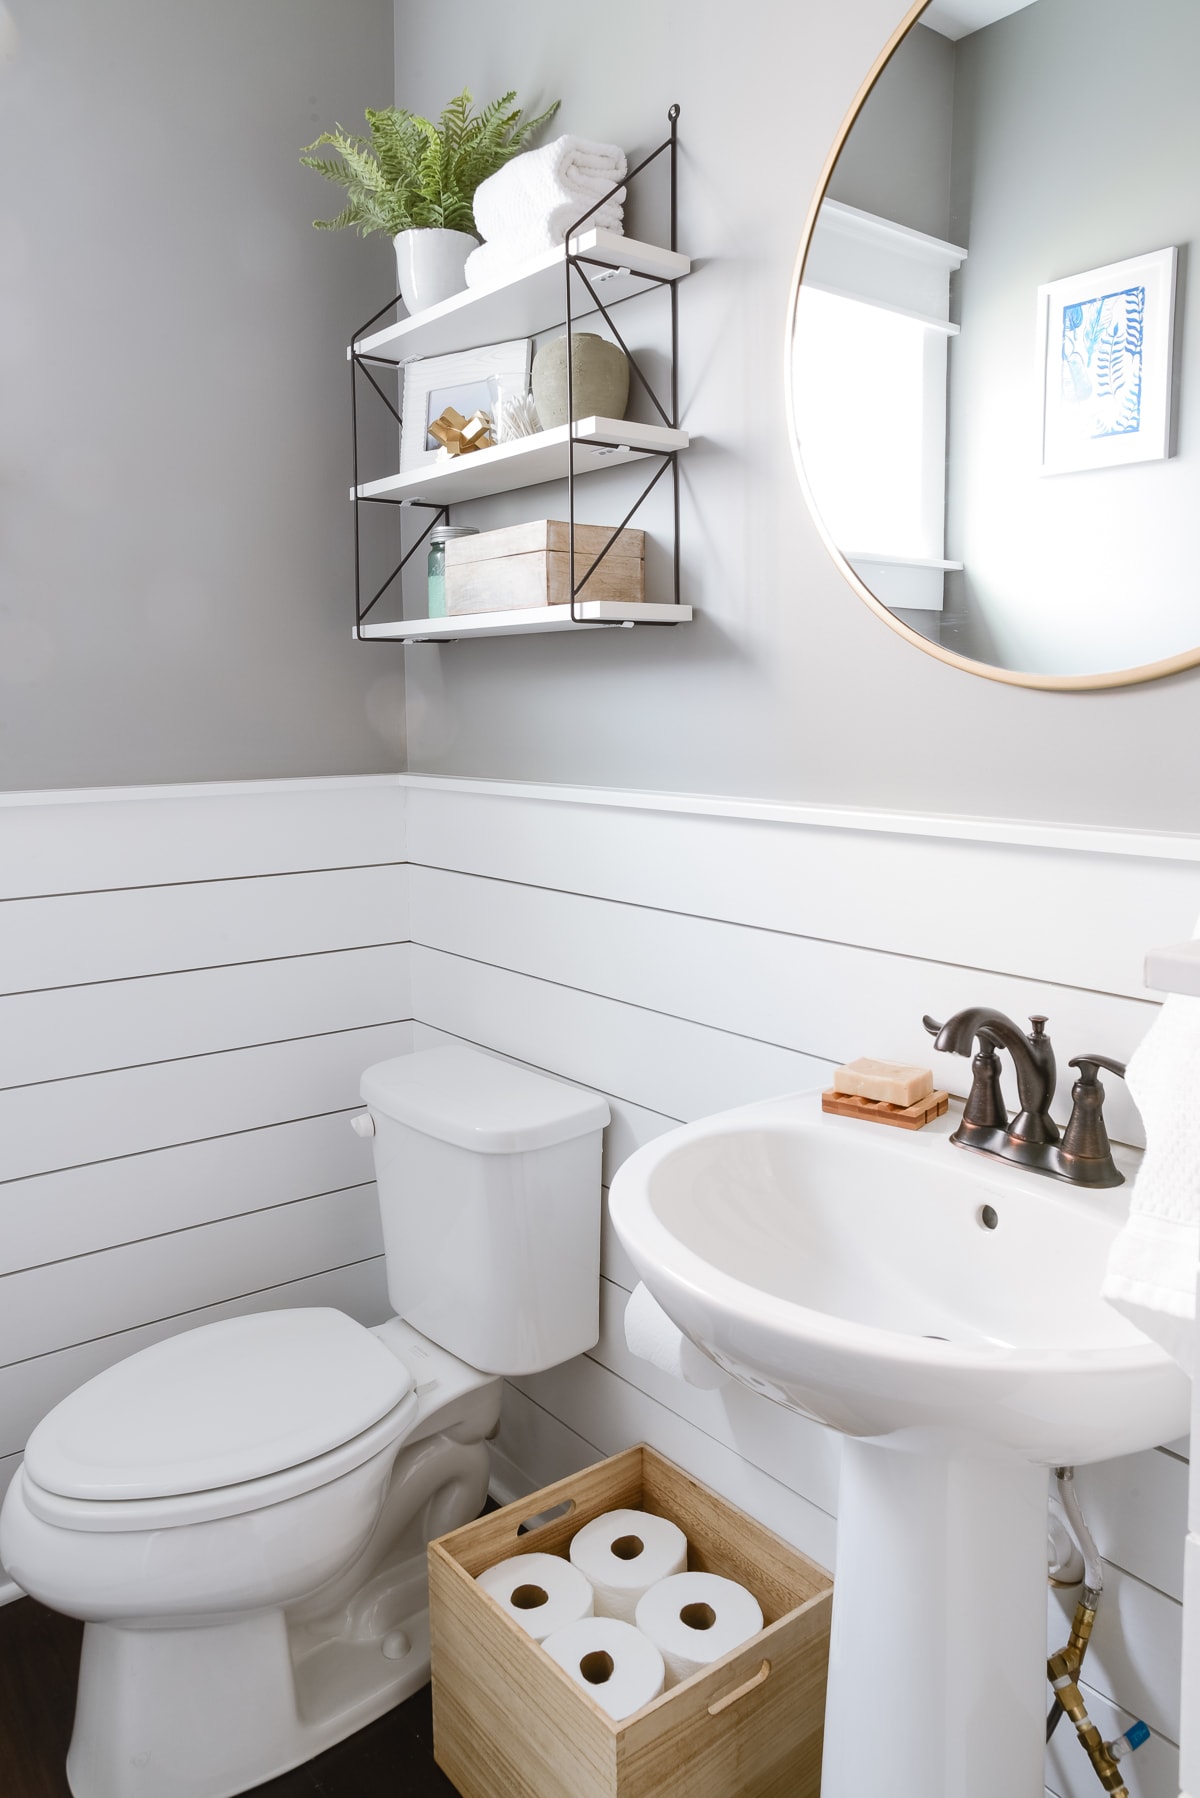
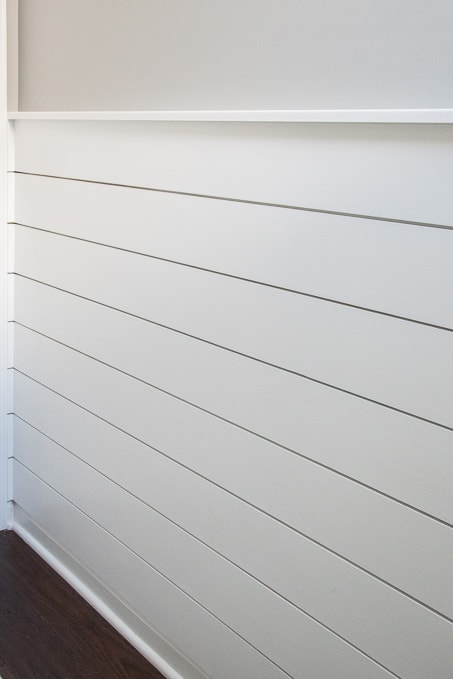
I wanted to create a classic white shiplap wall in our powder room.
First, we coated the entire shiplap wall with primer. After that was dry, we painted the shiplap with 2-3 coats of white semi-gloss paint.

To get an even coverage, we used a brush to get the paint into the gaps between the shiplap boards. Then, we used a roller on the outside surfaces of the shiplap to create a smooth painted finish.
Then, once everything was dry, we stepped back and admired the finished shiplap!
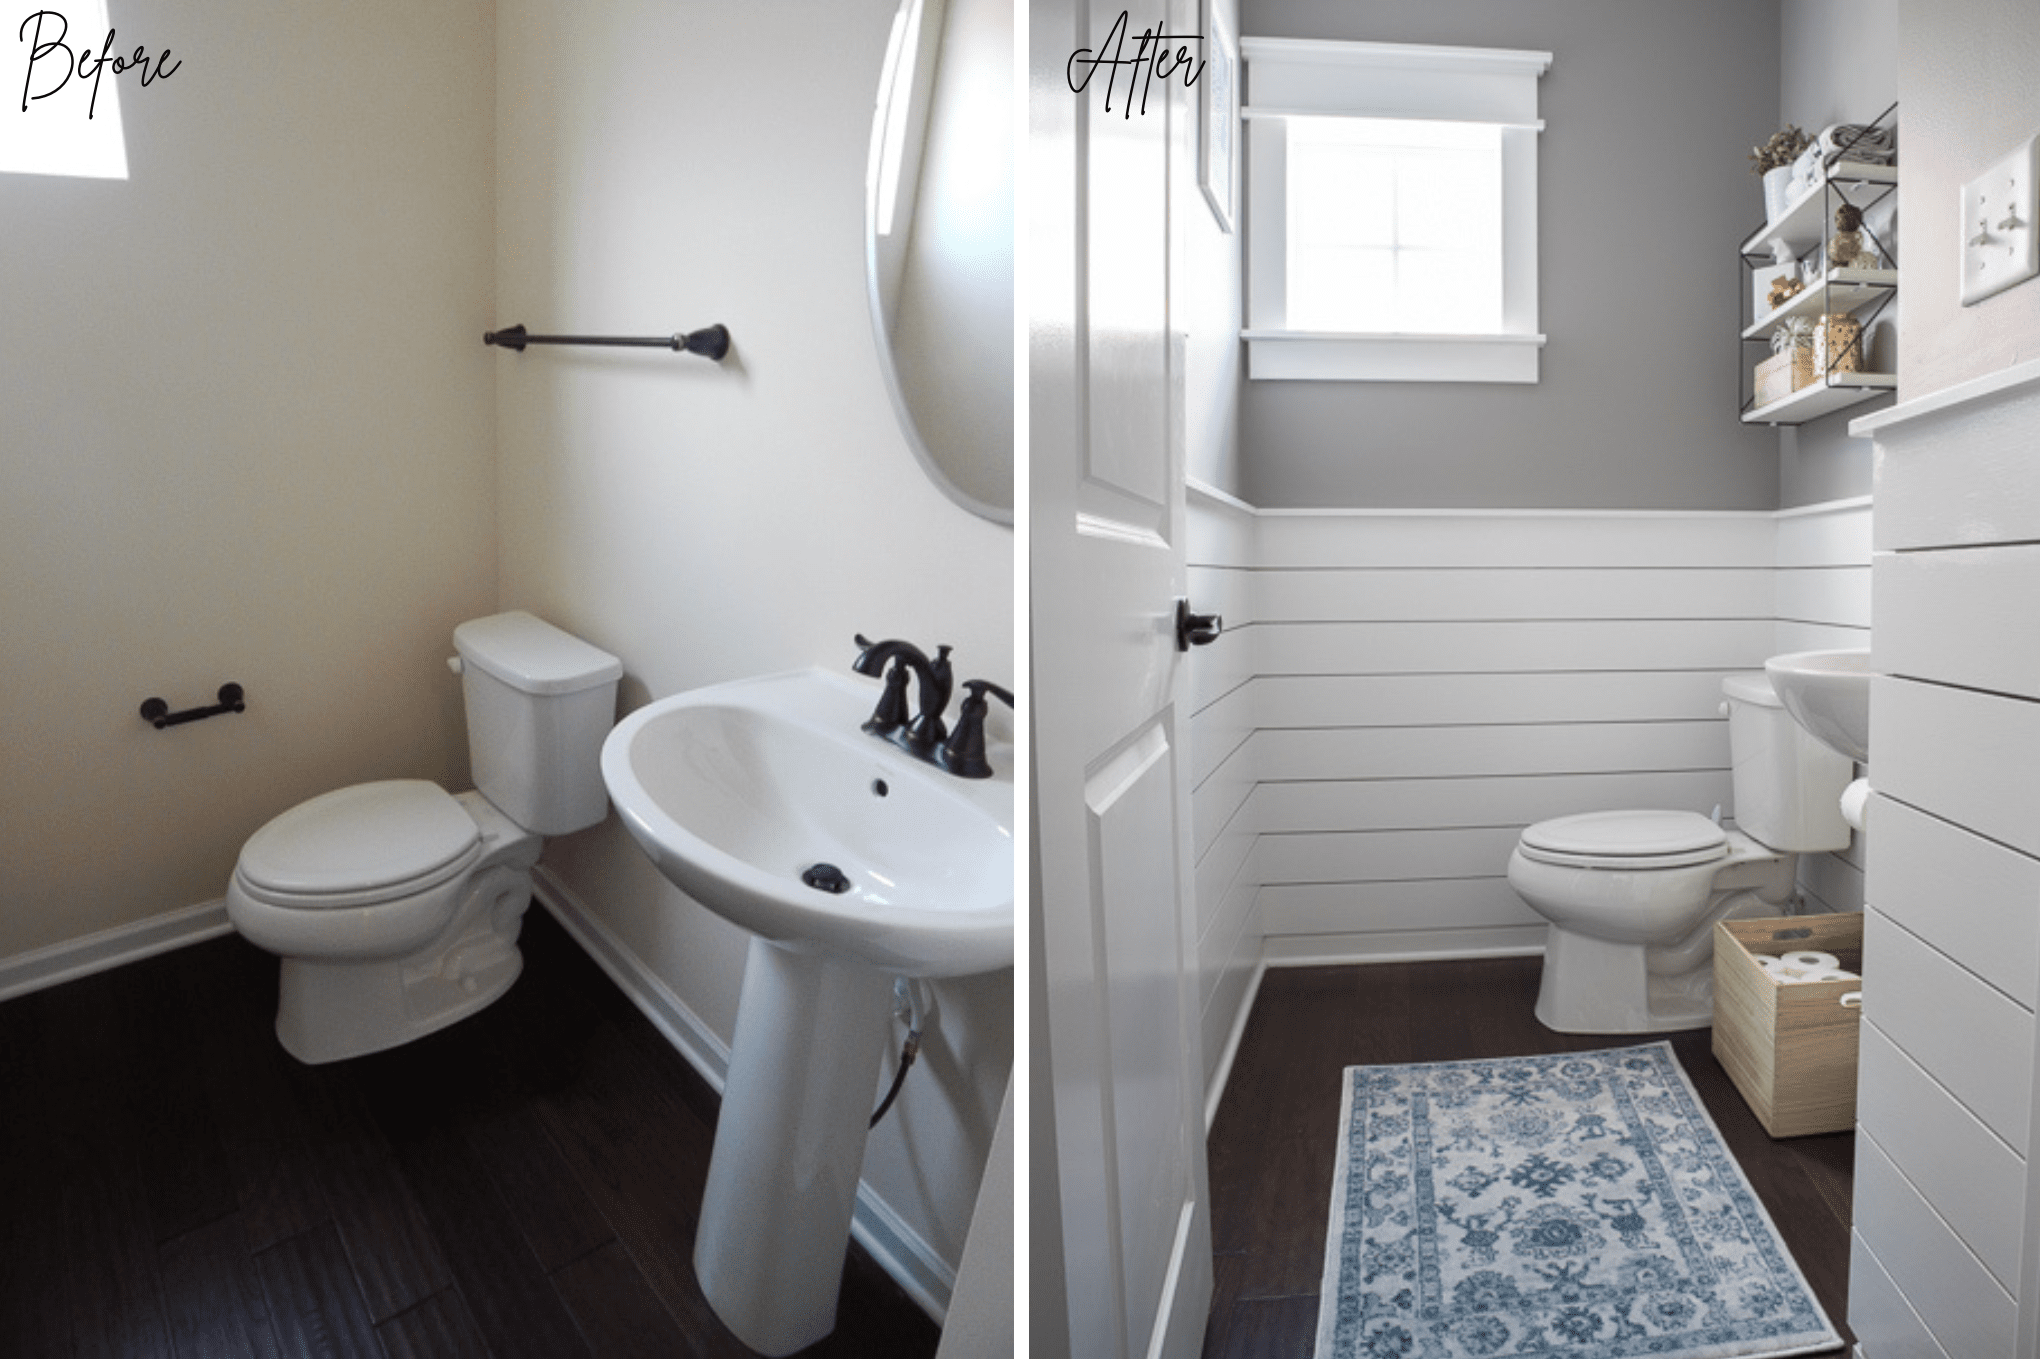
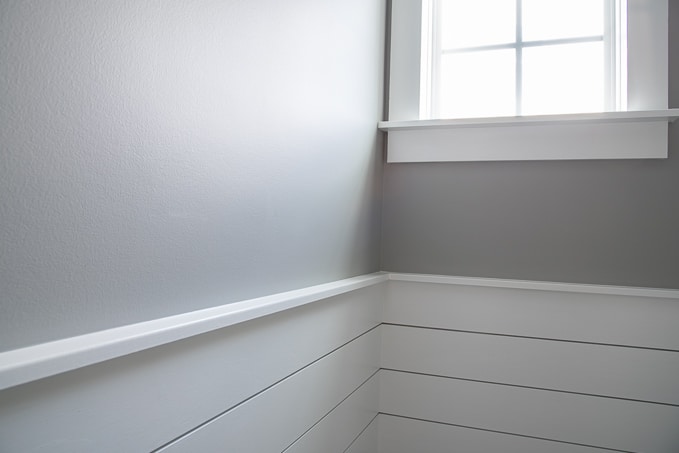
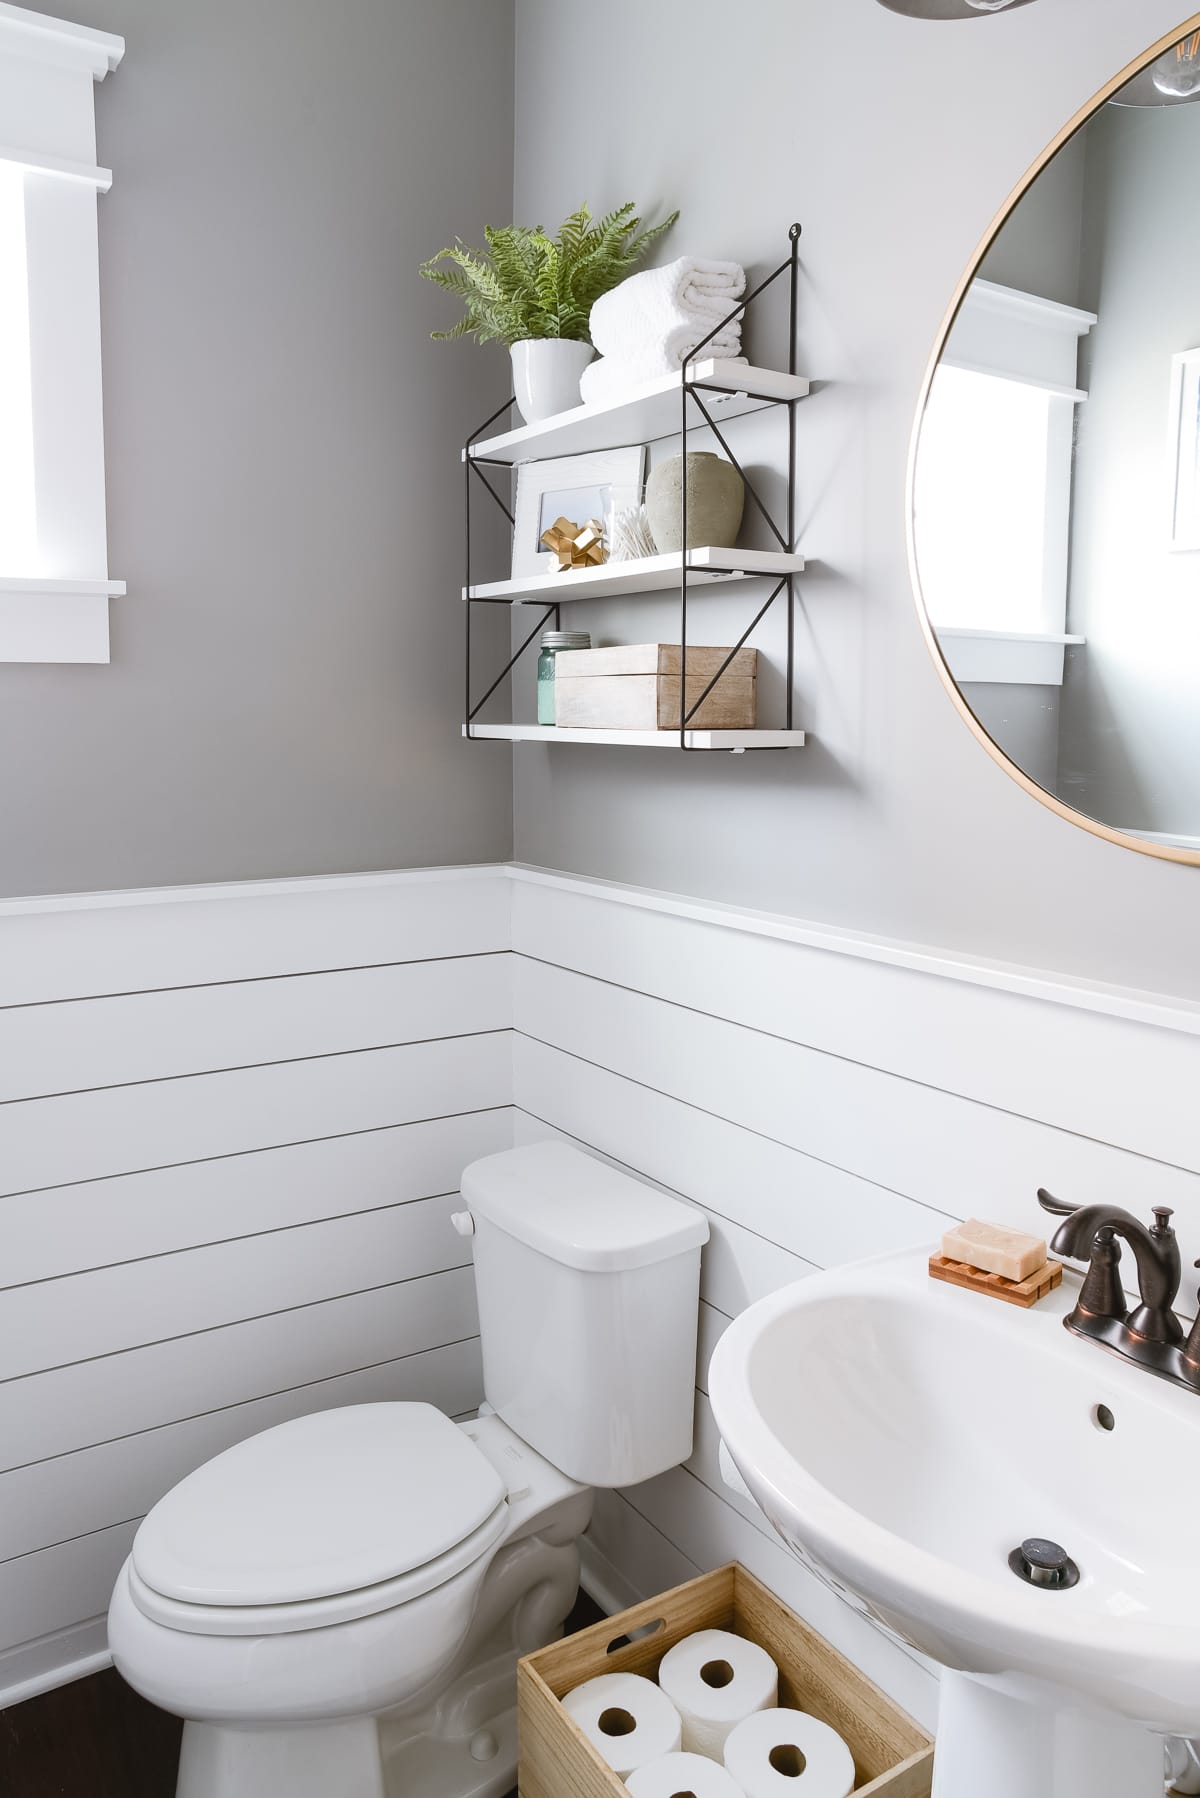
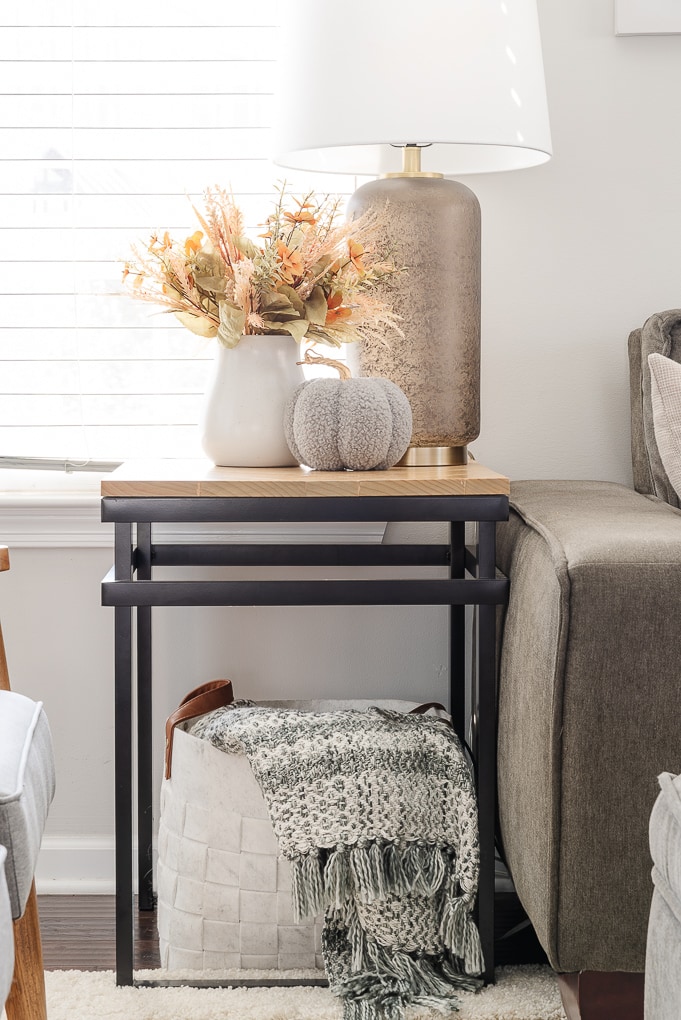
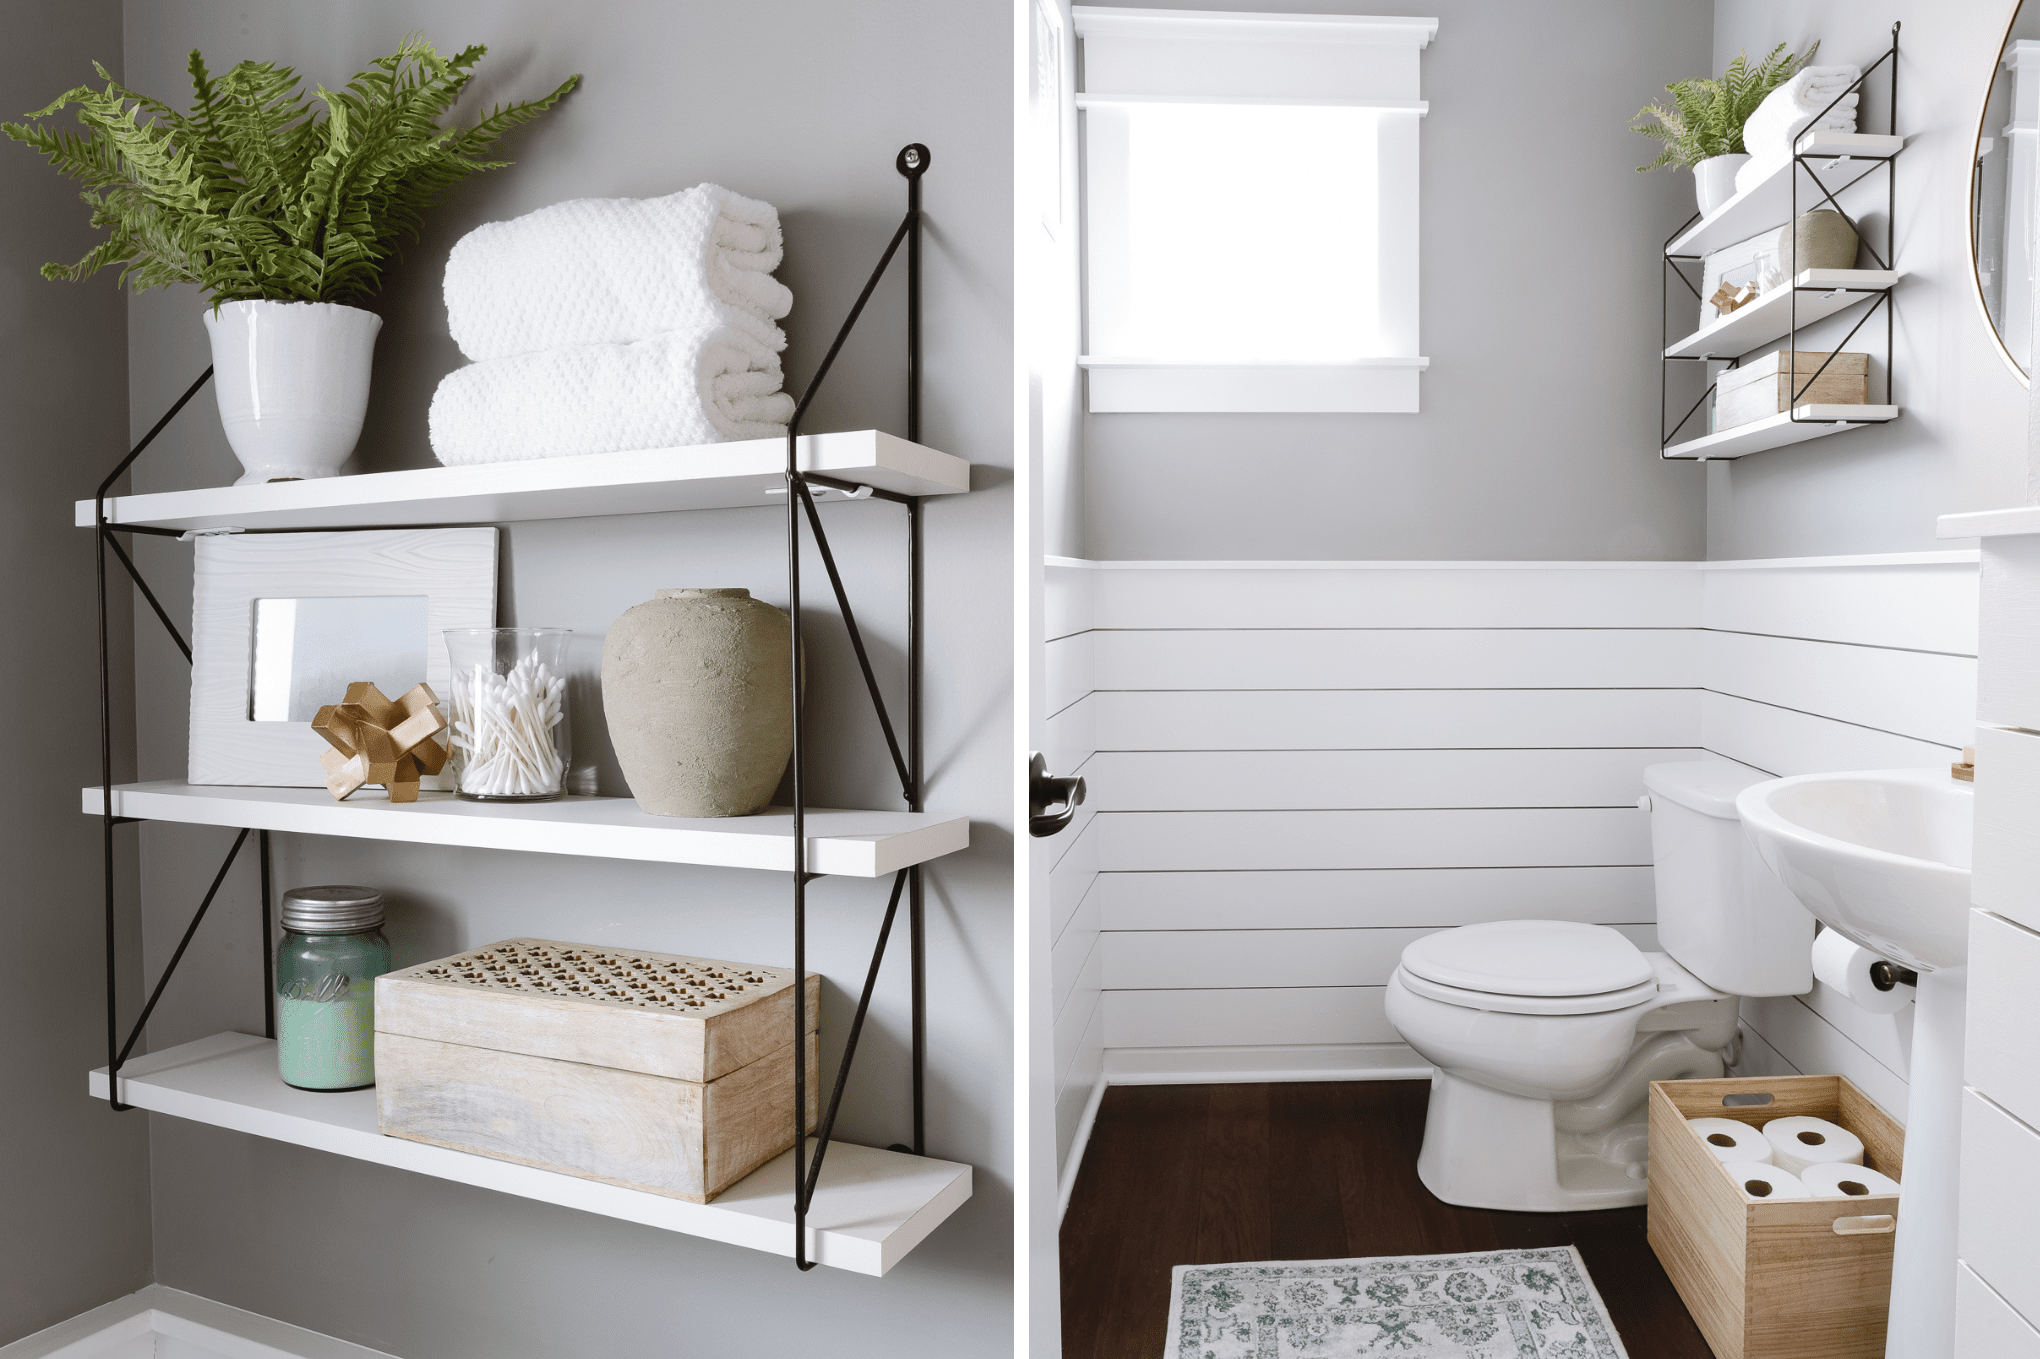
Shiplap Wall Transformation
After the shiplap was dry, we painted the upper part of the walls gray to contrast the pretty white wall treatment.
The paint color we used is Hazy Stratus by Valspar.

Related: Our Whole Home Paint Color Scheme
This DIY shiplap wall project in our powder room was a little tedious, but it was so worth it! I love the texture that it creates in the room and the contrast of the white and gray looks amazing!

The powder room is a really small space, so adding the white wall treatment really helped to brighten everything up. The crisp, clean lines and the contrast help make this shiplap look modern and fresh.
Related: Powder Room Makeover
Creating a shiplap wall is a perfect DIY project for beginners. By following these simple steps, you can transform any room in your home with your own DIY shiplap wall.


This looks so great! I love your dimensioning and plans 🙂 Our powder room needs attention, so I’m super excited to see how you do yours!
Thanks Brittany! It was really difficult to get some good pictures while we were building in that tiny space. So I ended up with my own illustrations ;). So glad to have you here on the blog! Thanks for stopping by.
>> Christene
It looks SO great! Your electrical outlet solution is genius, too. I’d have never thought of shiplap to be a modern design element but it works so well!
Thanks Meredith! I’m really happy with how it ended up looking. And my husband Ben gets all the credit for that outlet trick ????
>> Christene
Wow, love how it turned out! Thanks for such a helpful and detailed outline of exactly what you need to do to install shiplap! I’ll be using your guide when we do it ourselves in our dining room 🙂 cheers!
Thanks so much Briana! So glad to have you here on the blog!
>> Christene
FYI in your instructions you say to cut one board 1/2″ longer then the wall. If you did that the board would not fit end to end if it’s a 1/2 longer then the wall. I think you ment to say cut the board 1/2″ shorter. and the other board the same length as the wall, This will allow you to butt joint the corner up against the other. Nice job by the way!
Whoops! Thanks for catching that. I have fixed it in the post.
>> Christene
Great project and super helpful. Did I miss what you used to cap off the top on the shiplap?
The top piece is a piece of 1×2 MDF that I turned on it’s side to use as a “trim.”
>> Christene
Is there a reason you didn’t paint the boards before nailing them? Wouldn’t that have been easier?
I didn’t think of doing it that way but that would totally work too!
>> Christene
Hi, this looks great – looking to mimic you. What did you do about the 12″ toilet? Was it not flush against the wall?
Thank a lot for the instruction guide. This makes renovating so much easier 🙂
But there is still one question.
Were the shiplaps nailed directly onto the wall? What kind of wall was it that did not need a sub-construction?
Thank you,
Alex
Yes they were nailed directly into the wall.
What size of tile spacers did you use?! Can’t wait to copy you in a bathroom! It’s do fresh!
I used 3/16″ tile spacers
>> Christene
What size tile spacers did you use?
I used 3/16″ tile spacers
>> Christene
Did you remove the toilet for installation or were you able to work around it and fit the board behind?
We were able to just work around it without having to remove it.
>> Christene
Very good job! Where did you purchase the shelf unit over the toilet?
Hi Savannah! Thanks so much. The original shelf unit was from Amazon. The exact same unit is no longer available, but this is a very similar looking one from Amazon: https://rstyle.me/+M6hFh2d3NM3azUeDi_tBAg
Hope this helps!
>> Christene