How to make wood drawer dividers for kitchen cabinets.
Organizing kitchen drawers can be a frustrating task. Depending on the type of drawers that you have, it can be hard to find a custom kitchen drawer insert that fits your organizing needs exactly.
If you’ve looked everywhere for the perfect kitchen drawer organizer but just can’t seem to find it, you’re in the right place. The best solution is to make your own wooden drawer organizers.
Wooden kitchen organizers are something that you might see in custom built kitchens and cabinets. But did you know that you can make your own version for a fraction of the cost?
Getting your kitchen drawers organized is a huge priority, especially when you are using your kitchen every day. It’s time to get your kitchen drawers organized once and for all with this easy DIY project.
In our kitchen, we have 2 drawers that were chronically disorganized. And they happened to be the 2 most used drawers in our kitchen – the silverware drawer and the kitchen utensils drawer.
Every time I opened the drawers I would think, “Ugh, I should really organize this drawer!” It was so frustrating to never have a place for my most used kitchen utensils.
We used these two drawers every single day in our busy home. And I was tired of dealing with the constant mess!

Here’s what our kitchen utensil drawer looked like most of the time. When we would unload the clean dishes, we would just throw the utensils into that drawer.

Seriously, what a mess! The silverware drawer wasn’t any better. Just imagine a drawer filled with tangled forks, spoons, and knives.
Before we moved into the house, I had plans to buy drawer organizers and create a perfectly organized system. Every time I saw drawer organizers in a store I was tempted to buy them, but I was always worried they wouldn’t fit perfectly.
Finally, I decided that the best idea was to make my own custom utensil drawer organizers.
I’ve seen some beautiful kitchen organization ideas with perfectly fit drawer organizers. In those situations, every single item is in a dedicated place.
I love to see all of these perfectly organized spaces, especially from places like HGTV. But let’s be honest, these types of organizing systems aren’t always going to work in everyone’s kitchen.
Most of the time, these inspirational ideas are from custom kitchen designs with custom kitchen drawer inserts. And, as you know, anything “custom” ends up being really expensive.
Well, for this project, forget what you know about “custom.” Because these wooden drawer inserts are easy, budget friendly, and will give you the organized kitchen results you’ve been dreaming of!

This post contains affiliate links. For more information, see my disclosures here.
How to Make Drawer Dividers
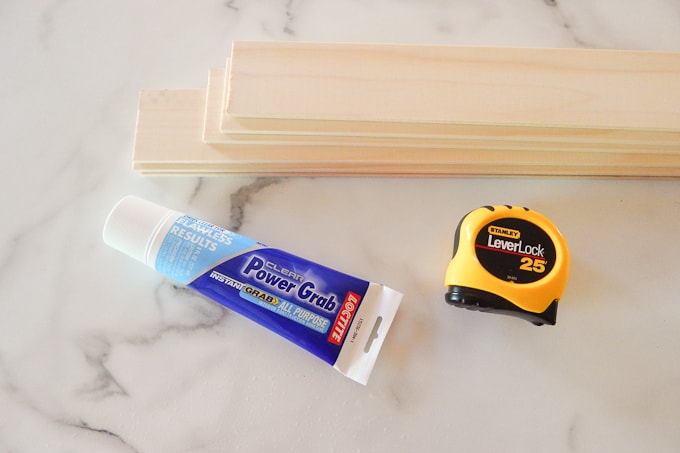
Materials for Drawer Dividers
- Unfinished Poplar boards (2.5” x 1/4”)
- You can find these at Lowe’s
- Loctite (Clear Dry)
- Measuring Tape
- Miter Saw
- or handsaw
- Square Tool
- Pencil
Organizing the Kitchen Drawer Contents
Before you start, first you need to figure out what items will go in your drawers.
For our kitchen utensils drawer, we emptied everything out and organized the items by type.
Using some trial and error, we selected one item of each “type” and placed it into the drawer to get an idea of where we wanted things to go. This helped us to visualize where the compartments should be in each drawer.
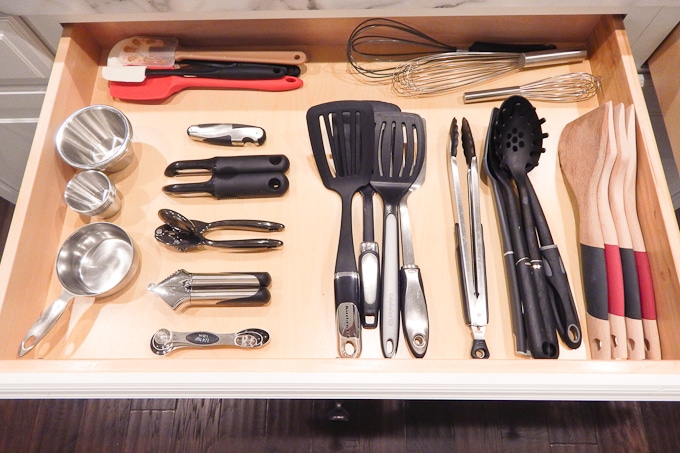
After figuring out where we wanted each “type” of item to go, we placed all of the items back into the drawer in their compartment location. Here’s the layout we came up with for our cooking utensils drawer.
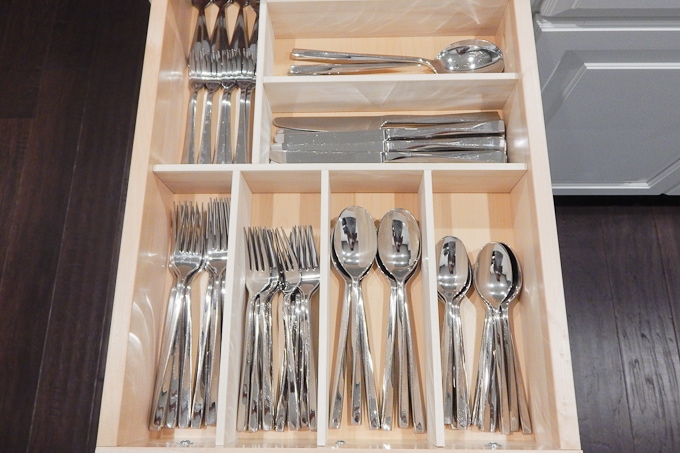
The silverware drawer was grouped in an obvious way – by forks, spoons, and knives.
Measure and Sketch Drawer Organizers
Next, you need to measure around the items in your drawer to figure out how big each compartment of your organizer will be.
We found that the best way to do this was by measuring the largest item in that compartment and adding some additional space to our measurement. We also took into account the thickness of our boards which was ¼”.
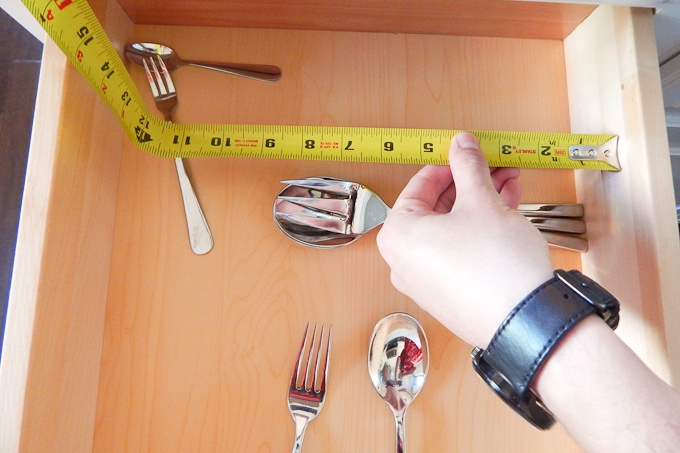
It’s helpful to grab a piece of paper and draw a sketch of your drawer organizer plan. Then, as you are measuring, you can jot down the measurements on your sketch.
Cutting Wood for Drawer Dividers
After your sketch is complete and you have all the measurements, it’s time to cut out the pieces of the drawer organizer.
Before we started cutting, we first made our cut list.
What is a Cut List?
A cut list is basically what it sounds like – a list of all the sized pieces that you need to cut for a DIY project.
When making a cut list, be sure write down the pieces in size order, starting with the largest pieces. That way when you are cutting, you don’t run out of wood before you’ve cut your largest pieces.
Once you have a list of the pieces you need to cut from largest to smallest, you are ready to go. Always start cutting from largest to smallest on your cut list.
To cut our wood pieces, we used our miter saw. The wood we used for this project was thin, so you could also use a handsaw instead.

Using our cut list and working one piece at a time, we marked the length needed from our cut list using a pencil and the straight edge on the square tool.

Then we lined up the edge of the saw with the pencil line to make sure we were getting an exact cut.

After making each cut, we measured the piece to also make sure the length matched the length on our cut list. Then we repeated this process – measure, mark with pencil, cut, measure – for each piece on our cut list.
This is kind of a slow process, but it is worth it to make sure all of your pieces fit perfectly, just like custom drawer organizers would.

How to Assemble Wood Drawer Organizers
Once we had all of the pieces cut out, we brought everything into the kitchen for assembly.
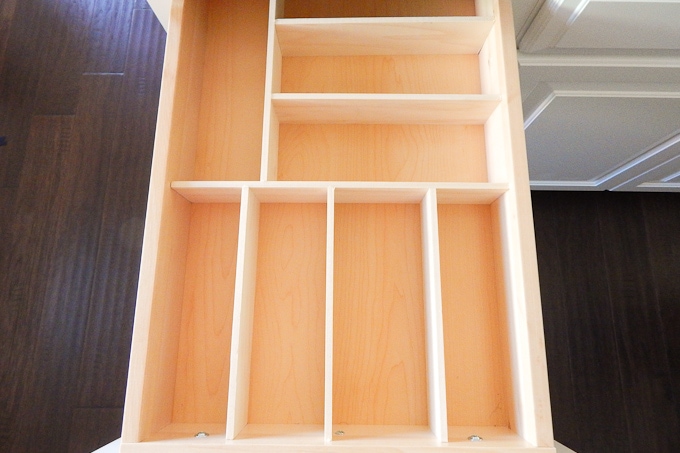
The first step to assembling your wooden drawer organizers is to dry-fit them into the drawer.
Dry-Fit Wood Divider Pieces
Dry-fitting is the process of testing the pieces in place before actually gluing them down. That way you can make sure your pieces will fit in the drawer as expected.
Here is the dry-fit layout of the silverware drawer.
Once all of the pieces were inside of the kitchen drawer, we took the time to mark where each wooden piece would intersect another wooden piece. Using a pencil, we made a small mark on each intersecting spot so we knew where to put the Loctite glue later.
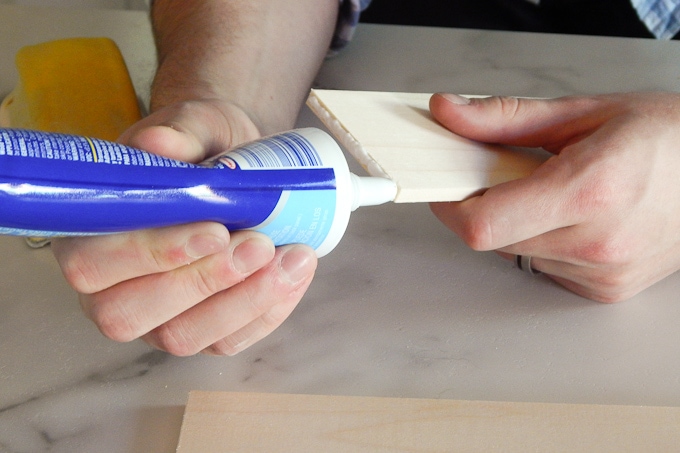
Gluing Drawer Divider Pieces
After the dry-fit process was done, we assembled the main structure of the drawer organizer outside of the drawer itself. We used our pencil markings and the sketch that we made earlier to glue the boards into place and create the compartments.


We let each piece dry for a few minutes so that it wouldn’t fall apart. Then we moved the compartments into the drawer and used the Loctite again to glue the wood inserts to the sides of each drawer.
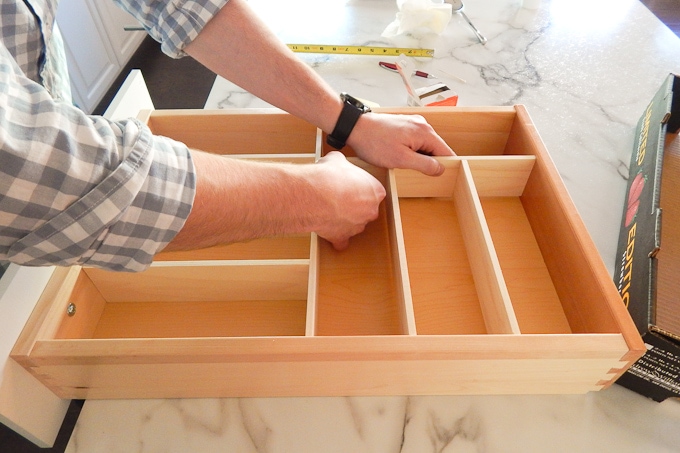
Some of the smaller wood pieces had to be glued individually once the main compartment structure was in place inside of the kitchen drawer.

Every kitchen drawer layout will be different, so the best way to assemble the wooden organizers is to place the largest component in first and then build onto the structure from there.
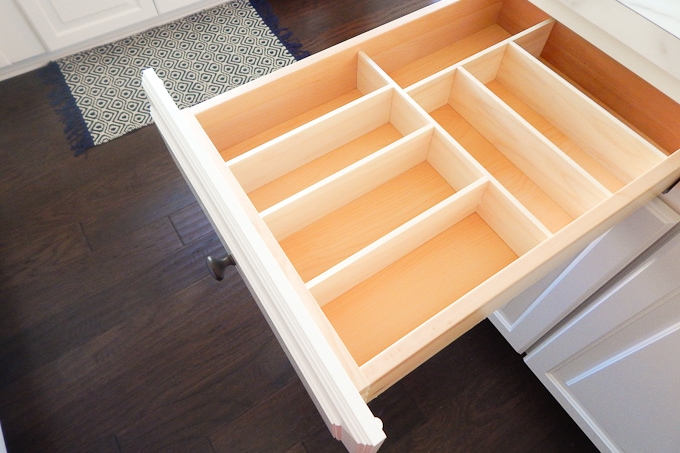
Finished Wood Drawer Organizers for the Kitchen
After we were done gluing everything into place, we were finished assembling the drawer organizers in the kitchen.
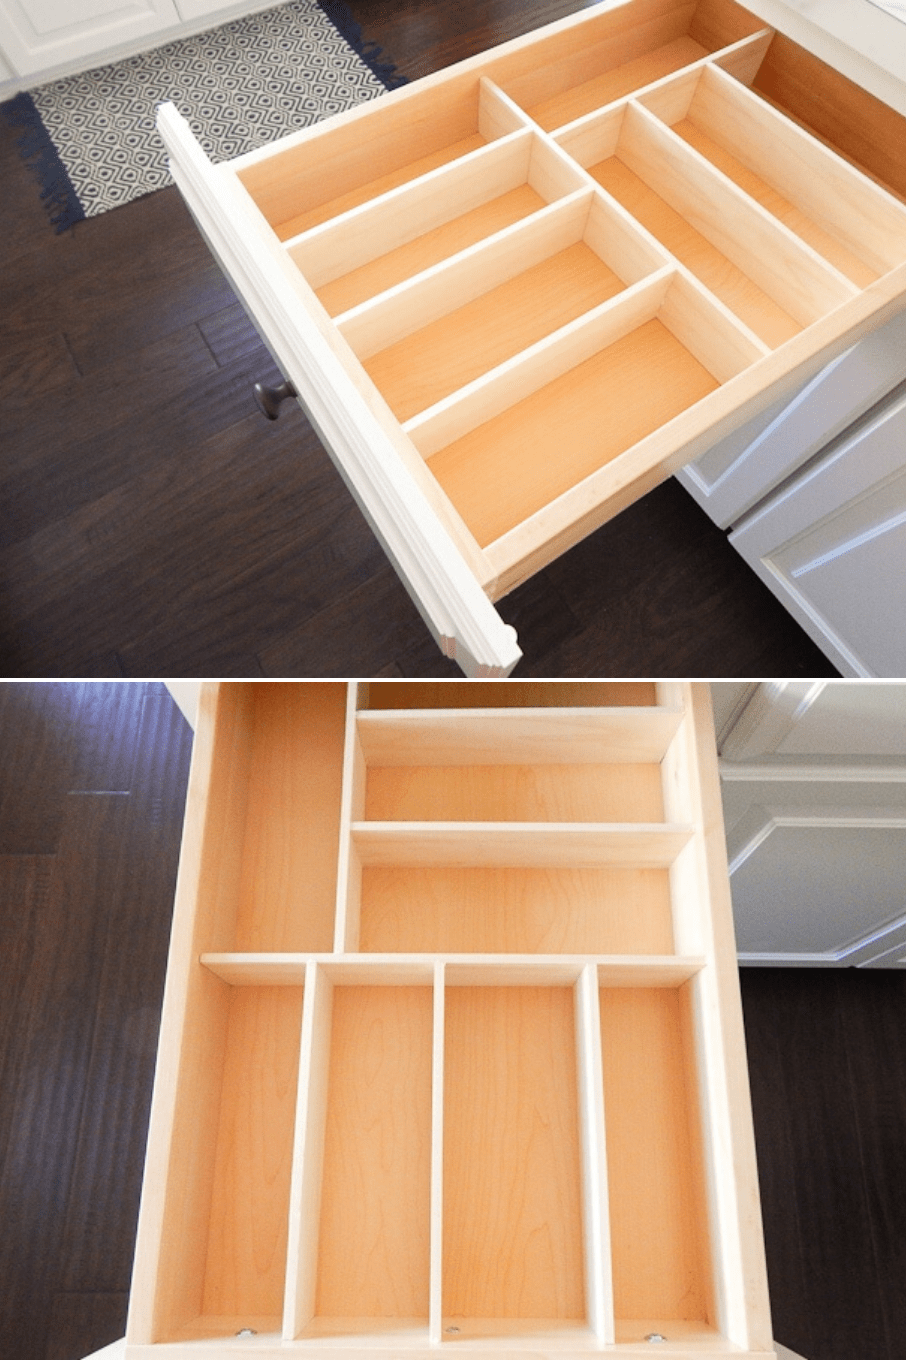
Organized Silverware Drawer
Here’s our finished silverware drawer dividers.
Organized Kitchen Utensil Drawer
And here’s our finished kitchen utensil drawer dividers.
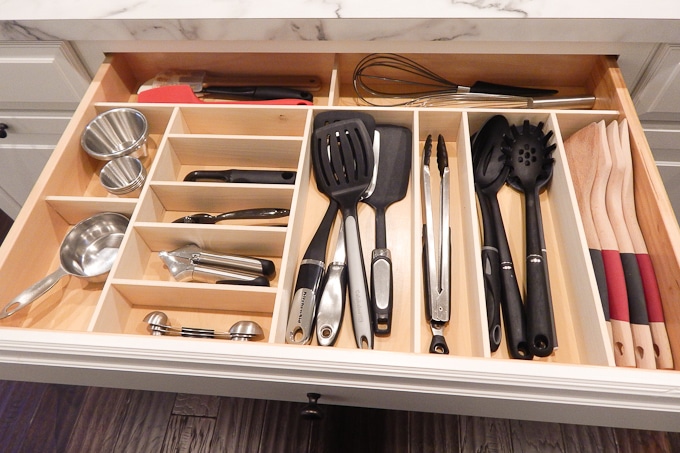
Amazing! These turned out exactly how I imagined! Perfectly fit custom wood drawer organizers. Now there is a compartment for everything and each item has a designated place.
We decided to keep the wood unfinished because it makes the dividers look like they came with the kitchen drawers, just like a custom design.
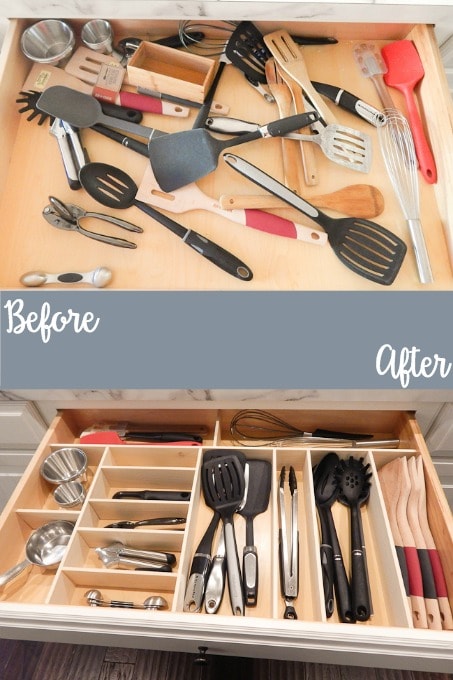
Before and After Organized Kitchen Drawer
Just for fun, here’s a little before and after comparison of the kitchen utensil drawer.
These custom wooden drawer inserts are perfect for kitchen cabinets, but can also be used in so many different places in your home.
I’ve got so many ideas for where I could use more DIY drawer organizers in the future. And, because I can create my own layouts, the options are limitless.
Final Thoughts on our DIY Custom Kitchen Drawer Inserts
Organizing your kitchen drawers can be a daunting task. Especially if you don’t have the right kinds of organizers.
I was so frustrated with how my drawers were functioning in my kitchen because nothing had a dedicated place. I’m glad I was able to come up with a simple, easy solution that made a huge impact in my home.
After making my own custom wood drawer inserts, I can now easily keep my most used drawers organized at all times.
Let me know in the comments if you try out this organizing project in your home.
Related Kitchen Organizing Posts
- 7 Things You Need to Get Rid of When Organizing Your Kitchen
- How to Organize Under the Kitchen Sink
- Organized Kitchen Cabinets and Drawers
- How to Organize a Bottom Freezer Drawer
- How to Organize a French Door Refrigerator


This turned out so nice! Thanks for sharing at Merry Mondays!
Thanks Angela! We love having these in our kitchen – everything has it’s place now and stays organized 🙂
Here from Centsational Girl, great post!
Thanks so much – and thanks for stopping by my blog 🙂
>> Christene
You make this look so easy, I think I just may be able to do this, I certainly need it.
Shared!
Thanks for the share Celeste!
>>Christene
Was about to say the same thing. Looks perfect. I need to organise my home. It’s so messy, I am overwhelmed all the time. I am happy I found you.????
Such a great idea! Not only is it practical but it looks so much pretty afterwards! Thank you so much for linking up to our Pretty Project Party this month 🙂
Thanks Sarah! Practical and Pretty is always the perfect combination 🙂
>> Christene
Absolutely amazing! I just moved into a custom home and still had plastic organizers brcause I was not about to spend the extra bucks on custom orgainzers. This is perfect, inexpensive and do-able! I love your ideas and clear instructions! It’s hard for young parents to.understand that being organized saves money, time snd frustration…but you need tools to be organized!! Thanks and keep ’em coming!
Lisa – I’m so glad you found this helpful! I know, those custom organizers can cost sooo much money. Staying organized definitely helps, especially after a move. Congrats on the new custom home!
>> Christene
Wow this looks awesome! we have a few drawers that is just one giant open space and this is perfect for me to try and organize my drawers!
Hey Christene,
I was impressed with yours blogs. Looks awesome! This is absolutely perfect for the kitchen drawers. Can’t wait to try something similar with this soon. Thanks for sharing! Such a great idea.
Cheers,
Oliver
Hi! Love this idea but planned out 7 drawers based on 1/8” thick boards per the materials list in your post. Just went to Lowe’s and they only carry 1/4” thick boards. Read down in the body of the post and it also says 1/4” thick boards were used. You may want to update your materials list so someone else doesn’t make the same mistake. 🙂 I’ll have to rework my measurements but looking forward to the end result! Thanks!
Oh No! Thank you for pointing this out and so sorry that I made it confusing and messed up your measurements. I will fix that now. I appreciate you letting me know.
>> Christene
Can’t find 1/8 boards, only 1/4. Are you sure it is 1/8? On the pictures it looks more like 1/4.
Hey! I am so sorry I had an error in my materials list. They are 1/4″ boards – one of my readers pointed out the error too.
>> Christene
Thanks for this excellent tutorial! I used this idea and the cracked silverware tray to transform my kitchen drawer. Looks so much better.
That’s awesome Linda! I’m so glad it worked out for you!
Christene
This looks easy! Do you have to glue it to the drawer? I would like to be able to remove it for easy cleaning.
We did glue ours into the drawer – so no we can’t remove it to clean. If there’s a lot of dust and other things, I used the handheld attachment and my vacuum to clean the drawers.
So happy I found this post! Last week my dividers that I purchase on Amazon came in but didn’t work so gave them away.
My “drawer” gives me an OCD moment everytime I open it. I’m going to the Depot tommorrow for supplies, already measured and have a layout. Can’t wait, thanks so much for sharing!
Yay Sheri! I’m so glad it was helpful! Can’t wait for you to have super organized drawers.
>> Christene
My email address did not go in right
What a great tutorial! Pinned!
Thanks!! I appreciate it
>> Christene
Just like everyone else said, you are awesome and very talented.
I am 65 years old and have had this kind of problem since I was 20. It’s really neat to finally find something that I can make to make it easier for me. Thank you so very much. You are my new go to person when I need to know how to do something in my house. Thank you, Thank you, Thank you.
Hi – Thank you for the kind words! So glad that you found this helpful! Good luck with your project.
>> Christene
Hello,
I was curious to how well these have held up.
Thank you!
They have held up great! We still have them in our drawers!
>> Christene
With a little creativity and some careful measurement from this post, I created a one-of-a-kind unique wooden drawer organizer that fits my kitchen space perfectly.