How to Make a Modern DIY Wood Accent Wall
Are you looking to add some character and interest to your home? A geometric wood accent wall is an easy and great way to do just that!
Not only is it a visually appealing feature, but creating one yourself allows you to customize it with different colors to fit your personal home style and decor.
In this post, I’ll walk you through the simple DIY steps to create your own geometric wood accent wall.
With a few basic tools and some wood boards, you’ll be well on your way to creating a stunning accent wall that will elevate any room in your home.
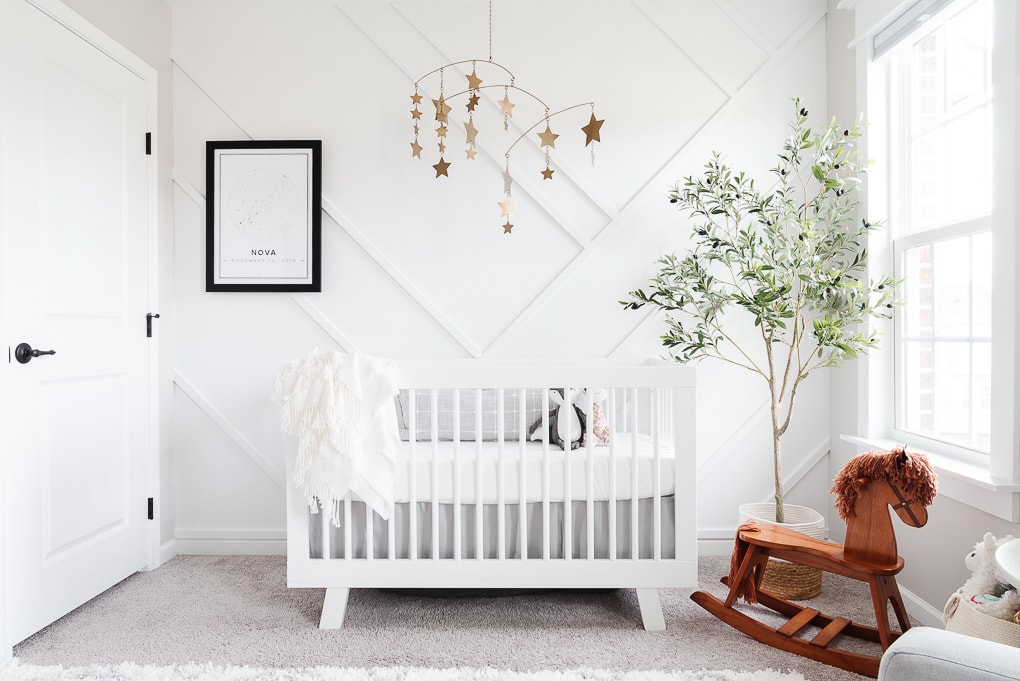
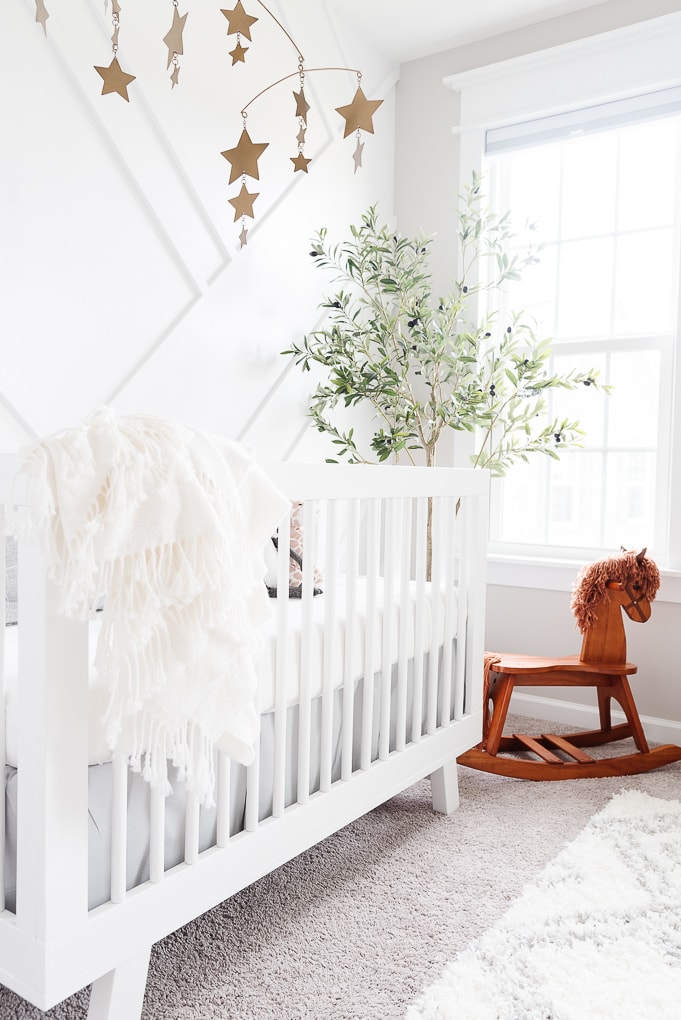
When I was designing my daughter’s nursery, I was looking for a way to add visual interest. I wanted to have some sort of feature wall to draw your eye to the wall where the crib would go.
That’s when I had the great idea to include an accent wall in the nursery design.
Accent walls are one of my favorite design elements because they add depth and personality to a room.
I wanted to do something similar to the grid board and batten wall from our master bedroom, but with a modern twist.
Instead of using traditional squares, I thought it would be fun to use a geometric design to create something more playful.

After searching online for geometric accent wall ideas, I found inspiration on Pinterest from Lindi at Love Create Celebrate, who had created a stunning, dark modern accent wall in her entryway.
I loved the way the boards were arranged at different ways and different angles to create a unique, yet intentional design.
That’s when I had the idea to create a similar design in all white for the nursery. I’m excited to show you how we made it!
This post contains affiliate links for your convenience. For more information, see my disclosures here.
Materials
- 1×2 MDF Board or Boards
- Wood Glue
- Wood Putty or Wood Filler
- Caulk
- Paint (We Used White Semi-Gloss Trim Paint)
Tools
- Tape Measure or Measuring Tape
- Miter Saw or Circular Saw
- Nail Gun (Brad Nailer) and Brad Nails
- Level
- Speed Square
- 220 Grit Sanding Paper
- Caulking Gun
- Caulk Scraper or Caulk Smoother (optional)
- Foam Paint Roller
- Small Paint Brush
- Medium Handy Paint Pail or Paint Tray
- Painter’s Tape (optional)
Designing the Accent Wall
One of the first things you’ll need to do is to plan out the design for your accent wall. This is the most important part.
Before you can start that process, you’ll need to measure. First, measure the length and height of the wall to establish the main dimensions. It’s also helpful to have a measurement to the center point of your wall.

The next step is to sketch a few design ideas on graph paper and decide the pattern and geometric shapes you want for your accent wall.
We used Lindi’s design as inspiration for our accent wall and eventually settled on our own design that we were happy with.
Create a Mockup of the Geometric Accent Wall Design
Rather than using washi tape to visualize the design on the wall as Lindi suggested in her tutorial, we decided to create the design on the computer.
We used Sketch-Up to create a final design mock-up of the wall and geometric pattern, which you can see below. This was the perfect cheat sheet while we were assembling the project.
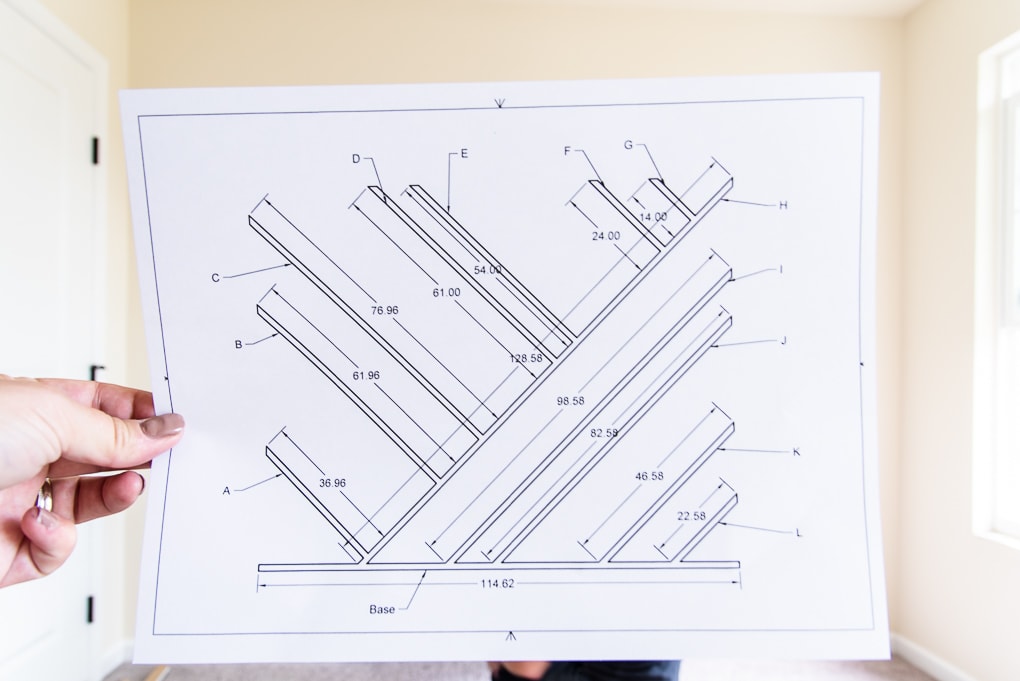
By inputting the main dimensions into the software, we were able to have the computer calculate the measurements for each individual board.
In order to make the project as simple and easy as possible, we made each of the angled pieces in the design a 45-degree angle.
Cutting the Wood into Strips
To help us assemble the design correctly, we labeled each board in the Sketch-Up design with a letter.
This was crucial because we were going to cut all of the pieces of MDF at the same time, and the pieces were all different sizes. The labels would serve as a guide for putting the pieces together to build the accent wall.
Using the computer design, we cut all of the boards to size with a miter saw.
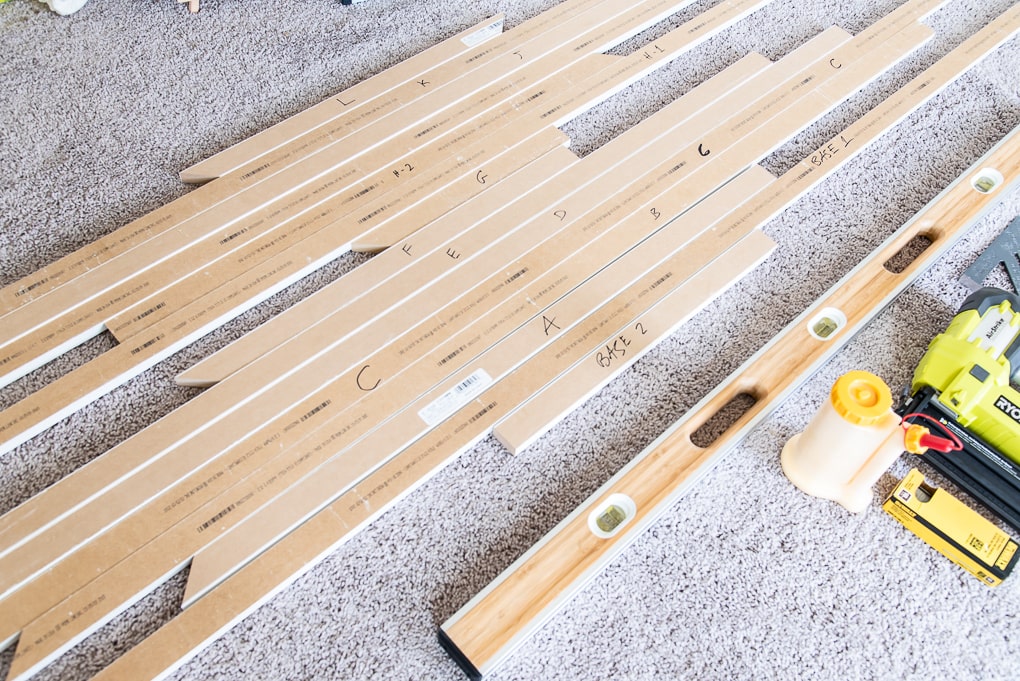
Some of the lengths in the design were longer than the MDF boards, so we had to use two boards for those areas and cut an angle between them to ensure a seamless fit on the wall.
After each of the wood strips was cut, we labeled the back of each individual board, and brought everything to the nursery for installation.
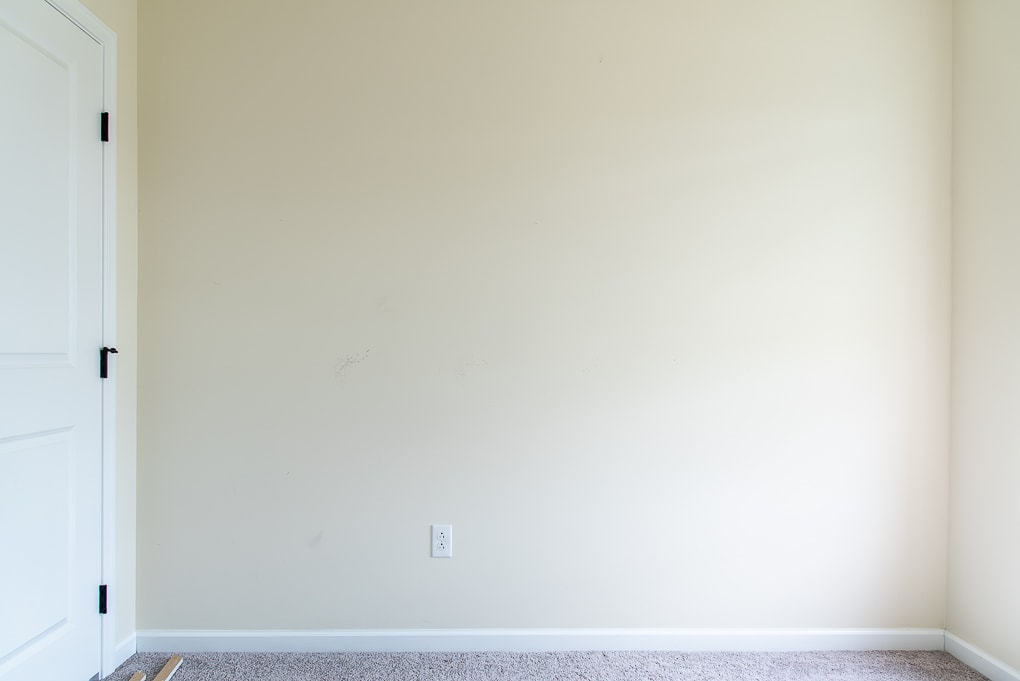
Prepare The Wall
Before you begin the assembly process, the first thing you need to do is prepare your wall. Remove any outlet covers and light switches, as well as any other wall art.
If the color of your wall is significantly different from the accent wall color you are designing, you may want to prime the blank wall first.
This will ensure that the original color of the wall won’t show through once the accent wall is painted.
Assembling the Geometric Wood Accent Wall
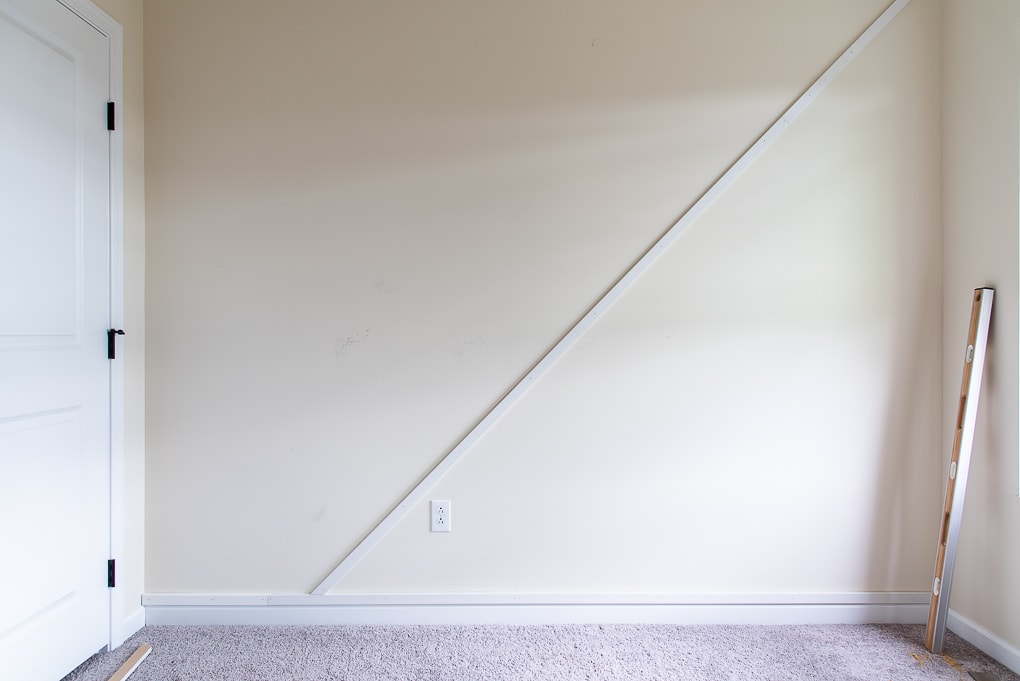
We started by installing the first board (base piece) at the bottom of the wall, just above the existing trim in the room. This created a horizontal line at the bottom of the accent wall and a nice straight edge.
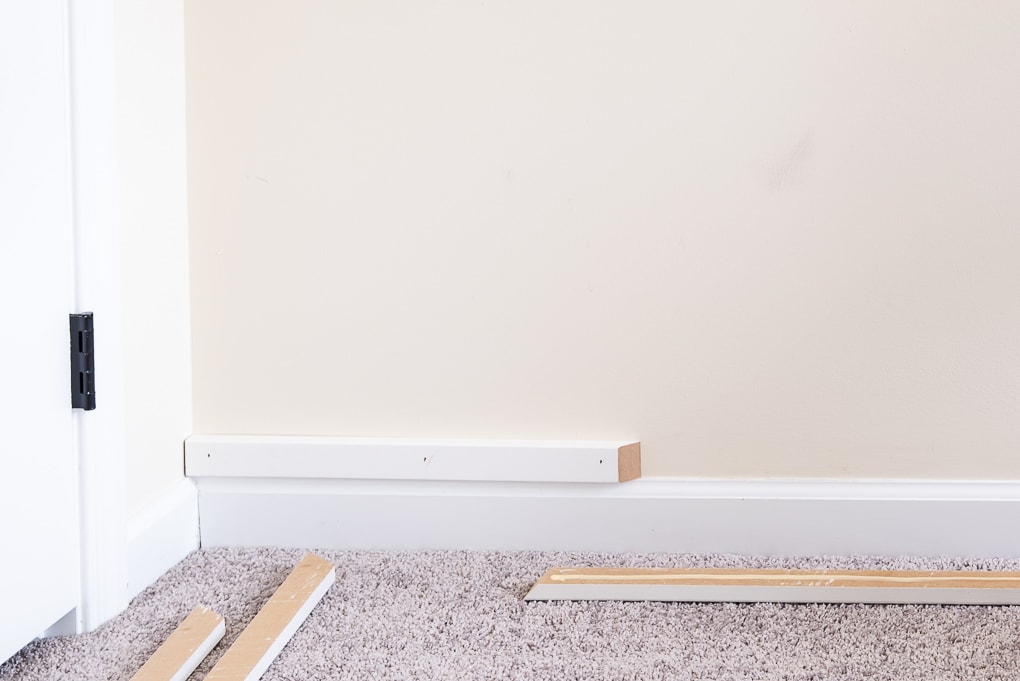
Since this piece was longer than the overall MDF boards we had, we needed to cut it into two separate pieces.
To ensure a seamless finish, we cut an angle where the two pieces would attach together to hide the seam. This made it look like a single, continuous piece of wood.
How to Attach a Wood Accent Wall
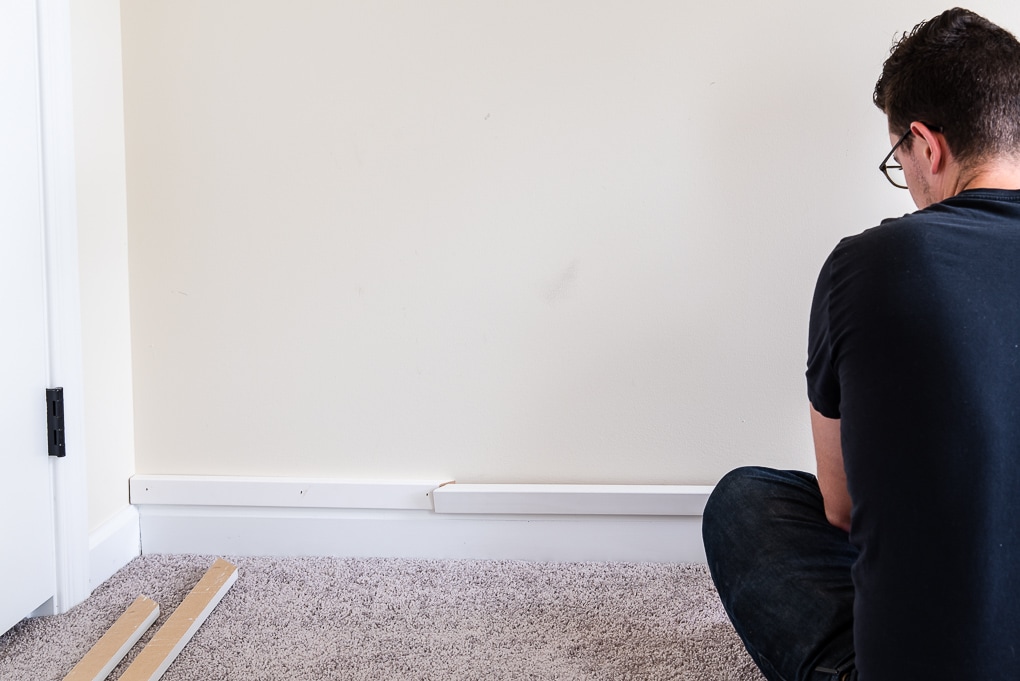
To attach the first base board to the wall, we applied wood glue to the back of the board and used a level to position it according to our design.
Once it was level and in place, we secured it to the wall with a nail gun. We wanted to make sure this was attached in a straight line so that it matched with the trim boards below.
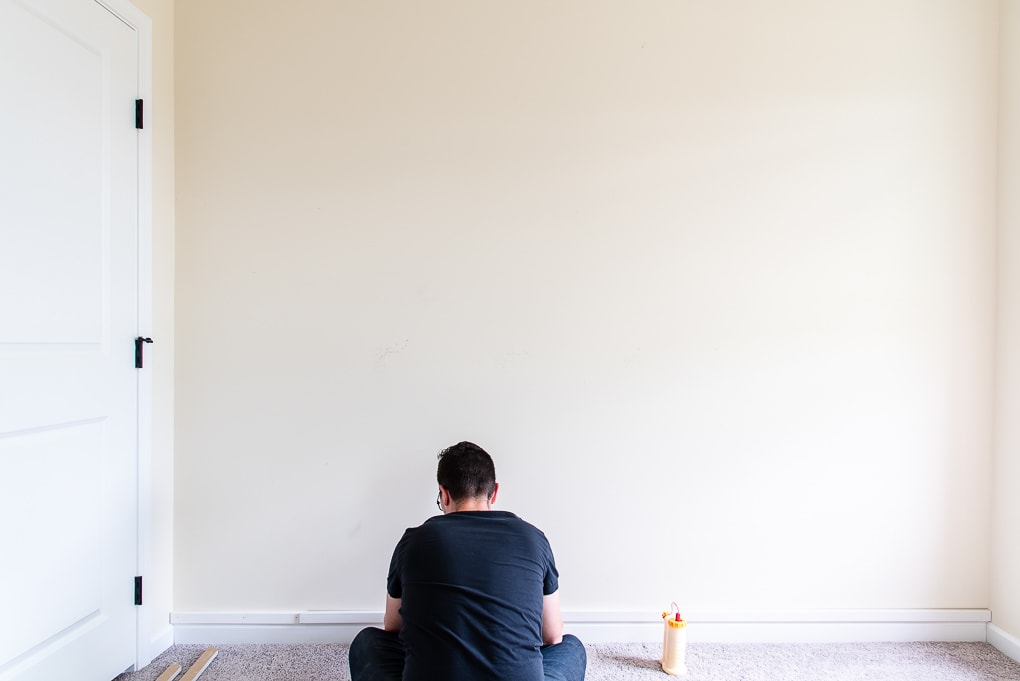
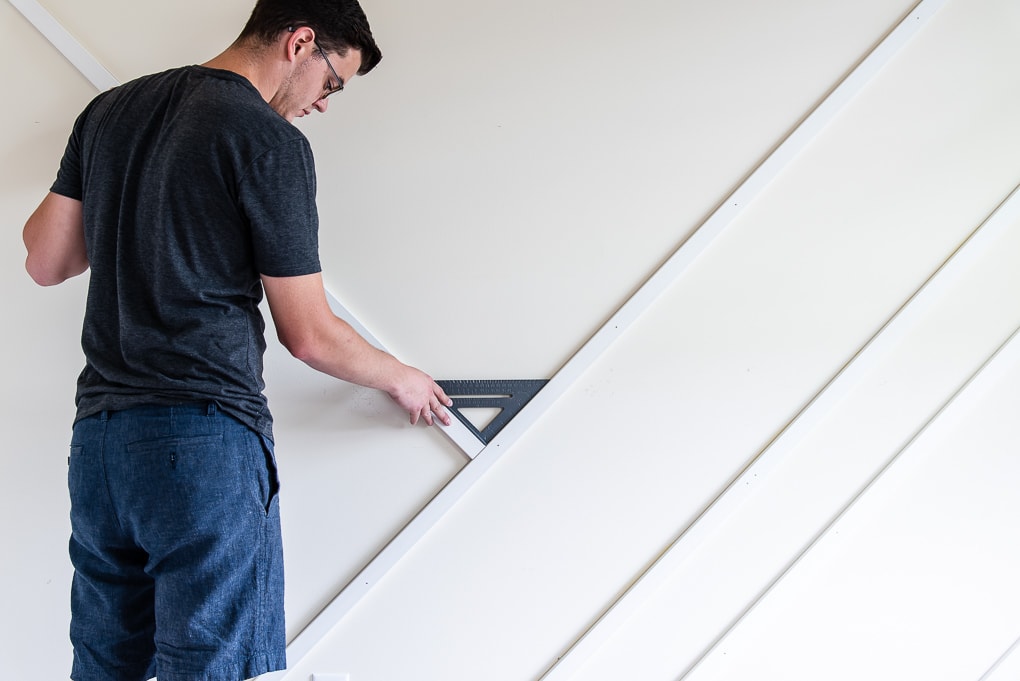
The next piece we installed was the main diagonal, which was the longest board and served as a guide for the rest of the accent wall installation.
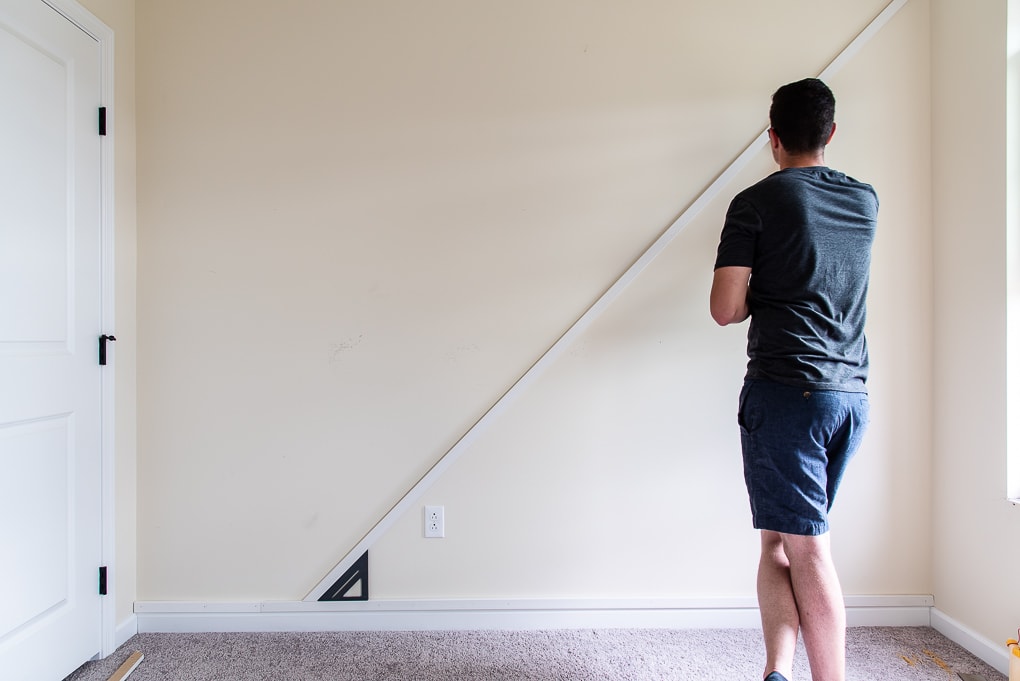
It’s generally easier to work with the largest wood pieces first, so we recommend doing this when you build your accent wall.
We used a speed square to ensure that the angle of the large diagonal piece was correct, and then attached it to the wall using the same method as the base piece.
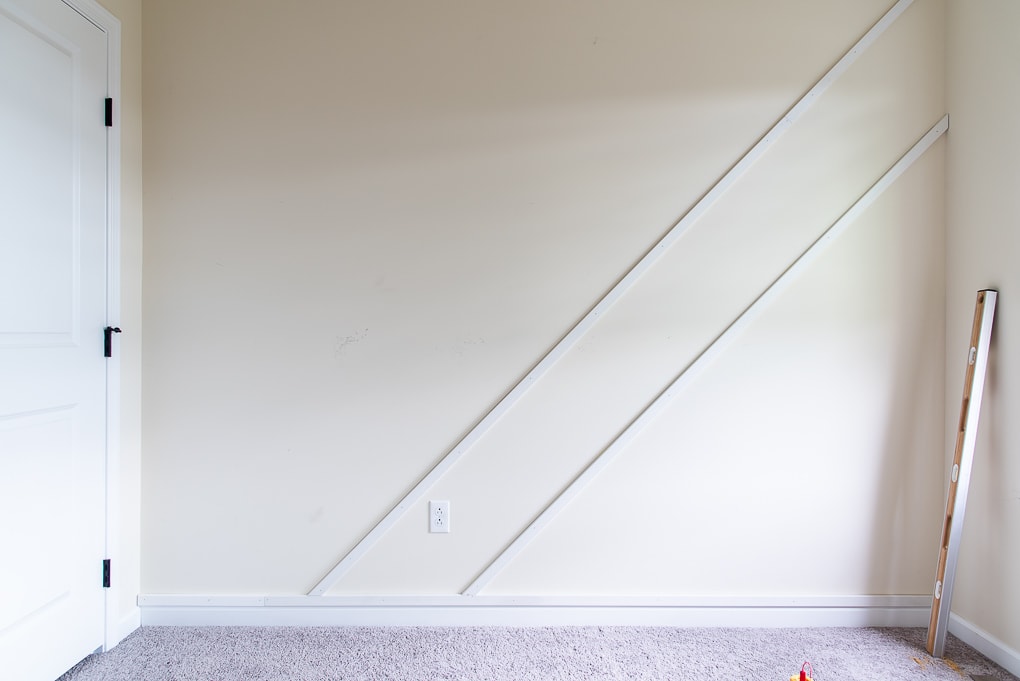
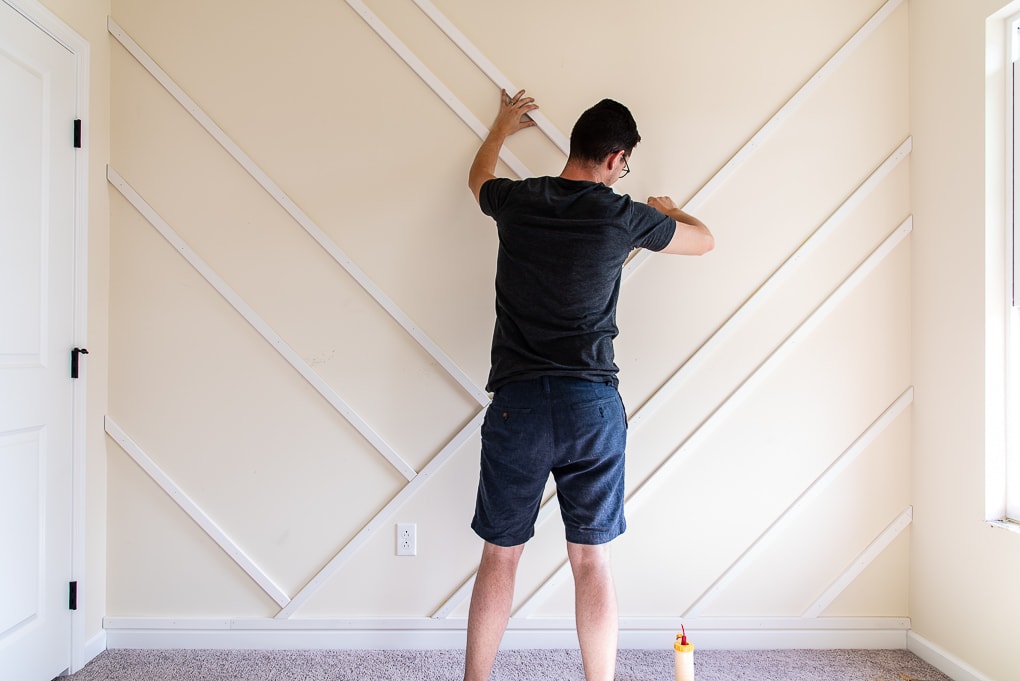
We continued installing the remaining boards according to the design plan.

Each time we measured the new board location based on the large main diagonal board that was already in place on the wall.
As we installed more wood pieces, we then measured the following board location based on the one we had just previously installed.
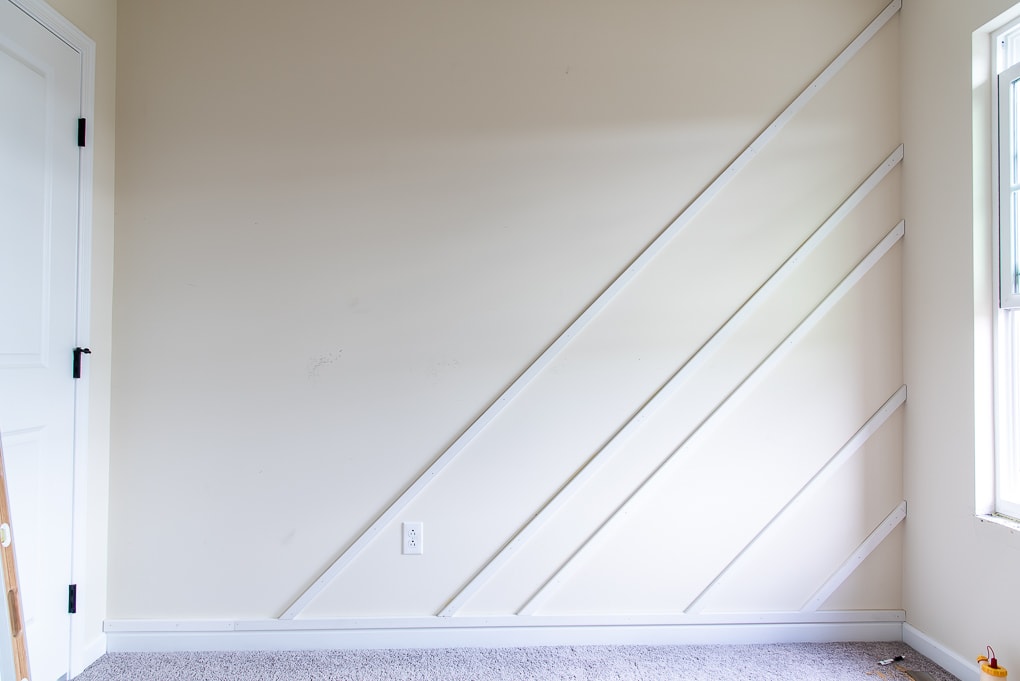
If your wall has light switches, or outlets, you’ll need to cut the wood pieces to accommodate them.
To do this, mark the location where the wood board needs to be cut and use a jigsaw to make the cut.
This will allow you to create a clean and cohesive look while still providing access to the necessary electrical features.
Add Finishing Touches
After all the boards are attached to the wall, you can move on to the finishing touches.
Fill Nail Holes
Since we had used a brad nailer to attach the boards, we needed to fill the nail holes with wood putty and sand them down to create a smooth surface.
Use wood putty to fill all of the nail holes. Once the putty dries, sand it lightly with 220 grit sandpaper for a smooth finish.
Caulk Gaps Between the Wood Pieces and Wall
To make the accent wall appear as a single, built-in piece, we decided to caulk the gaps between the boards and the existing wall. This would hide any gaps or spaces and create a seamless look.
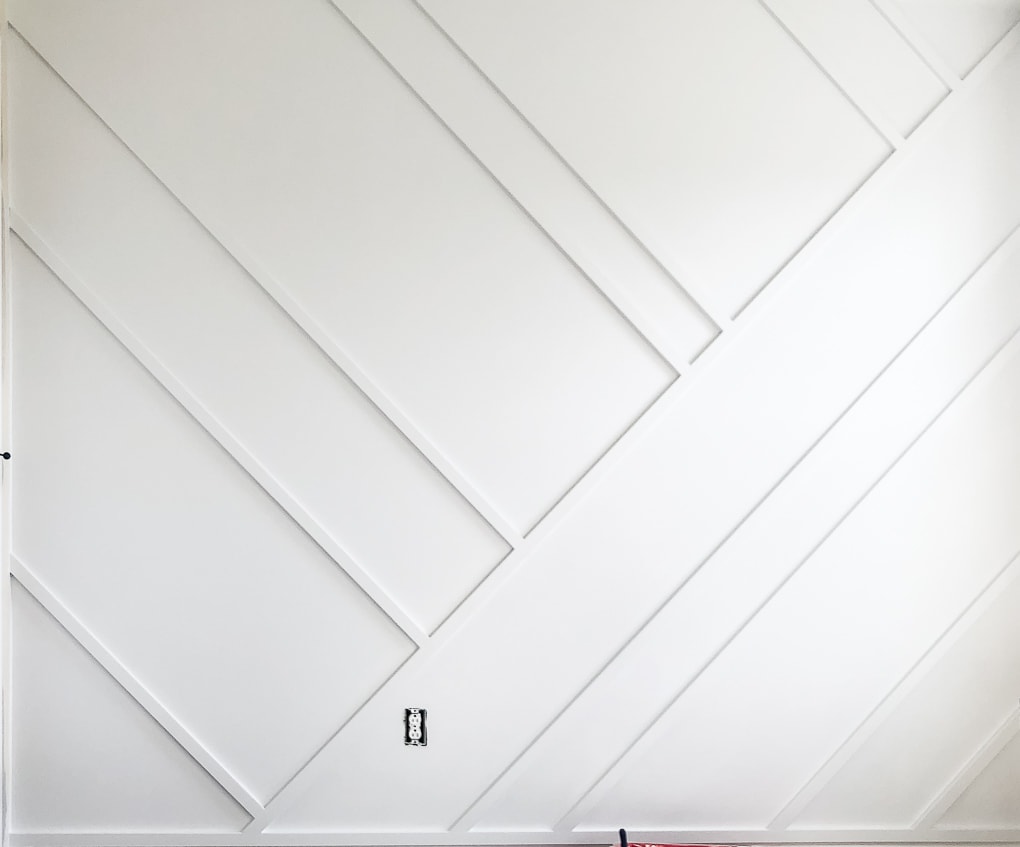
In the photo below, you can see the gaps between the boards and the nails from attaching the boards to the wall. This was before we applied the caulking and wood putty.
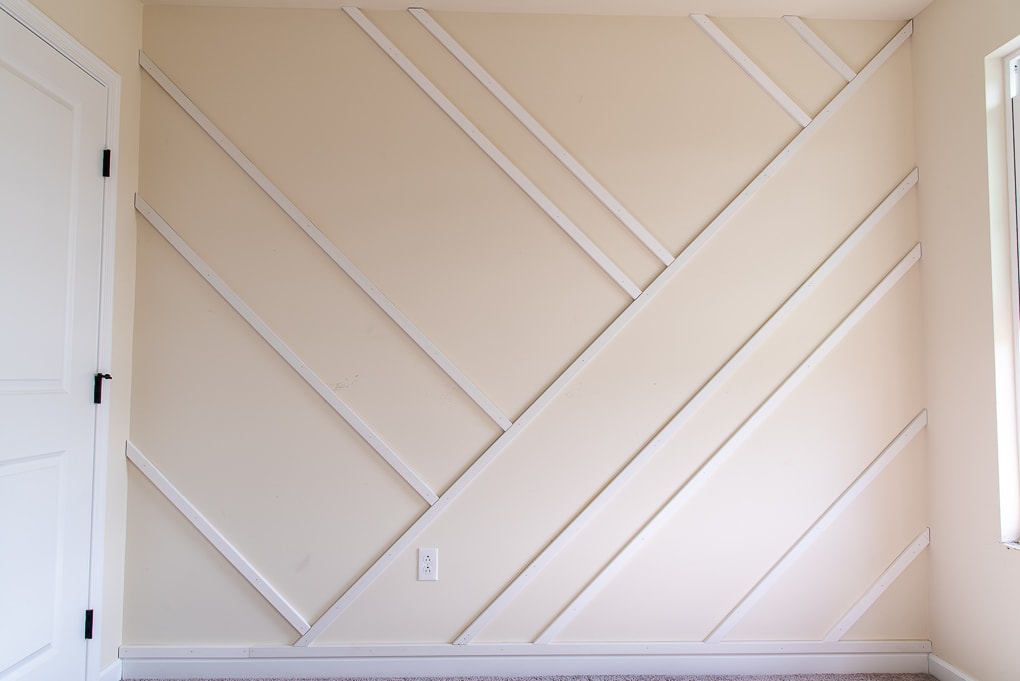
To caulk the gap between a wood piece and the wall, you will need to apply a bead of caulk using a caulking gun and smooth it out using a tool such as a caulk smoother or your finger.
Filling in the small nail holes and gaps may seem like a minor step, but it can greatly improve the overall appearance of your finished wall.
Paint the Wall
Once the caulking and wood putty has dried, the entire wall can be painted. Be sure to wipe all of the dust from the wall before you start painting.
I decided on white paint for the nursery accent wall.
We used a semi-gloss trim paint that we had on hand from previous home improvement projects. The trim paint gave the accent wall a nice, finished look.
I applied the paint using a small foam roller for the areas between the boards, and a small angled paint brush for the corners and side of the board pieces on the wall.
Select a paint color that coordinates with the rest of the room and makes your accent wall stand out. Sometimes a pop of color can make your own geometric accent wall stand out and bring a unique touch to your space.
I love the look of bold colors on a wood accent wall because they give the room a sophisticated, modern look. Find a color scheme that works with your home and design style.
Related: 15+ Best Nursery Paint Colors: Benjamin Moore
Begin by painting the edges of the wall with a small angled brush. Then paint all of the sides of the boards with a small paint brush.
Next, fill in the rest of the wood wall with a small foam paint roller. The best way to do this is by starting at the top and working your way down.

Use a paintbrush to touch up any areas that the roller may have missed.
Follow the recommended drying time on the paint can, and then apply a second coat if needed.
I applied two coats of paint to fully cover our accent wall. Once everything was dry, the DIY geometric feature wall was complete!
Related: Neutral Baby Girl Nursery Makeover Reveal
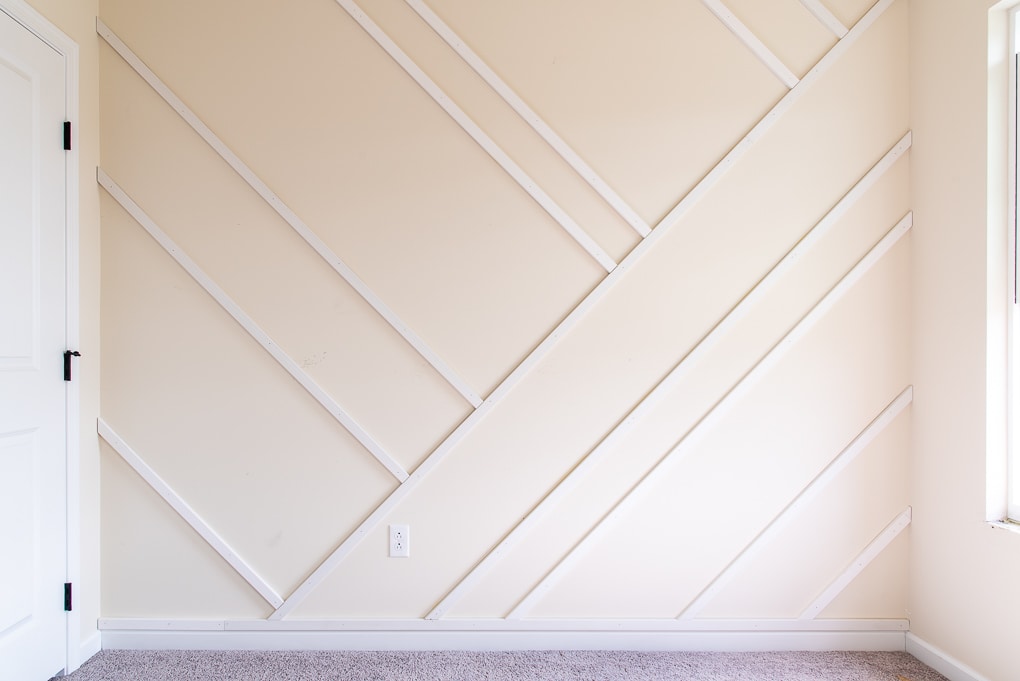
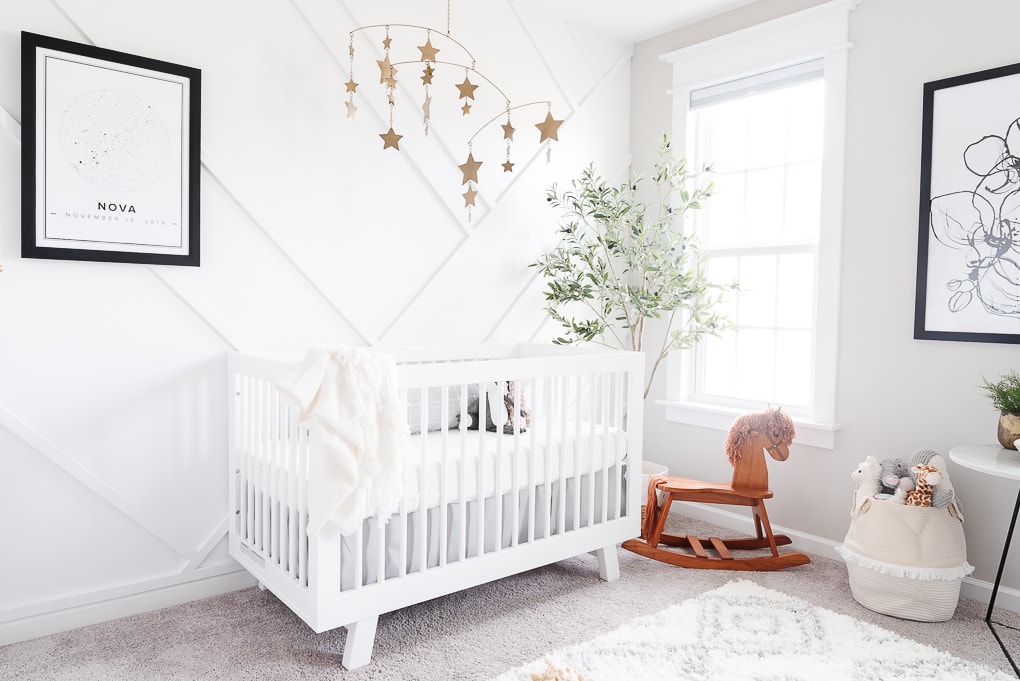
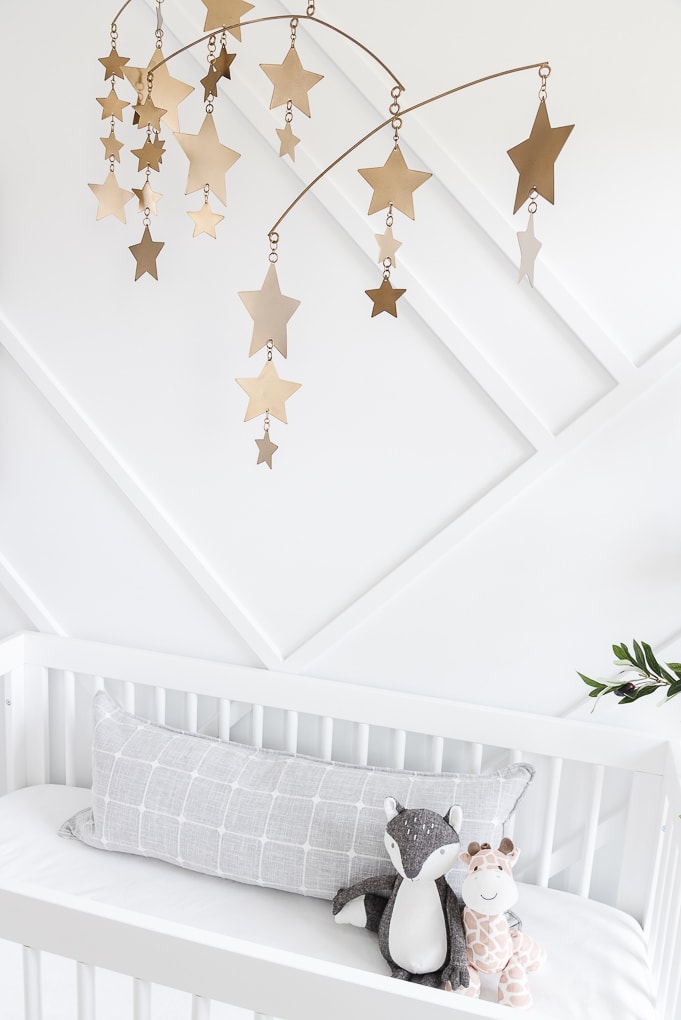
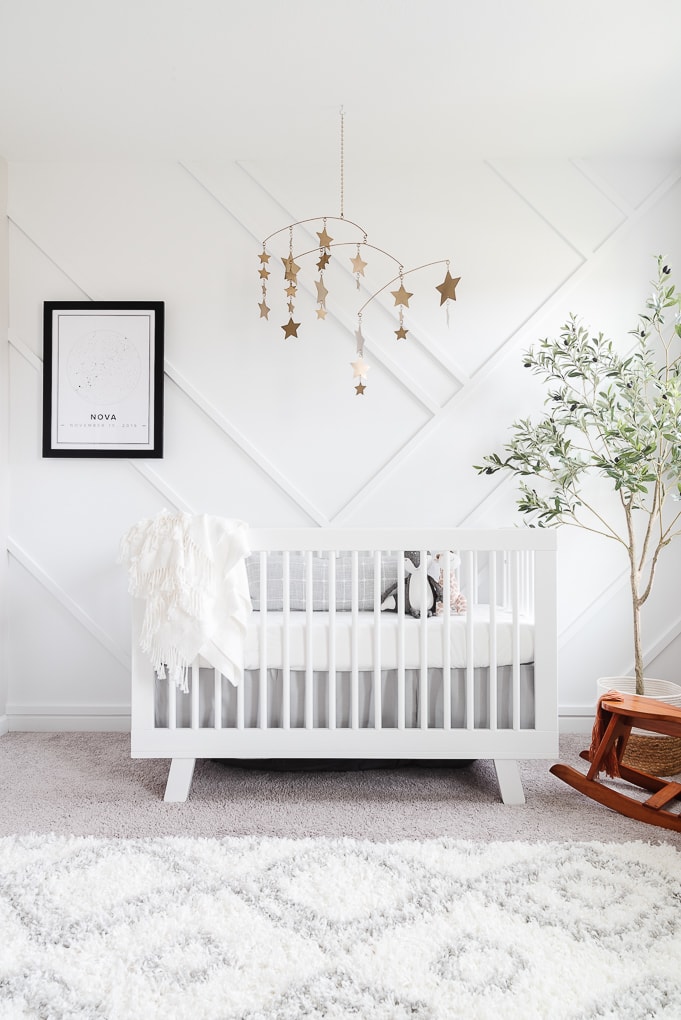
Finished Wood Accent Wall
I’m thrilled with the final result of the geometric wood accent wall in the nursery! The white wall really ties everything together and serves as a stunning focal point.
Adding a geometric wall is a simple and easy project that can bring character and interest to your home.
It can be easily customized to fit your personal home style. You can even create your own different patterns. By creating an accent wall yourself, you can save money and add character to your home.
With a few basic tools and some wood boards, you can create a stunning accent wall in your own home.
More Feature Wall Ideas
- DIY Board and Batten Bedroom Wall
- DIY Board and Batten Accent Wall in the Dining Room
- DIY Wooden Pallet Wall
- Removable Wallpaper Accent Wall in a Home Office


we like that you said that this process is not your favorite but is always worth it. My wife and I plan to our room. We will need a Painting Contractor Service to help us out on this.
My problems is that my walls are heavily textured. I hate the texture..but don’t want to n out up white msf board first. Do you think this design will work with textured walls?
With a textured wall, you may want to add an actual board to the wall before you add the battens. Something like finished plywood if you want the flat finish to the wall. A heavily textured wall might not give you the look you are going for
You can fill in the texture with drywall mud and sand smooth.
Really like that you used software to map out your design and your cut lines. I’m wanting to do the same but am not familiar with the software. Do you have a tutorial or instructions on how you used the software for this project?
Hi Christene,
Any chance you could share the sketch-up layout you created?
Thanks
Fred
Hi there! Unfortunately I don’t have access to the sketch up anymore. Sorry about that
What size brad nails did you use?